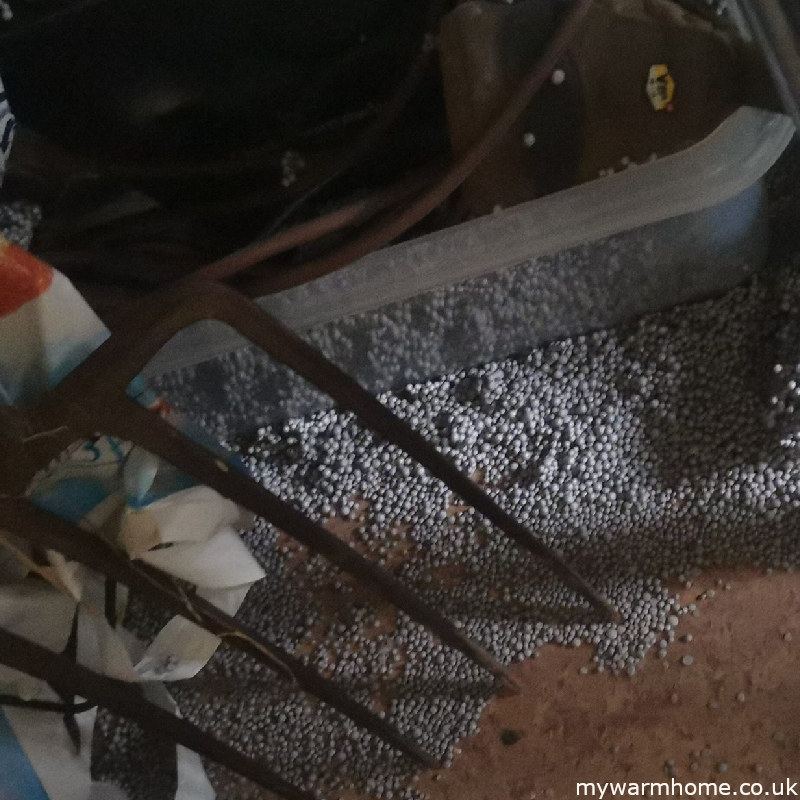
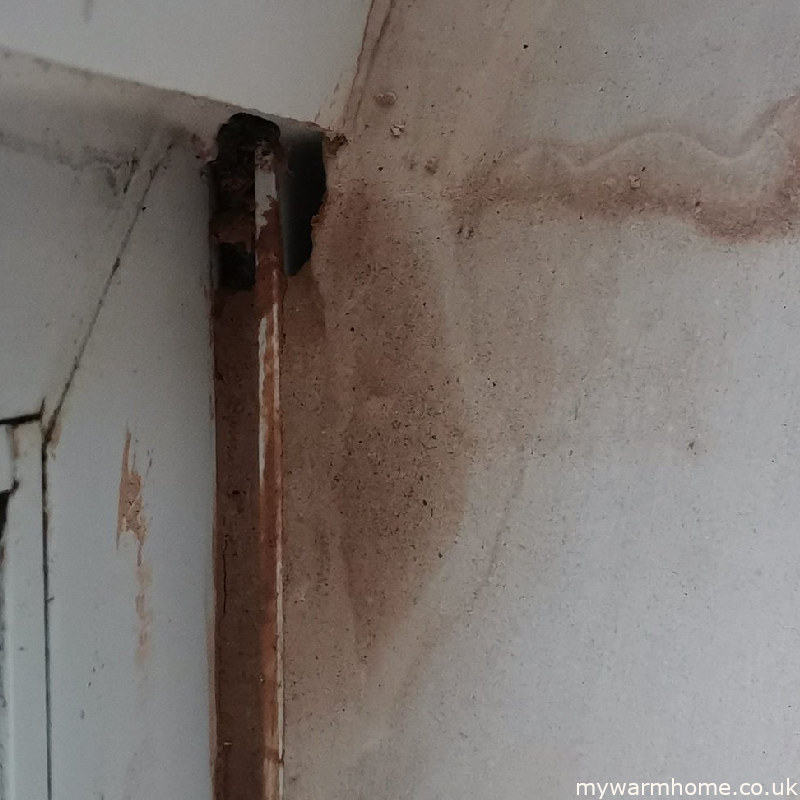
Sometimes in life its better to lower your values.
U-values for existing dwellings.
Roofs: 0.16 W/m²K
Walls: 0.30 W/m²K
Floors: 0.25 W/m²K
U-values for windows and doors.
Doors with over 60% glazing: 1.2 W/m²K
Other doors: 1.0 W/m²K, with a limiting value of 1.6 W/m²K
Replacement windows: 1.4 W/m²K or a B for its window energy rating (WER)
Insulation basics.
When insulating our homes, there are crucial factors to consider, ensuring optimal energy efficiency, comfort, maintaining moisture balance and compliance with building regulations. Effective insulation can significantly reduce energy costs, enhance indoor comfort, and contribute to environmental sustainability. However, selecting the right insulation involves more than just picking a material off the shelf.
Key considerations include understanding thermal values, moisture control, wall types, historical context and the specific properties of different insulation materials.
By carefully evaluating these aspects, homeowners can make informed decisions that suit their unique needs and conditions, ultimately creating a well-insulated, energy-efficient living space.
The first approach to make our homes warmer and more sustainable is to insulate before we install or upgrade to a new heating system, this not only allows us to save money* but approaches the property as our own personal ecosystem that we need to understand and maintain. If employing a contractor to install insulation then make sure they have the right qualifications, assurances, insurances and ideally be a member of the National Insulation Authority.
*Reducing the escape of heat from our properties, reduces the heating load, thus saving on fuel.
Types of insulation.
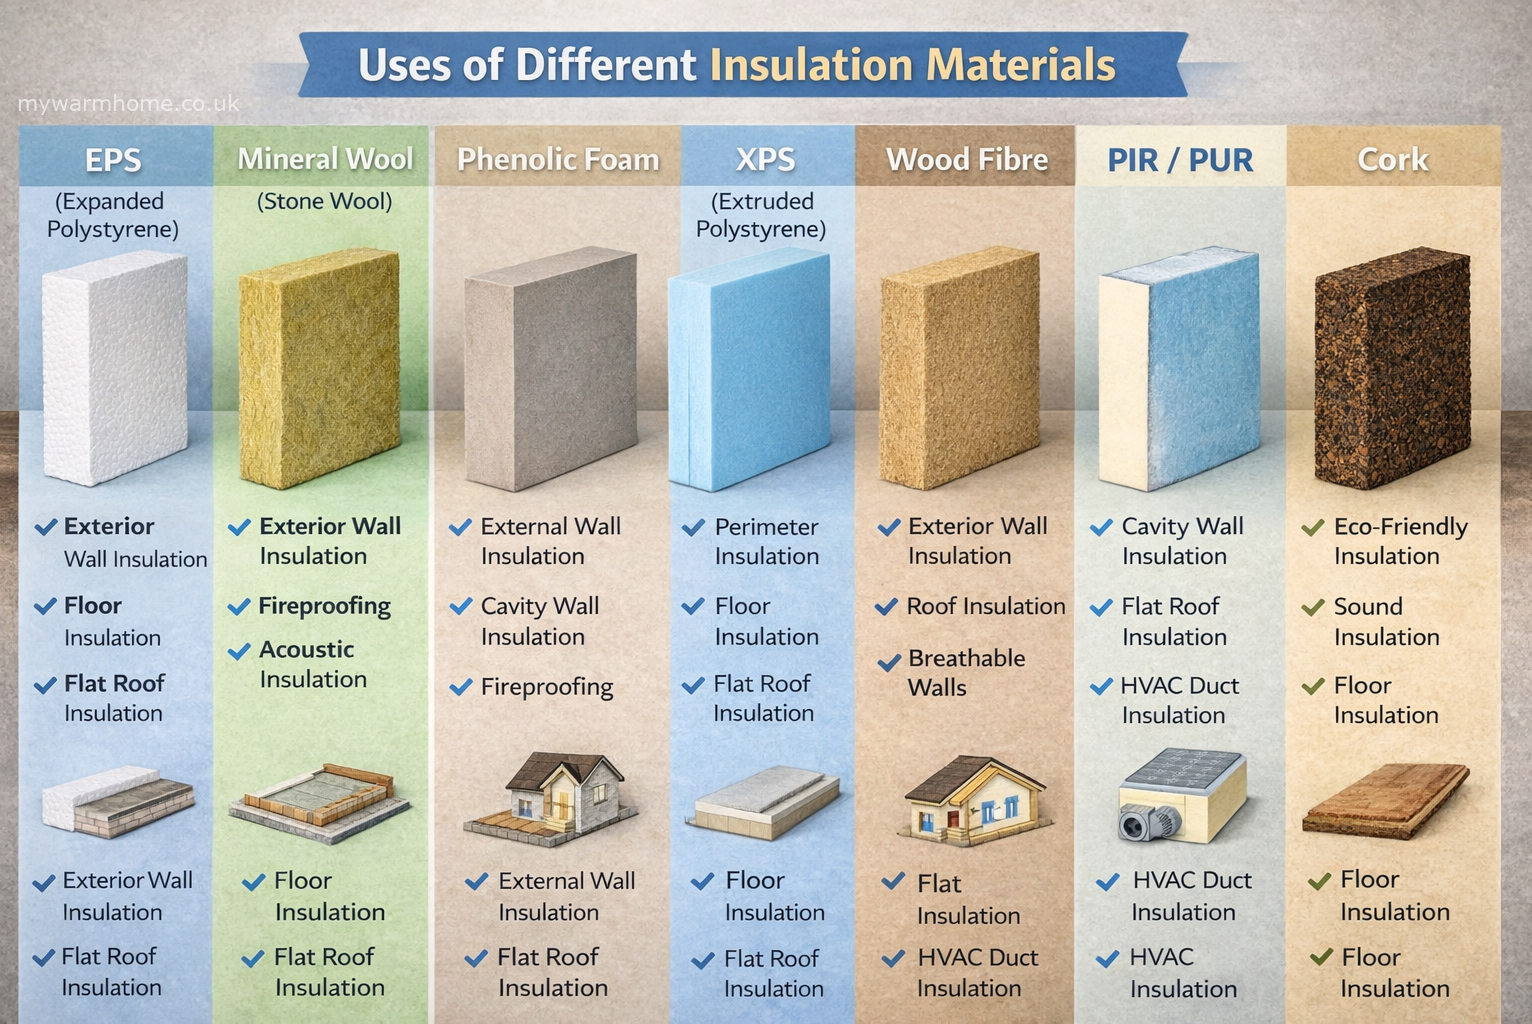
Insulation comes in all different shapes, sizes and composition, each performs to a required need and development is ongoing as we try to become more sustainable.
Below is a very brief list. Each section throughout the site goes into more details.
Wall insulation. Can be applied, sprayed, filled, fixed and even wall papered!
Floor insulation. Can be fitted, laid, filled and even sprayed by robots.
Pipe insulation. Can be pre fitted, wrapped, sleeved, waterproof and fireproofed.
Flat roof insulation. Can be laid, sprayed.
Insulation can come as closed cell and open cell. Each section will go into more detail.
Thermal Values.
All insulation should have details of its R-value either on its packaging or specification information. By having the details of the R-Values, you can work out the U-values, which you usually need for calculating the building regulation compliance thresholds.
R-Value.
Definition. The R-value measures the resistance of a material’s thermal resistance. It’s very much like a TOG value we have with sleeping bags and duvets! Higher Is Better. The higher the R-value, the better the material insulates.
Usage. Used to rate the effectiveness of insulation materials. Commonly seen in products like fibreglass batts, loft roll insulation, foam boards, and spray foam insulation.
Units. Typically, measured square meters Kelvin per watt (m²·K/W)
The R-value measures a material’s ability to resist heat transfer. Both the type of material and its thickness are important factors. A higher R-value indicates better insulation properties.
U-Value.
Definition. The U-value, also known as thermal transmittance, measures how well a material or building element conducts heat (or insulates). It is the rate of heat transfer through combined materials or a structure.
Lower Is Better. The lower the U-value, the better insulation. Usage. Used to rate the effectiveness of combined insulation and materials.
Units. Typically measured in watts per meter per degree Kelvin (W/m²·K).
The U-value measures a material’s ability to allow thermal transfer. Both the type of material and its thickness are important factors. A lower U-value indicates better insulation properties.
K-Value.
Definition. The K-value, also known as Lambda (λ) measures how well a material conducts heat. It is the rate of heat transfer through specific materials.
Usage. Used to rate the effectiveness of materials, mainly used by material scientists and designers of products used in the building industry.
Units. Typically measured in watts per meter per degree Kelvin (W/m·K).
The K-value measures a material’s ability to conduct heat. Only the material is measured. This value is used mainly by developers and material scientists. A lower K-value indicates better heat resistance.
Why is R-Value Important?
Higher R-value means better insulation, which helps keep your home warmer in the winter and cooler in the summer. This can lead to lower energy bills because heating and cooling systems don’t have to work as hard.
Comparing two insulations examples:
100mm mineral loft roll: Has an R-value of 2.50. (earthwool etc)
100mm PIR rigid board: Has an R-value of 4.30. (kingspan etc)
Rigid PIR boards can be installed at a reduced thickness, it insulates better because it has a higher R-value.
Why is U-Value Important?
The U-value, also known as thermal transmittance, measures how well a material or building element conducts heat. It is the rate of heat transfer through combined materials or a structure. The U-value is expressed in units of watts per square meter per degree Kelvin (W/m²·K).
The U-value represents the overall heat transfer coefficient of an element, whether it be insulation, building fabric, or even air. It is calculated as the *reciprocal of the total thermal resistance (R-values) of all layers within the element. Lower U-values indicate better insulation performance. When we look at building regulations, it is usually the U-Value that needs to be met.
*Reciprocal just means 1 divided by that number. R value of 6.8 would be U value of 0.14.
Choosing Insulation.
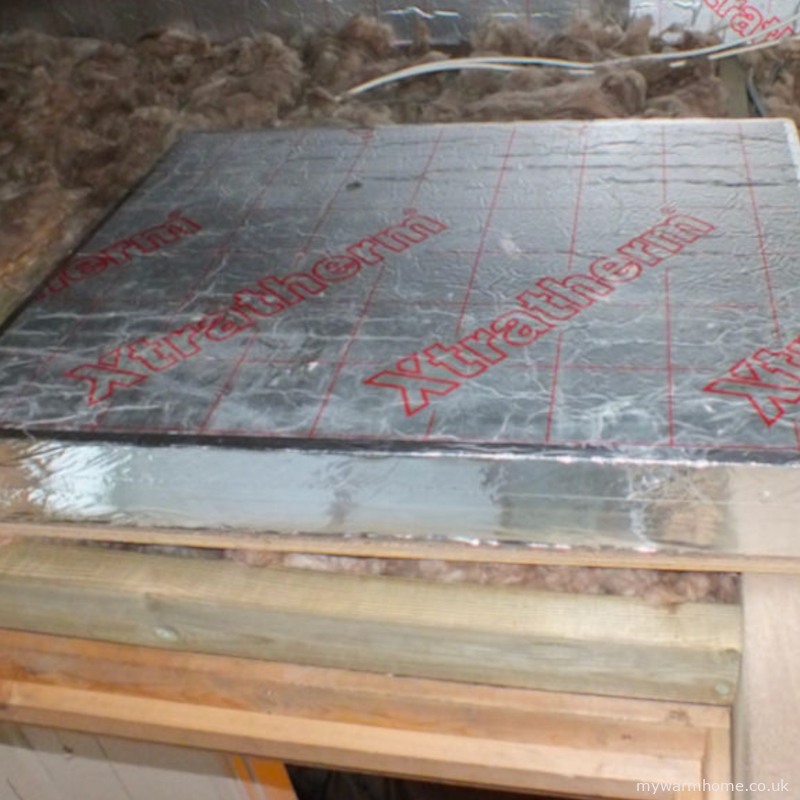
For a space with limited depth, like a suspended timber floor with 125mm joists we need to look at insulation products with a higher R value but a consideration to thickness, PIR boards would be a better choice for underfloor insulation because it provides better insulation in a thinner layer and would fit within the 125mm joists to meet regulations. If there’s more space, let’s say 250mm joists, mineral wool could be a good option, even though it needs to be thicker to meet the same insulation standards, it’s easier to fit and cheaper.
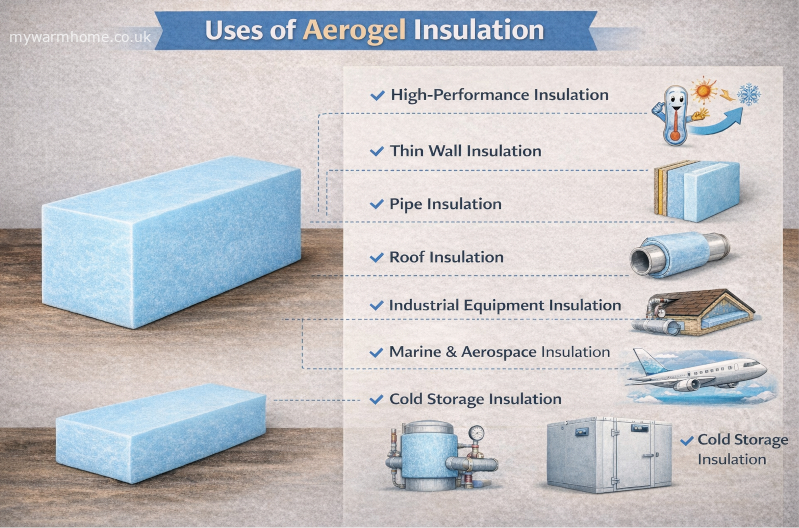
We may not be able to physically fit insulation around window reveals and doorways due to openings and possibly fire regulations, so thinner materials may need to be used like Aerogel. The insulation choice will usually be determined by cost and system design, but also by the makeup of the space we are trying to insulate, especially with older traditional buildings.
Understanding Heat Resistance.
Everything around us has some resistance to heat transfer. The R-value is a way to measure this resistance, helping us choose the right materials to keep our homes comfortable and energy-efficient.
In short, the R-value helps you understand how effective an insulation material will be at keeping heat from passing through it. The higher the R-value, the better the insulation performance.
How to calculate.
To calculate the U-value of a building element, sum up the R-values of each layer and then take the reciprocal of the total resistance:
U = 1 divided by total resistance (all the R values) 1/R1+R2+R3…etc.
This process applies to all insulation materials, although U-value calculations can become more complex with multiple materials and if external / internal temperatures are involved. For example, walls and floors consist of various *layers with differing properties, these will require consideration of each layer’s R-value and any air gaps present. Additionally, noticeable temperature differences in different parts of the country must also be taken into account. A basic bit of maths should give you an idea what should and could be installed.
When we are insulating our homes, we tend to just look at the R value of the products to be used.
* different layer examples are, wood, plasterboard, plaster coat, brick, thermal brick, air etc.
Practical Example.
Let’s consider insulating under a suspended floor to meet a regulation that specifies a U-value of 0.25 W/m²K. Using mineral loft roll with an R-value of 2.25 W/m²K and rigid PIR with an R value of 4.30 W/m²K.
With 100mm of loft roll: 𝑈 value = 1 / 2.25=0.44 W/m²·K (not meeting regulations) With 150mm of loft roll: 𝑈 value = 1 / 3.40=0.29 W/m²·K (not meeting regulations) With 200mm: 𝑈 value = 1 / (2.25+2.25)=0.22 W/m²·K (exceeding building regulations) With 100mm of PIR between joists: 𝑈 value = 1 / 4.30=0.22W/m2KU (meeting building regulations)
U-Value Calculator
U-Value Calculator
Calculate the U-value of a wall, roof or floor using common UK building materials.
Material
Thickness (mm)
Thermal Conductivity λ (W/mK)
R-Value (m²K/W)
Results
Total R-Value:0 m²K/W
Calculated U-Value:0 W/m²K
Includes standard internal and external surface resistances.
Where qualified professionals are appointed, their crews should hold the appropriate UK certifications
Health and safety Basics.
Health and safety must always be the foremost consideration in any building or home-improvement project. This helps safeguard all individuals on site and protects the property and its surroundings. You should always refer to the most up-to-date UK regulations and statutory requirements, including the Health and Safety at Work etc. Act 1974, the Construction (Design and Management) Regulations (CDM), and relevant Building Regulations, as needed.
Where qualified professionals are appointed, their crews should hold the appropriate UK certifications, follow industry best practice, and comply with all current legal duties and standards.
Below, we outline guidance on the typical requirements for both privately funded and government-funded installations.
Asbestos.
Asbestos is a naturally occurring mineral that was commonly used in building materials due to its heat resistance, durability, and insulating properties. It can be found in homes built before the 1980s, though it was used in construction and renovation well into the 1990s in some areas. Asbestos is typically found in materials like insulation, roofing, flooring, ceiling tiles, pipes, and even some adhesives.
When intact and undisturbed, asbestos poses little risk to health. However, if it is damaged or disturbed, such as during renovations or repairs, tiny asbestos fibres can be released into the air. Inhalation of these fibres can lead to serious health issues, including lung cancer, asbestosis (a scarring of the lung tissue), and mesothelioma (a rare form of cancer linked to asbestos exposure).
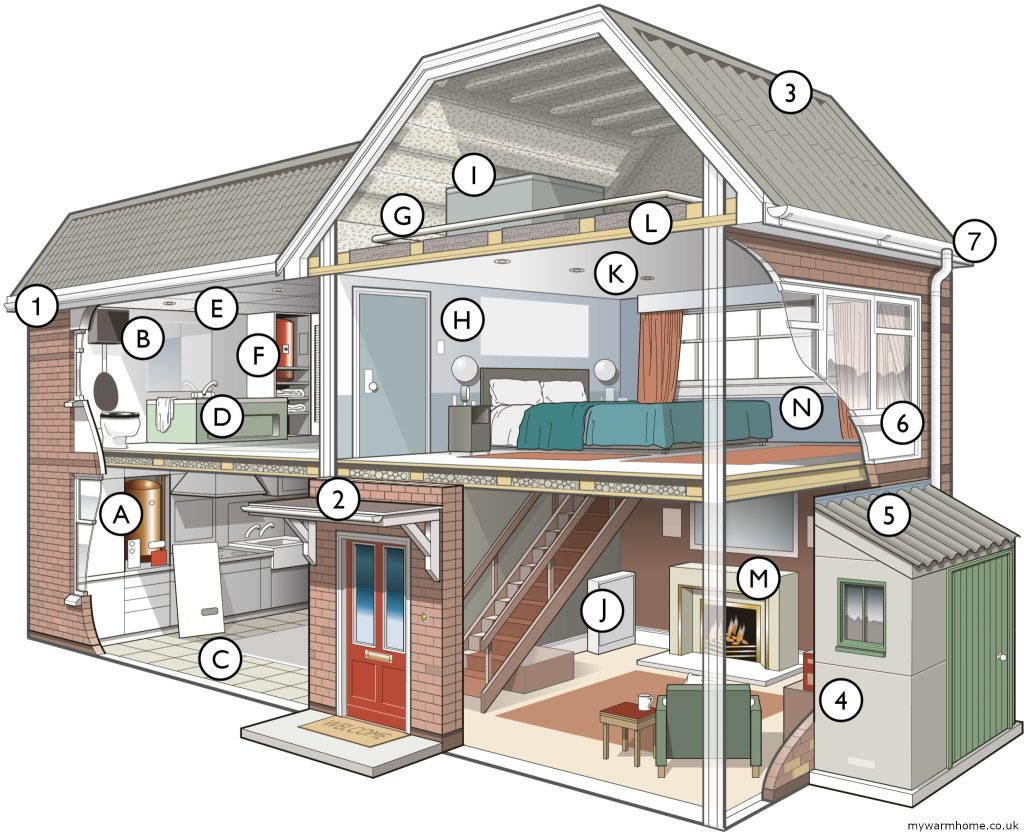
If you suspect that your home contains asbestos, it’s crucial not to disturb it and to contact a professional for testing and safe removal if necessary. Below image and reference from the HSE.
Locations of asbestos.
Inside.
Asbestos insulating board (shortened to AIB)
A. AIB around boiler. B. Toilet cistern. C. Vinyl floor tiles backed with asbestos paper and bitumen adhesive. D. AIB or asbestos cement bath panels. E. AIB ceiling tiles. F. AIB airing cupboard and/or sprayed insulation coating boiler. G. Pipe lagging. H. AIB partition wall. I. Asbestos cement water tank. J. AIB behind fuse box. K. Textured decorative coating, for example Artex. L. Loose fill insulation. M. AIB behind fire. N. AIB or asbestos cement interior window panel.
Outside.
Asbestos insulating board (shortened to AIB)
1. AIB or asbestos cement soffits and fascias. 2. Roofing felt. 3. Asbestos cement roof tiles/slates. 4. Asbestos cement panels. 5. Profiled asbestos cement sheeting. 6. AIB or asbestos cement exterior window panel. 7. Gutters and asbestos cement downpipes.
Gas and open flued appliances.
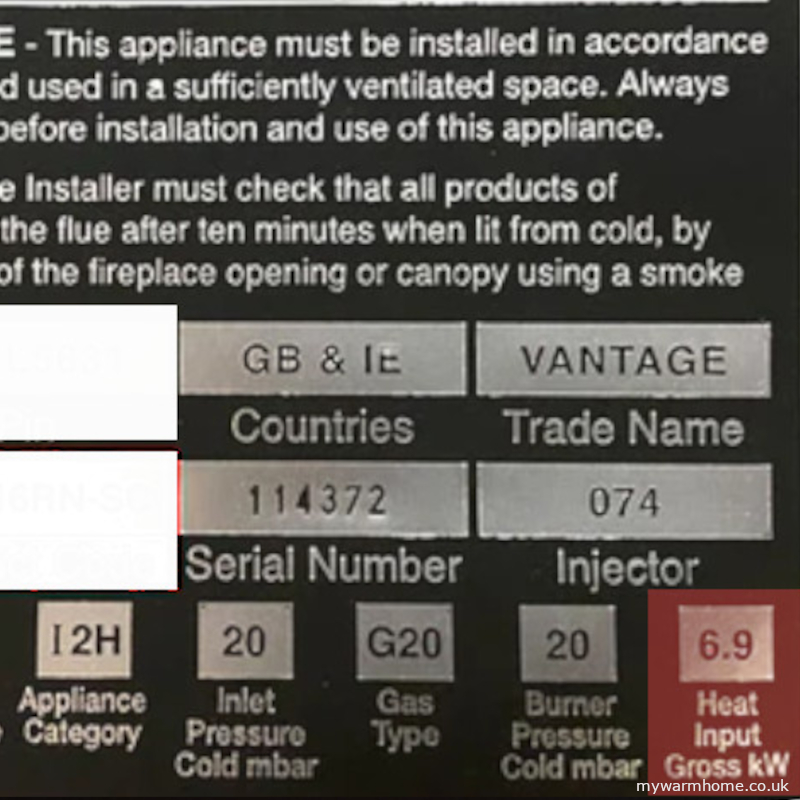
If the fabric of the property is being improved and open-flued gas appliances exist, then a gas spillage test should be carried out on each appliance by a suitably competent operative. Rules exist that give an average unimproved property a certain amount of leakiness (adventitious air) to allow open-flued appliances to operate safely. This all depends on how much fuel burns over a period of time, for example: 7.5kw/hr, 9kw/hr, 6.9kw/hr. You will see this on the data badge of the appliance (gas rating of an appliance here.).
The more fuel used, the more leakiness is needed. Multifuel appliances are treated in roughly the same way but do not come under gas safe legislations. HETAS and building regulations govern multifuel installations and ventilation.
This is the reason combustion ventilation is sometimes needed. This allows the air to be replenished (with an open flued appliance we are burning the oxygen in the room that we use to breathe)
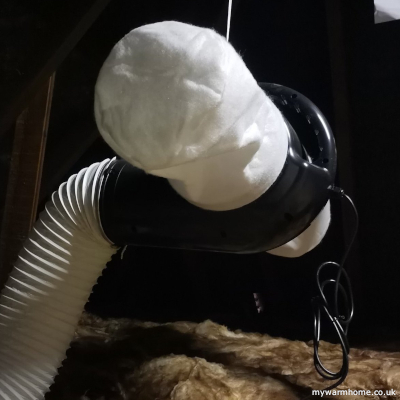
With the introduction of insulation, extraction ventilation should be installed as part of the process, we now have a different factor to add in with gas safety. Extraction fans either pulling or pushing air (PIV) can now effect the performance of the appliance.
Open flued gas appliances should be checked to prove they are not spilling products of combustion into the property. This is verified by performing a spillage test.
Part J states. “Extract fans lower the pressure in a building, which can cause the spillage of combustion products from open-flued appliances. This can occur even if the appliance and the fan are in different rooms”. Any funded insulation work now includes ventilation upgrades as part of the current PAS, so extract ventilation will be installed. This should have been factored in as part of any ventilation work carried out. A competent person is required to perform spillage tests.
Part B, 8(1) of the Gas Safety (Installation and Use) Regulations 1998 states that no person can make any changes to a premises that contains a gas fitting or storage vessel if the changes would compromise the safety of the fitting or vessel. This basically means if the fabric of the building (walls, floors, roofs) are being insulated then appliances need to be checked by a suitably competent and qualified person.
Electrical.
Electrics within insulation need to be protected in a way set out by the current regulations. Any high-powered cables that enter insulation either through walls, under floors or within lofts need to be verified as being safe to pass through. If they cannot deem to meet regulations, then they need to be removed out of the insulation or derated. Usually the most common high-powered cables you will find on domestic insulation work will be from main fuse board or through loft space to supply electric showers, electric storage heaters and cooking appliances. Non-fire rated downlights can’t be covered directly with insulation, so fire retardant covers may be required.
Heat pumps move energy so we can heat our homes and provide hot water.
Consider a heat pump to be a heat mover, not a heat maker.
The technical side of heat pumps can be somewhat confussing as grasping the idea that we create heat from cold air still baffles most of us. Hopefully this section will shed some light and hep with understanding. We also include some regulations and the “best practices”.
The Science.
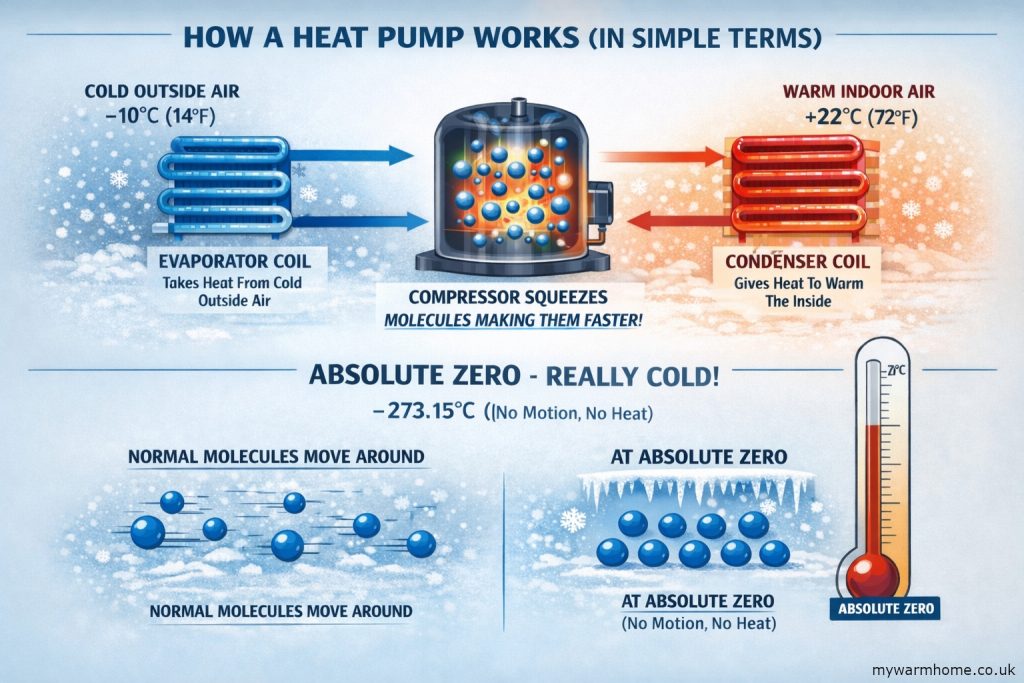
To understand how heat pumps work, we need to cover some basic physics. At a temperature of 0°C (273 K) and a pressure of 1 atmosphere (average sea level pressure), water freezes.
This condition is known as “Standard Temperature and Pressure (STP)”. While temperatures can drop below 0°C, the theoretical lowest possible temperature is called absolute zero.
At absolute zero (0°K*, -273.15°C, or -460°F), there is no molecular motion and no heat energy within the medium.
This understanding highlights an important fact: even when it feels freezing outside, the air, water, and ground still contain heat energy.
*The kelvin (K) is the SI base unit for thermodynamic temperature, starting at absolute zero (-273c) this is where all molecular motion ceases so anything above this movement exists and with movement temperature exists.
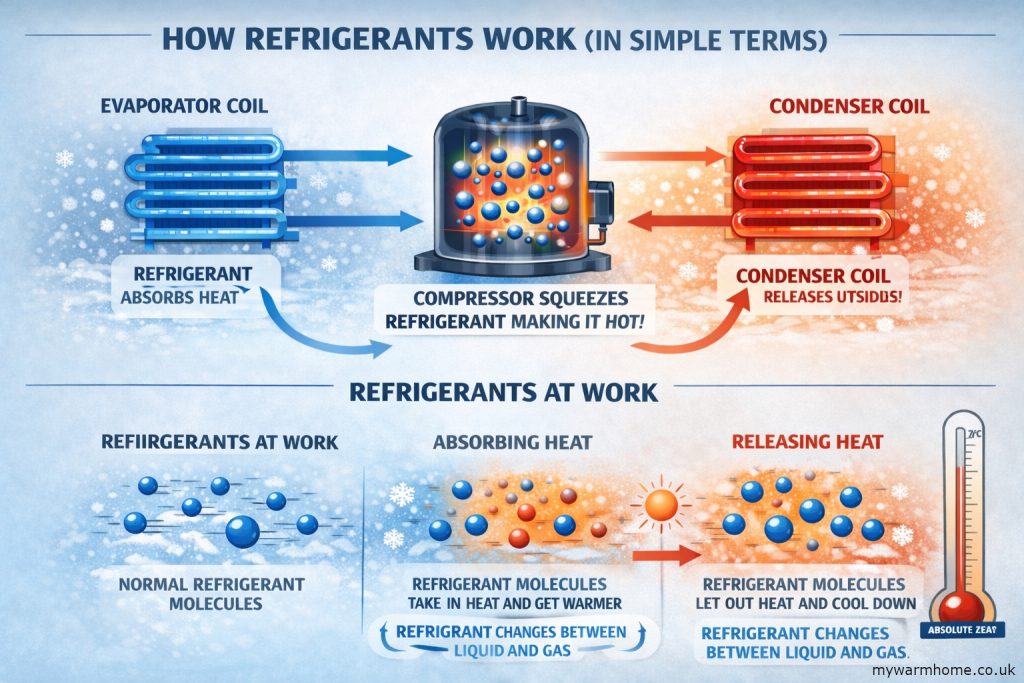
The key is finding a way to extract that heat and transfer it to a usable medium, such as radiators. This is where refrigerants come into play. Instead of water circulating within the heat pump (like we would have in a gas boiler), a refrigerant (see below) is used.
These refrigerants absorb heat from the outside environment, even at low temperatures, and their temperature increases as they change state.
Heat pumps come in three main types:
Air Source. (ASHP)
Water Source. (WSHP)
Ground Source. (GSHP)
Although their setups and installation methods differ, they all operate on the same fundamental principle: transferring heat from one place to another using a refrigerant cycle. Once you grasp the physics of this cycle, understanding how heat pumps function becomes straightforward..ish.
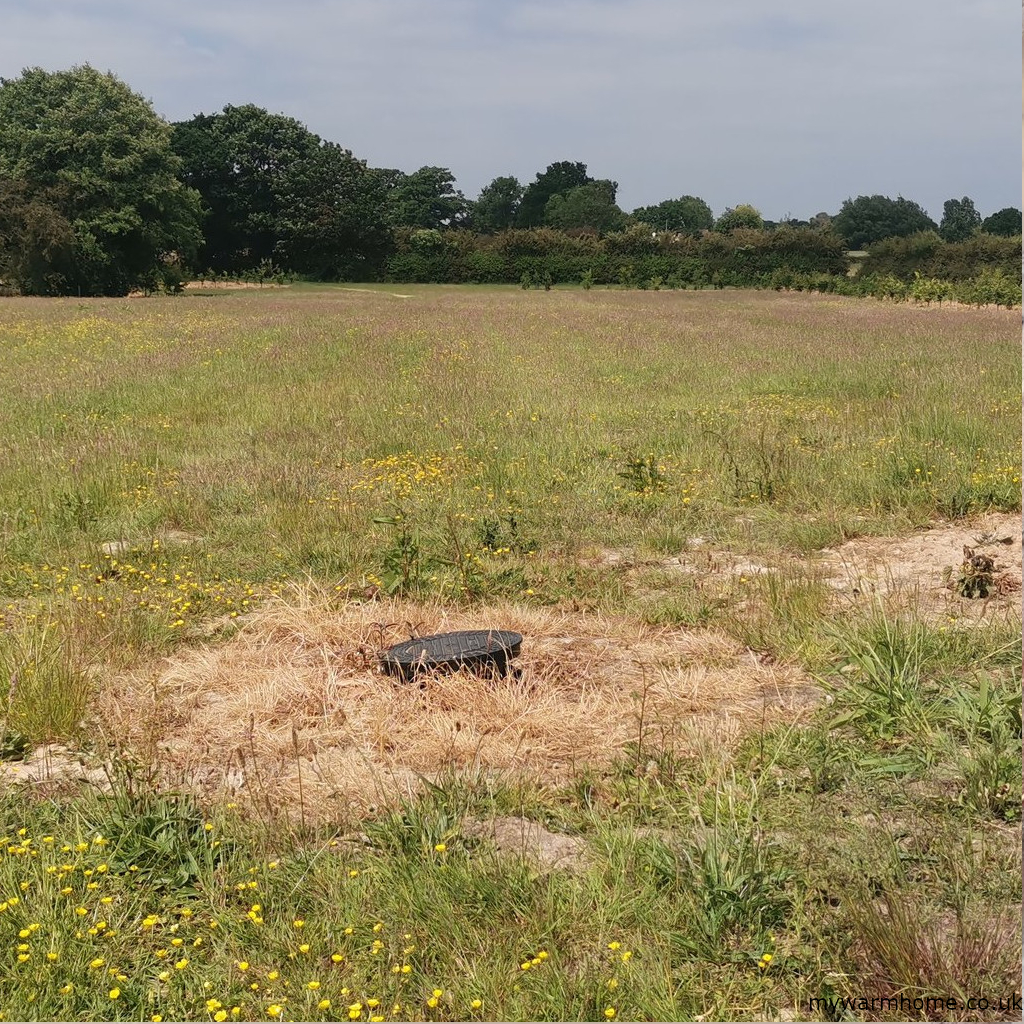
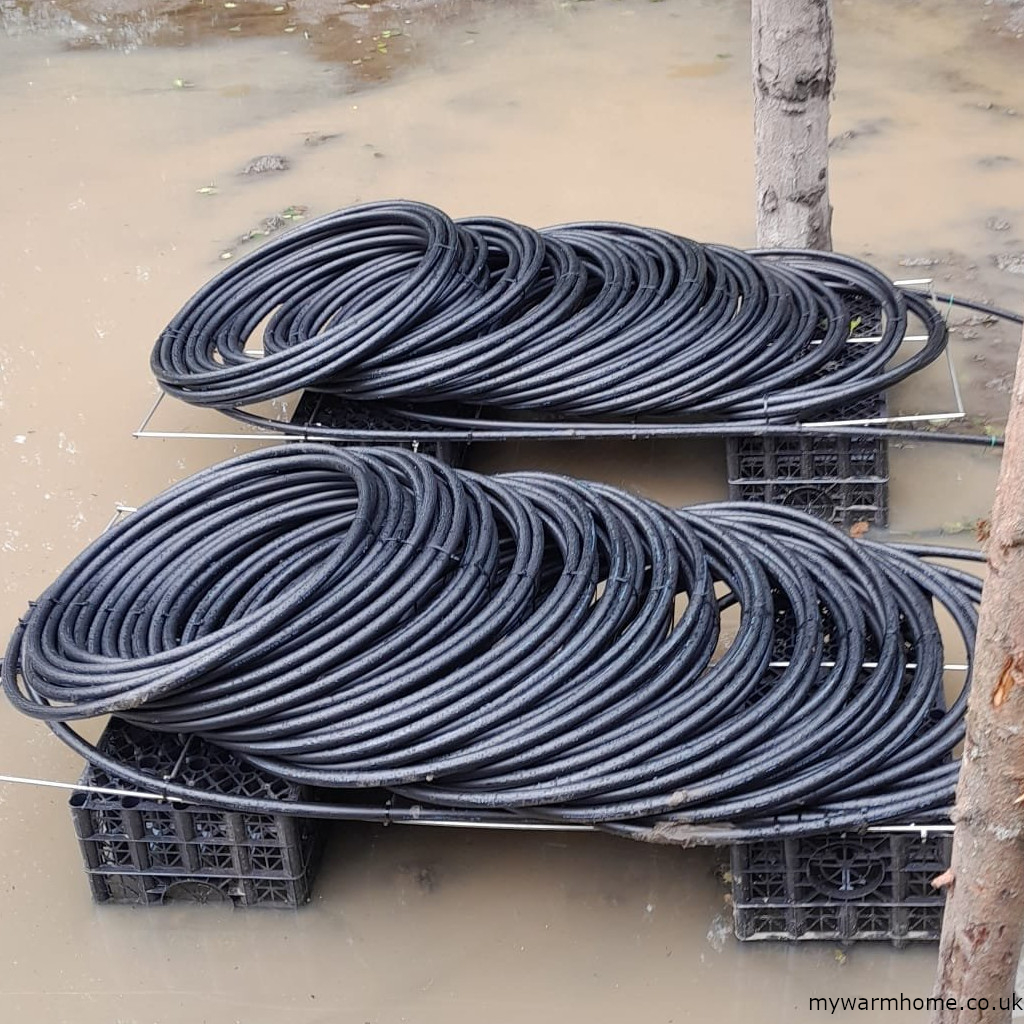
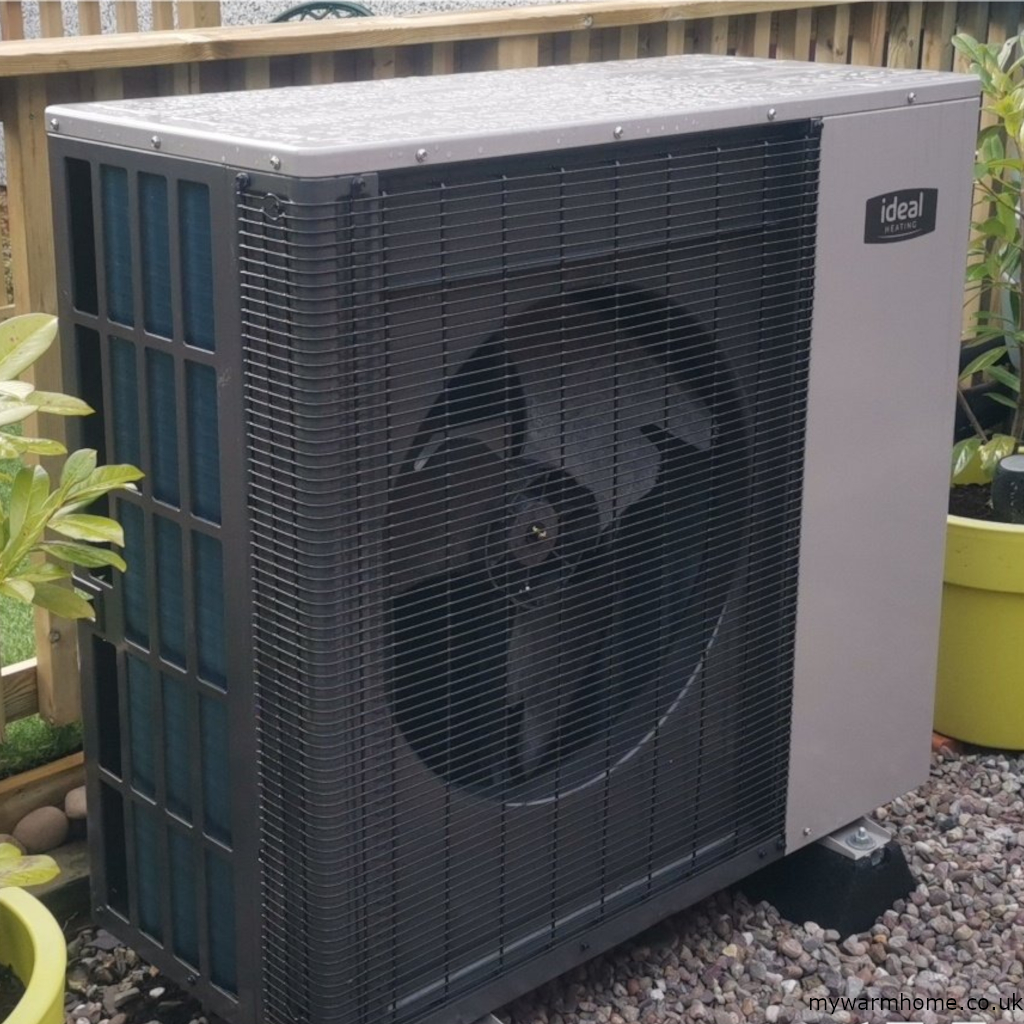
Manifold Chamber GSHPCoils for WSHPASHP
How it works! All heat pumps.
Heat pumps move heat from the selected source into a building through a refrigeration cycle. Whether its air, ground or water they all work on the same principe but with different installation techniques. ASHP use units outside that look like air condition units (they basically are). WSHP use coils or matts submerged in water and GSHP use horizontal loops spread over a open space at a depth of around 2m or vertical loops bored deep at around 100m. The heating side is the same and designed to suit the property and personal preferences.
Properties need to be well insulated to reap the full benefits and cost savings. Radiators should ideally be a size and rating to match the system and property requirements. The delta rating of radiators is becoming more important in the system design. Most new builds and retrofitted properties opt for underfloor heating systems, as they naturally run at a lower temperature.
A radiator’s delta rating, or Delta T, is the difference in temperature between the water circulating in a radiator and the room temperature. It’s calculated by subtracting the average room temperature from the average radiator temperature.
For example, if the radiator water temperature is 70°C and the room temperature is 20°C, the Delta T is 50°C
Now that you know a bit about Delta T, you can see how important it is to size a heating system correctly for your home. If the heat pump is too small, it will have to work too hard and may struggle to keep up. If it’s too large, it will use more electricity than necessary. The aim is to find the right balance between comfort and running costs, something that’s possible with good design and by using the system the right way.
It works a bit like a fridge in reverse:
A fridge pulls heat out of food and dumps it into your kitchen
A heat pump pulls heat from outside and dumps that heat it into your home (that’s why the back of a fridge is always warm)
How it actually warms your house.
Heat is collected from outside (air, ground, or water).
That heat is compressed to raise its temperature.
The warmed heat is delivered to radiators, underfloor heating, blower units, or hot water.
The cycle repeats, quietly and continuously.
You may ask how can heat energy be in cold water, the ground or cold air? Well thats the confussing part that can be hard to understand. Heat is always around us, even when it feels cold. The air, the ground and water all contain natural heat energy because they’ve absorbed warmth from the sun and the earth over time. Even on a chilly day, there is still energy in the air, it’s just at a low temperature. Modern heating systems like heat pumps don’t create heat from scratch; they simply collect this existing, low-level warmth and concentrate it to a higher temperature that can be used to heat your home. So instead of making heat, we’re just capturing and upgrading the heat that’s already there.
Because it’s moving heat rather than creating it, it uses much less energy than traditional heating when designed and specified properly.
Some heat pumps can be 400% efficient.
When people say a heat pump is “400% efficient”, it doesn’t mean it’s magically creating energy. It means for every 1 unit of electricity you put in, you get about 4 units of heat out. Abbreviations like “SCOP (seasonal coefficient of performance” and “COP (coefficient of performance)” are used and this is where the % comes from.
COP = today’s efficiency
SCOP = the yearly average efficiency
SCOP is the number that really matters for running costs.
The Different Types of Heat Pumps.
If you’re considering replacing your current heating and hot water system with a renewable alternative, it’s essential to be aware that this can be a significant investment. In many cases, it involves a partial or complete system upgrade, as heat emitters often (though not always) need to be updated to achieve optimal flow rates.
To determine if a heat pump is suitable for your property, you can consult the UK government’s suitability guide. The MCS best practice is here.
The primary types of heat pumps used in the UK include:
ASHP: Air Source Heat Pumps.
WSHP: Water Source Heat Pumps.
GSHP: Ground Source Heat Pumps.
A hybrid system is another option to consider, where a fossil fuel-powered boiler (like gas) works alongside a heat pump. This setup can help meet increased heating demands during the colder winter months while still reducing overall reliance on non-renewable energy sources
Although all heat pumps work on the same principle, they collect heat in different ways:
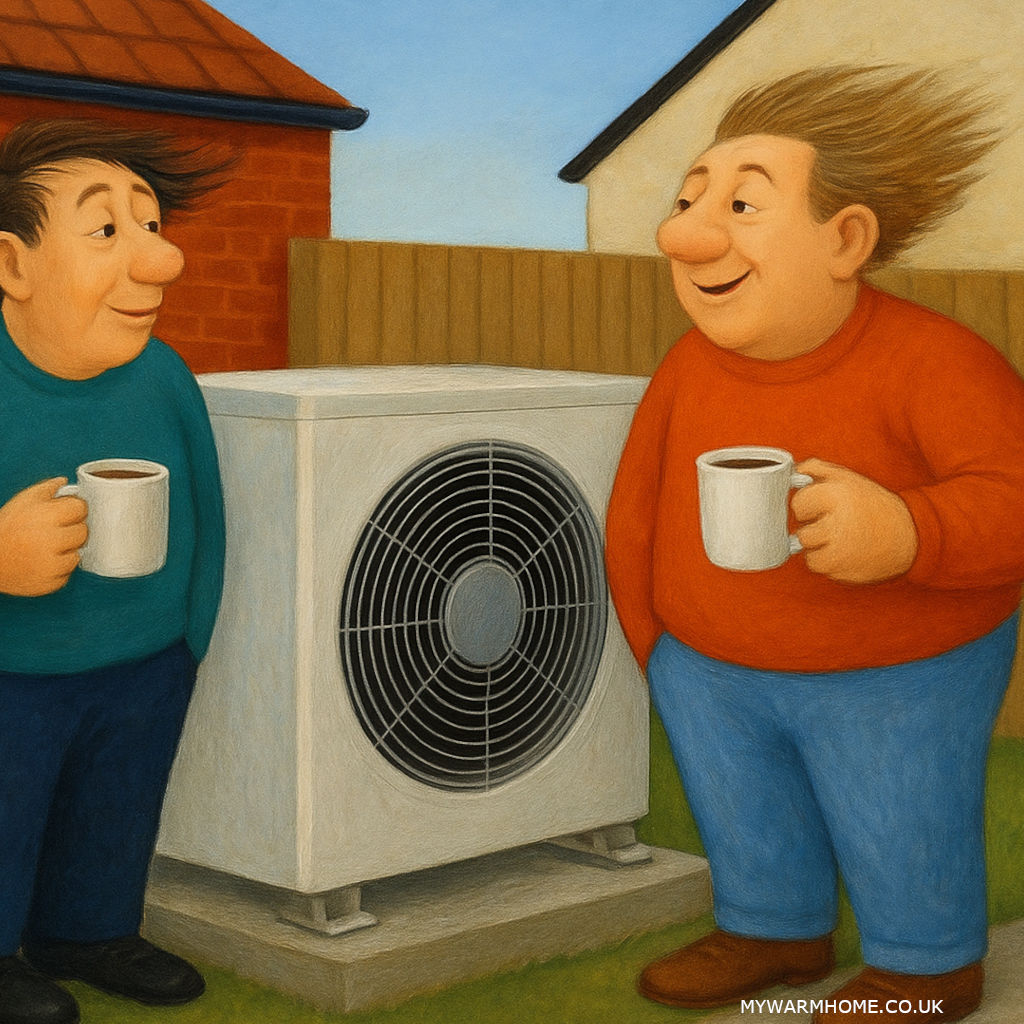
Air Source Heat Pumps (ASHP) These draw heat from the outside air using a unit that looks similar to an air conditioner — because it almost is one, just working the other way around.
Water Source Heat Pumps (WSHP) These collect heat through coils or mats placed under the surface of a pond, lake, or river.
Ground Source Heat Pumps (GSHP) These use long loops of pipe buried in the ground — either horizontally about 2 metres deep or vertically down boreholes reaching around 100 metres.
Once the heat is gathered, it’s transferred into your home through radiators, underfloor heating or blower units, depending on your home’s design and comfort preference.
This technology is new to many of us, and it needs to be used a little differently.
During the heating season, it’s best to control your home’s temperature rather than demand it. In other words, let the system maintain a steady temperature instead of turning it off and on all the time. It’s more efficient (and cheaper) to let the heat pump gently adjust the temperature up or down.
Most modern systems use outdoor temperature sensors to help with this. These sensors measure the air temperature outside and tell the heat pump how much heat your home is likely to need. On mild days, the system runs at a lower level; when it’s colder, it automatically increases output. This helps your heat pump work in tune with the weather — keeping your home comfortable while using less energy overall.
Things to consider ASHP (other heat pumps in main section).
Position.
Away from sleeping and noise-sensitive areas. (newer ASHPs are very quiet). Making sure the area around the heat pump is to manufacturers guidance to allow optimum airflow and service needs.
Condensation removal.
Water will come from the unit and can pool. It’s not the same as gas boiler condensate, which can be acidic, so just basic removal to soak away or drain, depending on the manufacturer’s instructions.
Radiator sizes and pipework.
Heat pumps work at lower temperatures, so a bigger surface area, ideally underfloor heating, is beneficial. (see delta T in technical area)
Insulation of property.
The better the wall and loft (or room in roof) insulation, the less heat loss.
Uninsulated pipework.
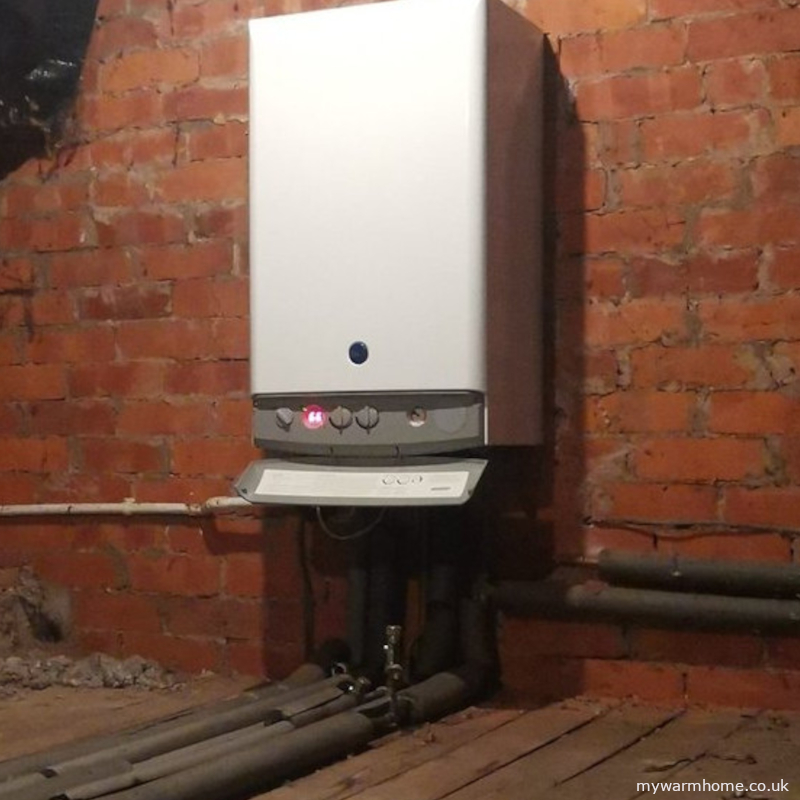
Bathroom supplies and central heating pipework at the plant should all be insulated. All external pipework should be insulated with a class 0 UV protected insulation.
Maintenance requirements.
Please refer to manufacture guidance as maintenance period may affect warranties. In a ideal world you shoul get external ASHP serviced every year after the heating season. A good clean and check that the unit is in good condition is a must.
Running costs.
What is the average yearly cost to run the heat pump! This can be really important, and research and information from your installer is a must.
Heat Pump Running Cost Calculator
Heat Pump Running Cost
Daily Cost: £0.00
Solar matching.
As heat pumps operate differently through the seasons, the same goes for solar. If you are having solar PV installed thinking the panels will run the heat pump, then think again. You could try to match the solar generation to the heat pumps output, which could help with running costs.
Understanding Heat Pump Efficiency: SCOP and COP.
When looking at heat pumps, you’ll often see the terms COP and SCOP. These are simply ways of measuring how efficiently your system turns electricity into heat.
COP — Coefficient of Performance.
Measures efficiency at one moment in time — usually in perfect test conditions.
For example, a COP of 4 means that for every 1 unit of electricity the heat pump uses, it provides 4 units of heat. However, real life isn’t always perfect — temperatures change, systems switch on and off, and conditions vary throughout the year. That’s where SCOP comes in.
SCOP — Seasonal Coefficient of Performance. Gives a more realistic picture of your heat pump’s efficiency over an entire heating season.
It takes into account:
Changing outdoor temperatures as the weather warms and cools.
Energy used during standby and defrost cycles.
How efficiently the system runs at different power levels.
In short, SCOP tells you how efficient your heat pump is across the whole year, not just in ideal lab conditions.
How is SCOP Is Calculated?
SCOP compares how much heat energy your system produces with how much electricity it uses:
SCOP = Total Heat Output ÷ Total Electricity Used
Example.
If your heat pump has a SCOP of 4, that means for every 1 kWh of electricity it uses, it provides 4 kWh of heat. That’s why people often say a heat pump can be “400% efficient” — it’s not creating energy, just moving it very efficiently.
Privately installed or funded?
For any renewable heating project, whether funded privately or through a UK grant scheme, the current best practices, manufacturer’s instructions and relevant building regulations should be strictly adhered to. If installed on a UK grant scheme then a quality assurance program that certifies small-scale renewable energy systems and installers need to be followed, currently this is called MCS if insulation is being carried out at the same time and as part of the funding then it must meet the current PAS.
Have a look at the funding area of the site for more information especially the changes to the ECO scheme.
Installation Guide.
The manufacturer’s instructions will highlight any regulations that are required. Currently, all electrical regulations need to be followed and documented, as is the MCS checklists if installed on government scheme. Requirements are that properties are well insulated prior to the installation (fabric first approach) and full heat loss calculations are carried out to provide information to install the system to best practice.
If hot water is being heated in storage tanks by the heat pump then steps need to be taken to protect from bacterial growth. Stored hot water systems connected to heat pumps have cycles to heat the water at given times and a given temperature to stop the growth of Legionella bacteria.
Electrical certificates.
The two types of electrical certificates you will come across as a customer who is having any electrical work as part of installing EEM’s (energy efficient measures)
Electrical Installation.
Minor Works Certificate.
Electrical Installation Certificate.
An electrical installation certificate is the type of certificate a customer receives after an electrician has installed one or more new circuits. Other examples include a complete rewire, a replacement consumer unit or an additional consumer unit. Generally, any time electrical work is done at the consumer unit, a new installation certificate will be issued.
Minor Works Certificate.
A minor works certificate is issued after an electrician has made an alteration to an existing circuit. Minor works certificates are often used to certify work such as adding additional sockets to an existing circuit or increasing the number of light fittings in a room. It can also be where a fused spur has been installed for an appliance or boiler connection.
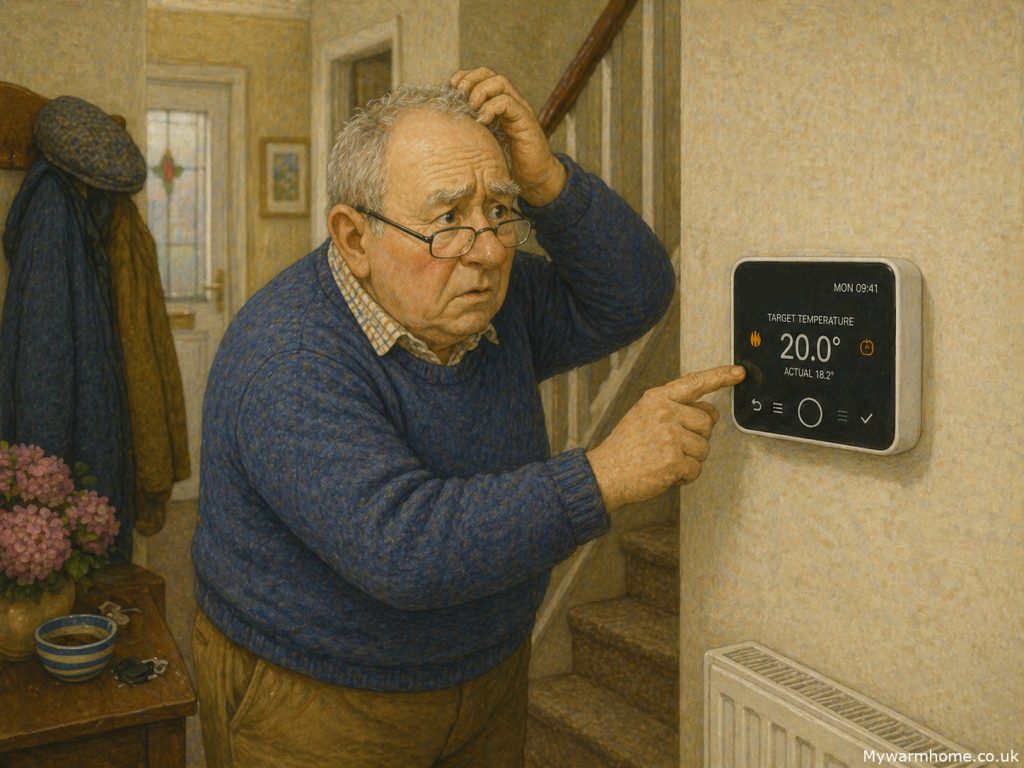
For someone used to a simple dial thermostat, navigating icons, settings, and scheduling interfaces can feel unnecessarily complex.
Controls for modern heating systems are often designed with flexibility in mind—but that flexibility can come at the cost of usability, particularly for older homeowners. Many systems now rely on layered menus, small touchscreens, or app-based controls that assume a level of digital confidence that not everyone has. For someone used to a simple dial thermostat, navigating icons, settings, and scheduling interfaces can feel unnecessarily complex. Even basic adjustments like increasing the temperature can become frustrating if they’re buried behind multiple steps.
There’s also a strong reliance on smartphones and apps, which doesn’t always reflect reality. A significant number of older people either don’t use smartphones at all or use them in a very limited way. Small screen sizes, poor contrast, and fiddly controls can make apps difficult to read and operate—especially for those with reduced eyesight or dexterity. On top of that, concepts like Wi-Fi connectivity, accounts, and software updates can create barriers that simply don’t exist with traditional controls. When heating becomes dependent on an app, it can leave some users feeling locked out of their own system.
Technology awareness plays a big role too. Many modern interfaces assume familiarity with common digital behaviours, swiping, tapping icons, navigating menus, but these aren’t universal skills. For older users, there can be a lack of confidence in “trying things,” especially when there’s a fear of pressing the wrong button and causing a problem. This often leads to systems being left on default settings, or worse, used incorrectly, impacting both comfort and efficiency.
Always ask installers what controls will be fitted. Ask for a easy to manage and NON app connected if technology will cause a problem. Don’t settle for “thats the only one we can fit!”
So what’s available? Encouragingly, there are still more accessible options. Some manufacturers offer simplified thermostats with large buttons, clear displays, and minimal menus, focusing only on core functions like temperature up/down and on/off. Others provide wired controls that stay in a fixed location, avoiding the need for apps altogether. There are also programmable thermostats with physical buttons and high-contrast screens, designed specifically with readability in mind. In more advanced systems, it’s sometimes possible to pair a smart setup with a basic user interface for day-to-day use, leaving the more complex controls to installers or family members if needed.
Ultimately, good design should work for the person using it, not the other way around. When specifying heating controls, it’s just as important to consider usability as it is efficiency. A system that’s easy to understand and operate will always perform better in real life than one packed with features that never get used.
Technical Monitoring. Why It Matters for Your Home.
If you’re considering or had insulation, a heat pump, or upgrades through schemes like ECO4 or the Boiler Upgrade Scheme, you’ve probably (or have been) told how much warmer and cheaper your home will be to run.
But here’s the uncomfortable truth: not every installation delivers what it promises.
At mywarmhome.co.uk, we’ve seen first-hand that the difference between a great upgrade and a problematic one often comes down to one thing technical monitoring.
What Is Technical Monitoring?
Technical monitoring is simply having an independent expert check that the work being done in your home is actually correct to current regulations and best practices..
Not just:
“Has a boiler been installed?”
“Has insulation been fitted?”
But:
Has the heating system been installed to regulations?
Has the insulation been installed to best practices?
Are any health and safety breeches?
But even technical monitoring has failed in its own way!
Where technical monitoring has often fallen short is in how inspections are structured. Many schemes rely on rigid, “one-size-fits-all” checklists built around simple pass/fail questions. While this approach creates consistency on paper, it doesn’t reflect the complexity of real homes or installations.
In practice, these standardised question sets can limit the effectiveness of technical monitoring agents. Instead of applying professional judgement or exploring site-specific risks, inspectors are often confined to ticking boxes. That means nuanced issues, like early signs of moisture risk, poor system design choices, or interactions between measures can be overlooked simply because they don’t neatly fit into the checklist.
A more effective approach would allow for flexibility and technical discretion, enabling monitoring agents to follow the evidence, investigate anomalies, and record observations beyond predefined questions. Without that freedom, technical monitoring risks becoming a compliance exercise rather than a genuine safeguard for quality.
What it should be is;
Is it the right system for your home that has been installed?
Have all warranties/Insurances been set up and are in place?
Have all controlling bodies and expectations been met? (MCS, Solar registered with energy supplier etc)
Have all regulations been met?
And most important…Has the installation been performed in a professional and to a decent standard.
It’s the difference between a box being ticked… and your home genuinely improving.
Why Homeowners Should Care.
Energy upgrades can be transformative, but when they go wrong, they go very wrong.
Without proper oversight, issues we regularly see include:
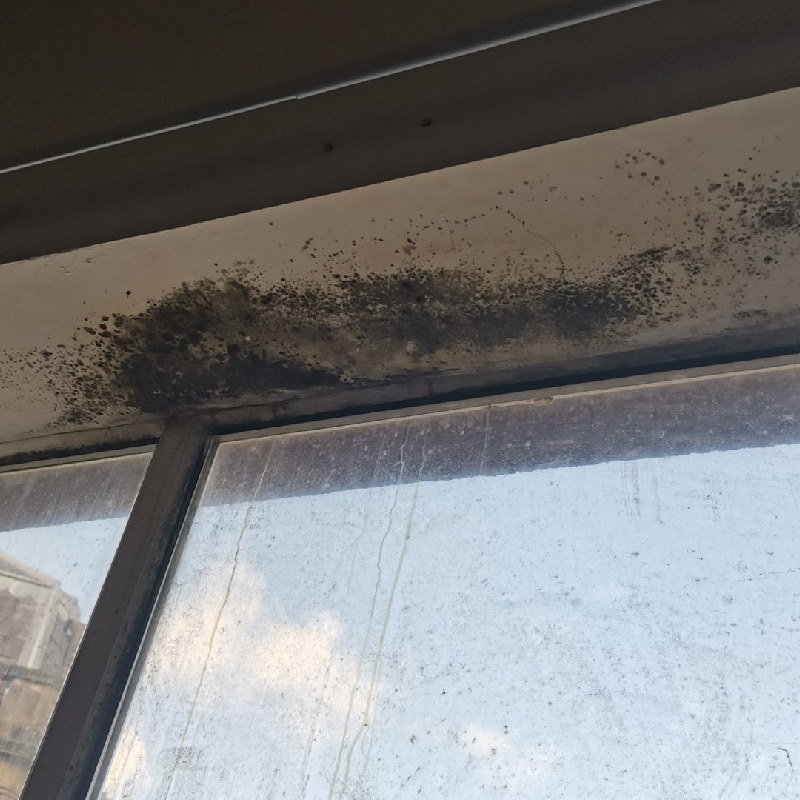
Insulation trapping moisture, leading to damp and mould.
Heat pumps that are too large or too small, inefficient and expensive to run.
Poor ventilation, condensation and unhealthy air.
Properties that should not have been retrofitted.
Systems installed to meet targets, not your home’s needs.
Poor workmanship that will fail over time.
Destruction of architectural features without discussions with occupiers. (coving, door frames, picture rails etc)
Destruction of furnishings due to lack of care and respect.
Below is a tiny selection of some fails over the years.
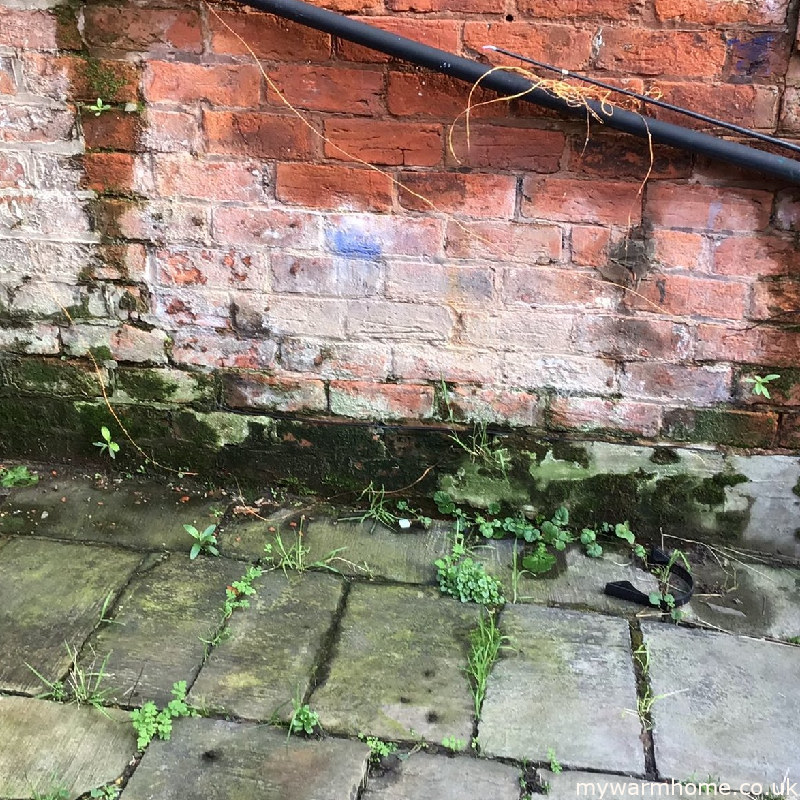
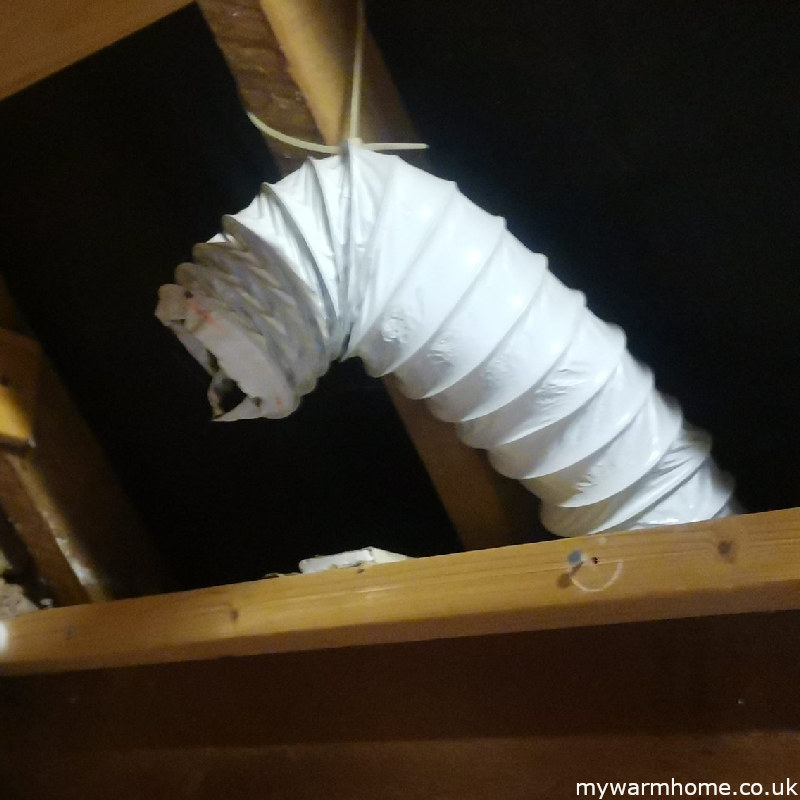
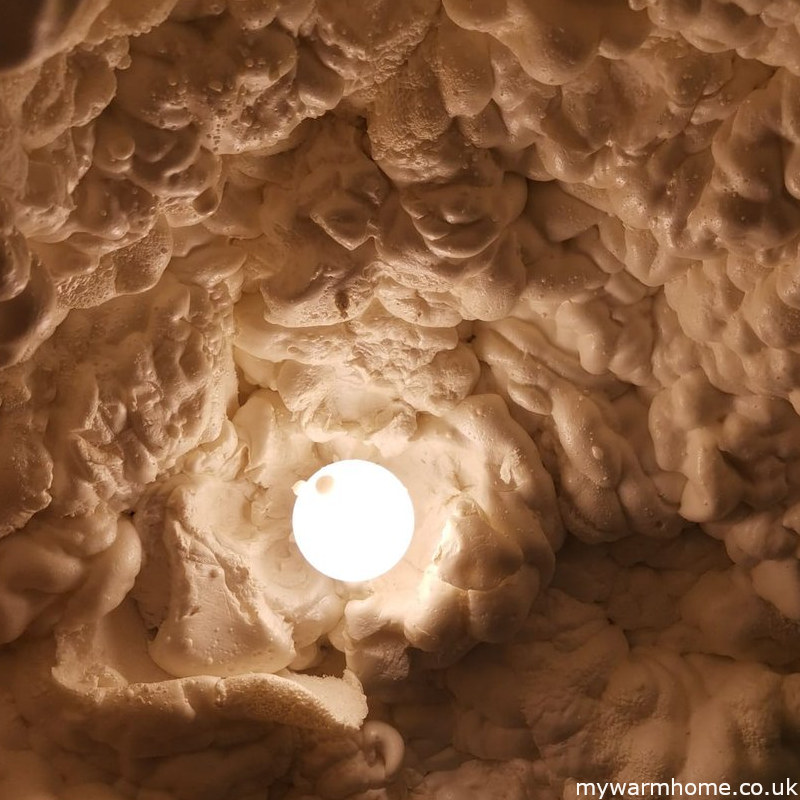
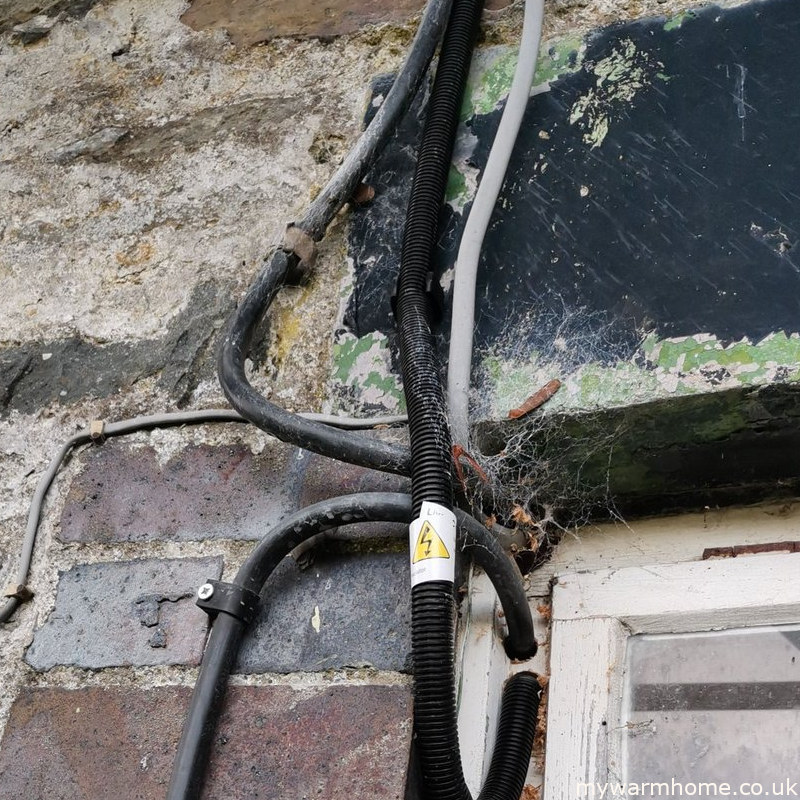
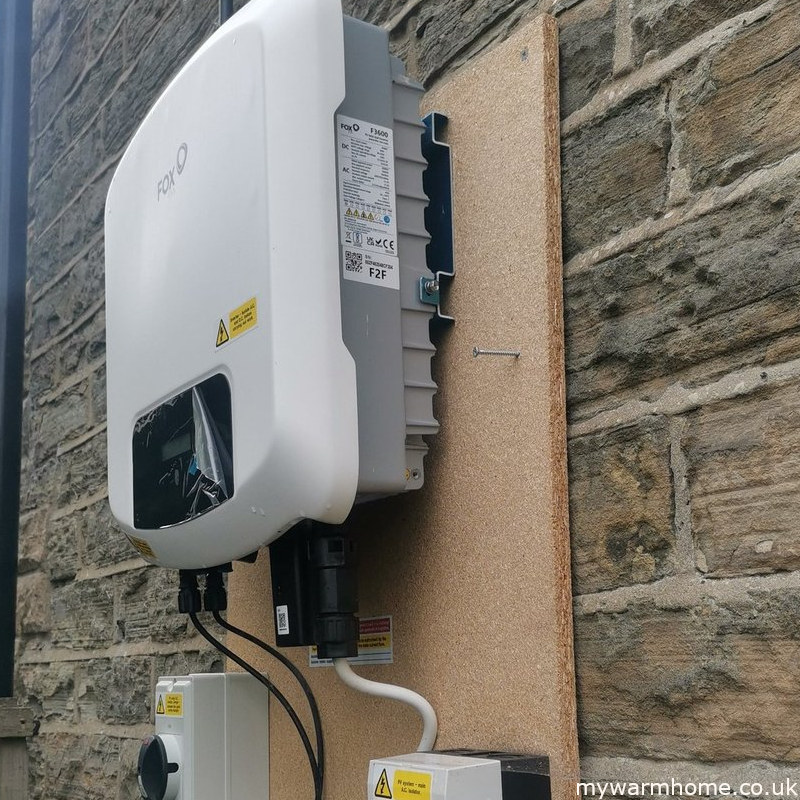
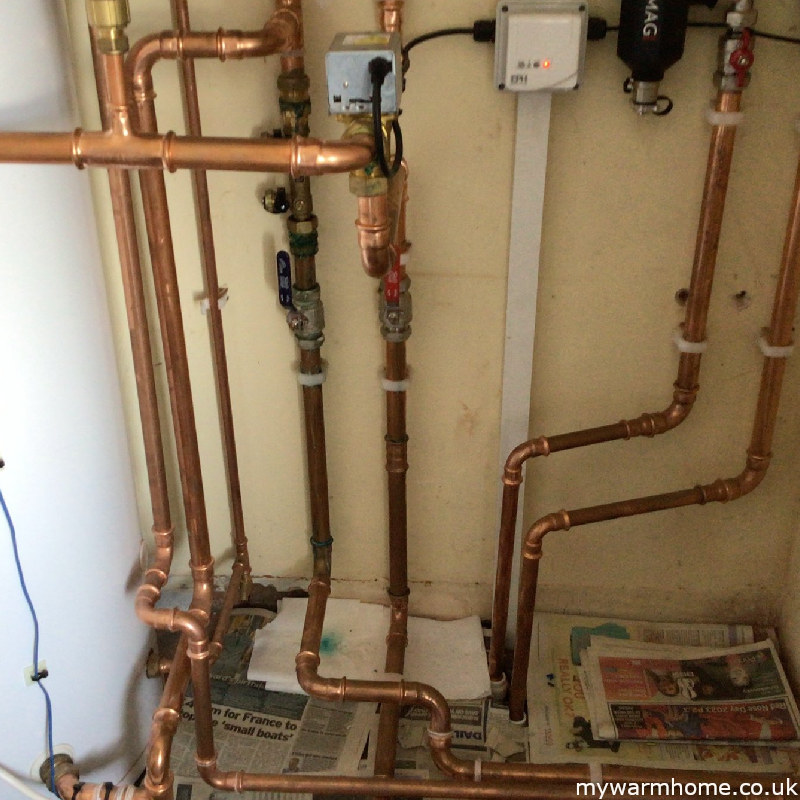
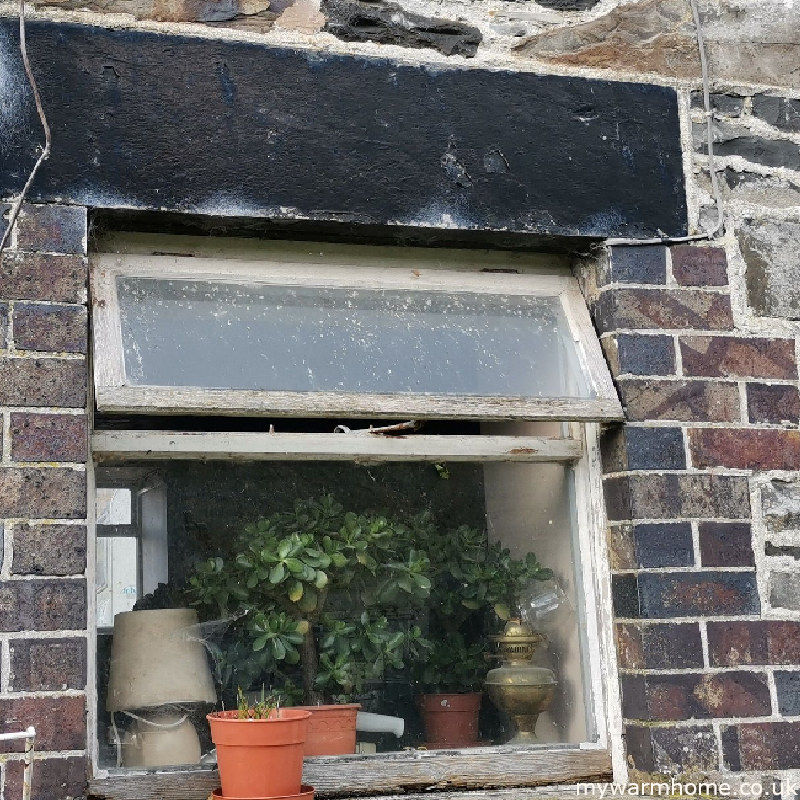
Poor DetailingWork around detailingCavity Bead OverspillPost Install IWIPoor Detailing EWIWater Ingress Damp Course FailVented to LoftSpray foam Around BulbDrilled Through FrameExternal Mount On MDF!Poor VentilationUninsulatted PipeworkPoor Windows on IWI
Technical monitoring has uncovered a significant number of issues over the years. However, if monitoring agents had greater freedom to investigate more thoroughly, many more failings would likely have come to light. The reality is that only a small fraction of problems have been identified across a vast number of installations, largely because inspections cover such a limited percentage of the overall work.
What Good Monitoring Looks Like.
For homeowners, good technical monitoring isn’t complicated, it just means someone is asking the right questions at the right time:
Before installation.
Has your home been properly assessed?
Are the proposed measures suitable?
During installation.
Is the work being carried out to a good standard?
Are corners being cut?
After installation.
Does everything actually work as intended?
Are there any risks (e.g. ventilation, moisture, system performance, health and safety)?
This is especially important for measures like:
Solid wall insulation.
Heat pumps.
Whole-house retrofits.
Who Is Actually Checking the Work?
You might assume “someone official” is always checking installations—but it’s not always that simple.
There are frameworks in place, such as TrustMark and standards linked to MCS, and they do include inspections.
However:
Not every job is checked.
Some checks are paperwork-based.
Many happen after installation is complete.
That means problems can still slip through.
The Gap: Why More Monitoring Is Needed.
Current schemes rely heavily on sampling, only a percentage of homes are inspected.
From a homeowner’s perspective, that creates a simple risk:
What if your home isn’t one of the ones that gets checked?
As schemes scale up, the pressure to deliver volume can sometimes outweigh the focus on quality.
That’s why independent, homeowner-focused technical monitoring is becoming more important than ever.
Because once work is signed off, it becomes much harder to fix.
What You Can Do as a Homeowner to help yourself as you may never get inspected!
You don’t need to be a technical expert, but you do need to be informed.
Here are a few practical steps.
Request copies of assessments and designs from installers.
Take photos before, during, and after installation.
Don’t be afraid to question anything that doesn’t feel right.
Get an independent opinion if something seems off.
The Bottom Line
Energy efficiency schemes have huge potential, they can make homes warmer, healthier, and cheaper to run.
But quality isn’t guaranteed.
Technical monitoring is what turns a install into a successful outcome for your home. Without it, you’re relying on trust. With it, you’re relying on evidence.
A warm, energy-efficient home only works properly when: insulation + heating + ventilation all work together.
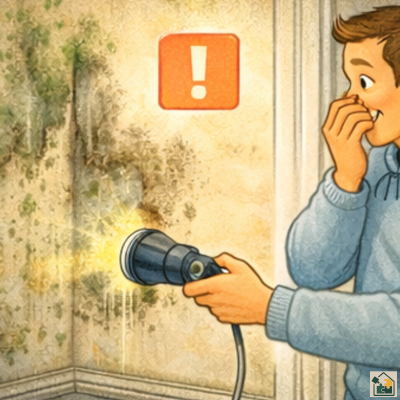
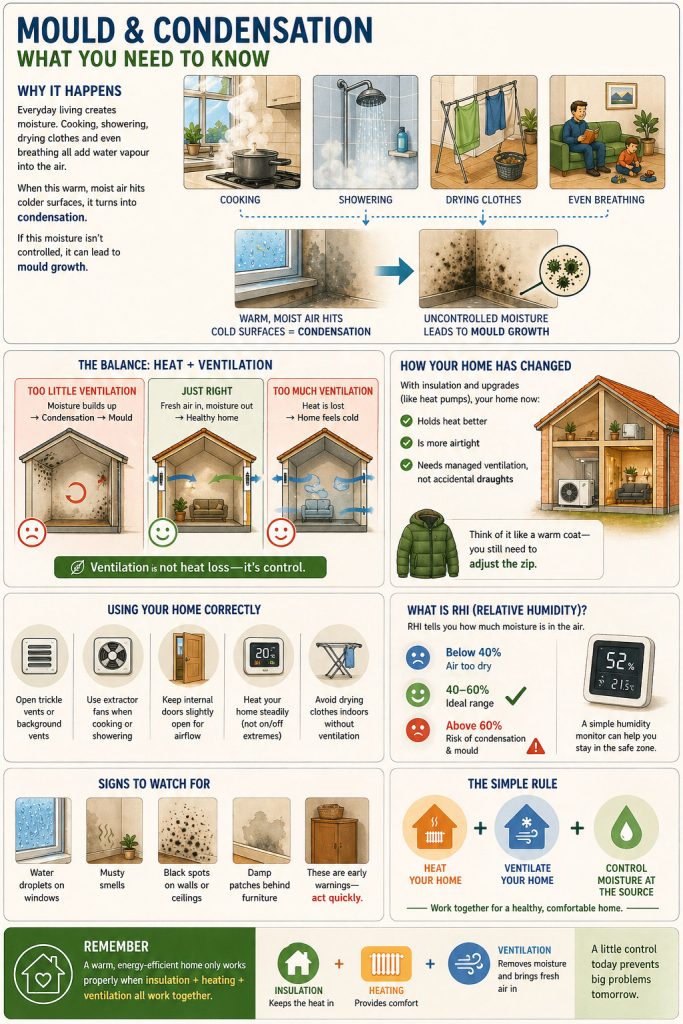
Cooking, showering, drying clothes and even breathing all add water vapour into the air. When this warm, moist air hits colder surfaces, it turns into condensation.
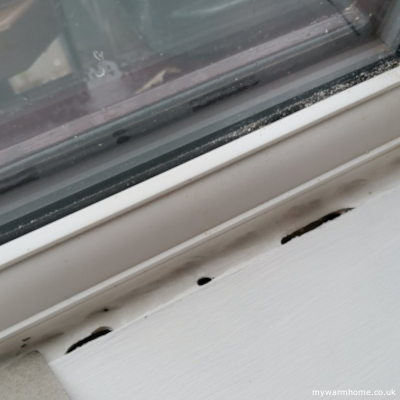
If this moisture isn’t controlled, it can lead to mould growth.
The Balance!
Too little ventilation = Moisture builds up → Condensation → Mould.
Too much ventilation = Heat is lost → Home feels cold.
Just right, Fresh air in = moisture out → Healthy home.
Ventilation is not heat loss, it’s control.
How retrofit changes our home..
With insulation and heating upgrades, your home now:
Holds heat better.
Is more airtight.
Needs managed and controlled ventilation, not accidental draughts.
Think of it like wearing a warm coat, you still need to adjust the zip if you gret too warm..
USING YOUR HOME CORRECTLY
✔ Open trickle vents or background vents. ✔ Use extractor fans when cooking or showering. ✔ Keep internal doors slightly open for airflow. ✔ Heat your home steadily (not on/off extremes). ✔ Avoid drying clothes indoors without ventilation.
Understanding what goes on behind the scenes!
Interstitial condensation is the formation of liquid water inside the hidden, internal layers of a building’s structure (walls, roofs, or floors) rather than on the visible surface. It occurs when warm, moist air penetrates the building envelope and reaches a cold surface (dew point) within insulation, brickwork, or behind cladding, often causing structural damage, rot, and reduced insulation performance. This is extremely important when internal wall insulation is installed as any failures in design will cause weak points, This allows moisture to venture behind and out of sight. This is why ventilation and attention to design and detail is paramount.
What is Relative Humidity (RH)?
RH tells you how much moisture is in the air. Take a look at the video below to show you what 100% humidity is like.
Below 40% → Air too dry.
40–60% → Ideal range .
Above 60% → Risk of condensation & mould .
A simple humidity monitor can help you stay in the safe zone.
Signs to watch out for.
Water droplets on windows.
Musty smells.
Black spots on walls or ceilings.
Damp patches behind furniture.
What is the Dew Point?
The dew point is the temperature to which air must cool down to become fully saturated with water vapor and start producing dew, fog, or condensation. A higher dew point means more moisture in the air, making it feel stickier and more uncomfortable outside.
Dew point and Relative Humidity (RH) are linked because they both measure moisture in the air, but they do so in different ways: dew point measures the actual amount of moisture, while RH measures how “full” the air is with moisture compared to its capacity at a specific temperature.
REMEMBER. A warm, energy-efficient home only works properly when: insulation + heating + ventilation all work together.
Fabric First Approach, What It Is and Why It Matters!
The fabric first approach is built on a simple principle: reduce heat loss from the building before upgrading heating systems or adding renewables.
“Fabric” is just another term for walls, roof, floors and windows.
Instead of installing a high-tech heating system in a leaky home, fabric first aims to fix the building first, then optimise how it’s heated.
Why Fabric First Became the Gold Standard.
For years, fabric first has been the backbone of UK retrofit policy (including PAS 2035), and for good reason.
1. It Reduces Energy Demand at Source.
By improving insulation and airtightness, the home simply needs less heat to stay comfortable.
Lower energy bills.
Less reliance on heating systems.
Reduced carbon emissions.
This is fundamental—you can’t efficiently heat a home that constantly loses heat.
2. It Improves Comfort and Health
Fabric improvements don’t just save energy, they change how a home feels.
Warmer surfaces (no cold walls).
Fewer draughts.
Reduced risk of damp and mould.
More stable indoor temperatures.
These benefits are well documented, including improved physical and mental wellbeing.
3. It Futureproofs the Home.
A well-insulated building works better with any heating system.
Heat pumps perform more efficiently.
Smaller systems can be used.
Lower running costs long-term.
In other words, fabric first makes every future upgrade more effective.
4. It Supports a “Whole House” Approach
Fabric first encourages thinking about the home as a system:
Insulation.
Airtightness.
Ventilation.
Heating.
All designed together, not as bolt-on measures.
So Why Is It No Longer the “Only” Answer?
Despite its benefits, fabric first is no longer seen as the universal gold standard, especially when viewed through the lens of net zero.
This shift is strongly influenced by research such as the “Every Home Counts” review (which highlighted quality, whole-house thinking, and unintended consequences) and more recent academic work like “Fabric first: is it still the right approach?”.
The Key Challenges.
1. Net Zero Has Changed the Priority.
Fabric first was developed when all heating was fossil fuel-based.
Today, we can decarbonise heat directly using technologies like heat pumps.
Research shows that:
In some homes, switching to low-carbon heating alone can achieve major carbon reductions.
Fabric upgrades, while beneficial, are not always essential for decarbonisation.
2. Time and Scale Constraints.
Deep fabric retrofit (e.g. solid wall insulation, floors, airtightness upgrades):
Is expensive.
Is disruptive.
Requires skilled labour.
At current rates, rolling this out across all UK homes would take decades.
This creates a real issue: If you wait for “perfect fabric,” you may delay urgent carbon reduction.
3. Diminishing Returns.
Many homes have already had:
Loft insulation.
Cavity wall insulation.
What’s left is:
Harder.
More expensive.
More invasive.
The cost-benefit balance becomes less attractive at scale.
A practical guide for homeowners on doing things in the right order, and for the right reasons.
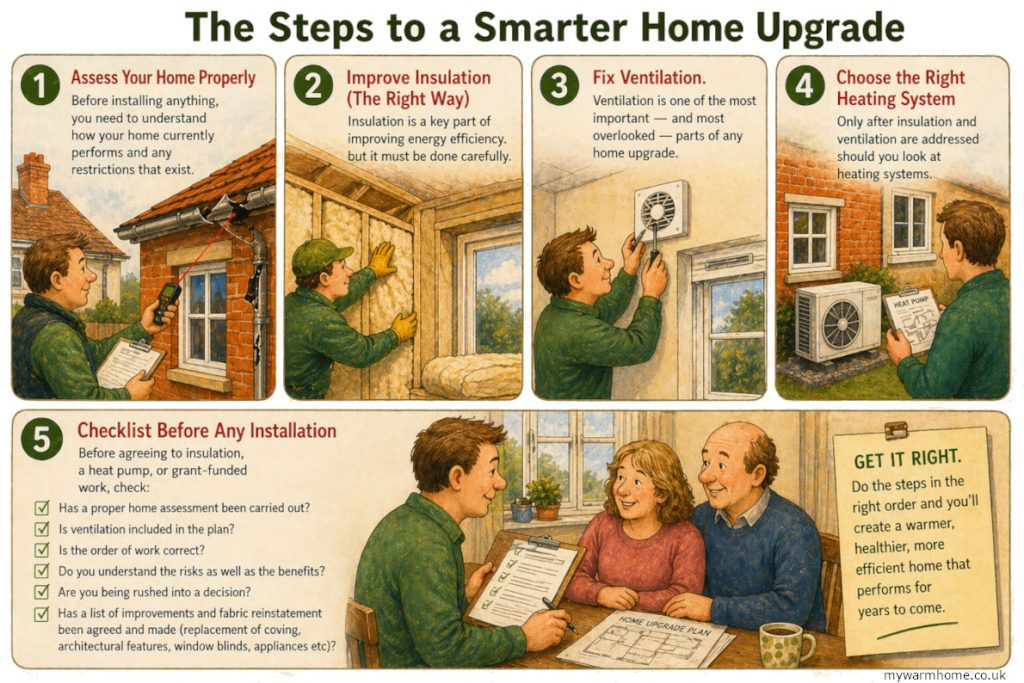
Retrofitting a home isn’t just about adding insulation or upgrading heating systems. Done properly, it’s a carefully balanced process that considers how heat, air, and moisture move through a building. Get the sequence or method wrong, and you can end up with condensation, mould, or even structural issues.
Before we go into any details an understanding of the bits and pieces that are contained in the “Whole Process “may help you in further reading.
The steps.
We want to make our home warmer and possibly more efficient, so we want insulation and maybe a new heating system.
Lets get an assessment done.
A retorfit assessor will look at the whole property and make a retrofit report that details property construction, ventilation, current insulation levels and any failing that exist (damp, mould, fabric etc)
Why?
The assessor is not only a domestic energy assessor they also hold a qualifications in identifying property characteristics to enable a retrofit coordinator plan out a way to stage the development of retrofit in the right order.
Why a right order?
Whats the use of installing a new or upgrading a heating system if the heat is going to go out the window! This just means we need to control the heat loss first or we are just wasting energy. So first things to consider is the fabric and make up of the property, this is where the ventilation etc comes in.
Why does the ventilation matter, arn’t we just adding more draughts into our property?
Different homes behave differently, so insulation must match the construction type.
Different homes.
Older properties (typically pre-1930s) are designed to breathe. Moisture moves through walls and evaporates naturally through the seasons.
More modern homes are built with cavities that were originally built with a clear air cavity to protect the property from moisture and add some form of insulation (air can be insulation!)
Balancing a central heating system properly is what separates a working” system from an efficient, comfortable, and compliant one
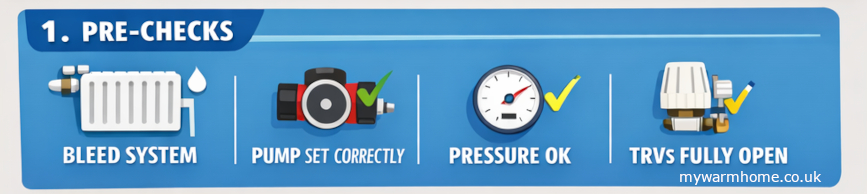
1. Pre-checks are critical.
Before touching lockshield valves:
System fully bled (no air)
Correct system pressure.
Pump operational and correctly set.
All TRVs fully open.
Room thermostat calling for heat.
Boiler at normal operating temperature (flow ~70°C typical).
If these aren’t right, balancing will be inaccurate.
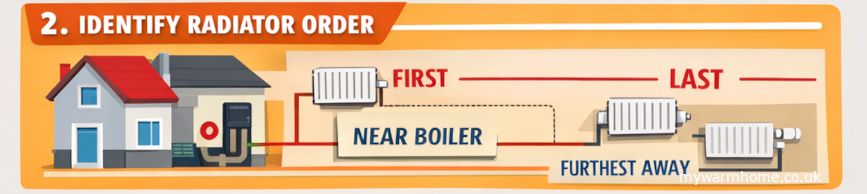
2. Identify radiator order
You need to know flow sequence:
First radiators = closest to boiler
Last radiators = furthest away
This matters because closer radiators naturally take more flow.
3. Fully open all lockshield valves
Remove caps (if still on!).
Open all lockshields fully (anti-clockwise).
4. Measuring temperatures.
Measuring temperatures when balancing radiators can feel a bit daunting at first, but a digital thermometer is inexpensive and easy to use. Most are simple point-and-click devices, allowing you to quickly take readings from the flow and return pipes.
For greater accuracy, clamp thermometers can be used, although they tend to be more expensive.
The flow and return pipes can be installed either way, but typically the TRV is fitted on the flow side. If you’re unsure, it’s worth checking while the system is heating up one side will warm up faster, helping you identify the flow
While heat naturally rises, a large amount is also lost through poorly insulated external walls,
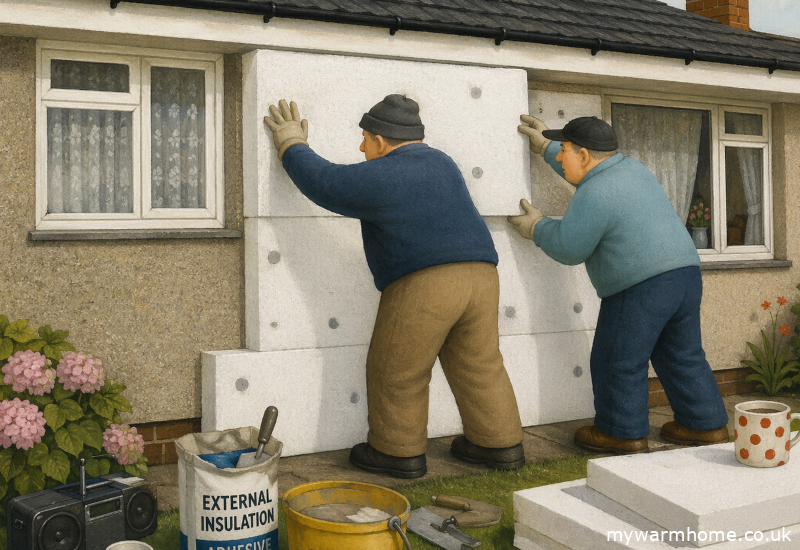
External wall insulation plays a crucial role in reducing how quickly heat escapes from our homes. While heat naturally rises, a large amount is also lost through poorly insulated external walls, especially in older properties. In fact, without adequate wall insulation, a significant proportion of a home’s heat can be lost through the building fabric itself, making it harder and more expensive to keep warm.
By installing external wall insulation (EWI), we effectively wrap the home in a thermal layer, helping to retain heat inside for longer. When designed and installed correctly, this can dramatically improve energy efficiency, enhance comfort, and reduce heating bills.
Standards and materials have evolved considerably over the years. Back in the mid-1980s, minimal insulation levels were common, with basic materials considered sufficient at the time. Today, expectations are much higher.
Modern external wall insulation systems use advanced, more environmentally conscious materials and are installed to far more demanding performance standards, ensuring homes are better protected against heat loss while also supporting long-term sustainability Have a look at the installer page for some handy questions to ask.
Health and safety.
You may need specialist advice from trades people and professionals regarding things like, High amperage cables. Solar installations, overground electrical supplies to property. Nesting. Bees, wasps, bats. Vermin. Rats, mice, squirrels Asbestos. Vermiculite, flues, drainage, roofing. Your installers should pick up most of the above items on the initial pre-installation survey.
As a general rule, high-amperage cables should always be positioned outside the insulation, rather than beneath it. Special care must be taken if there are any nesting bats, as well as bees or wasp nests. If vermin around or under property, installing insulation can create a warm environment that attracts them. Making sure any vermin problem is erradicated will allow the insulation to remain sealed.
EWI insulation.
Correct background ventilation. *All rooms with the installation of trickle vents or wall vents if required Correct door undercuts. *Undercuts to internal doors allow the free movement of air around the property.
*Testing of the background ventilation pre-installation may allow the installed measure(s) to move forward without the need for door undercuts or trickle vents installed.
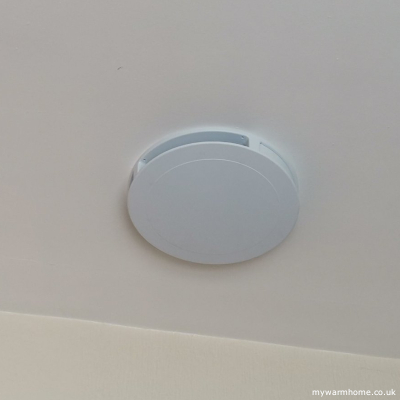
Correct extract ventilation in wet rooms. Kitchens, bathrooms,
WC’s, and utility rooms are all classed as wet rooms.
If extraction exists, then checks need to be carried out by referencing the manufacture’s data or performing an anemometer (testing apparatus) test to confirm extraction rates are being met.
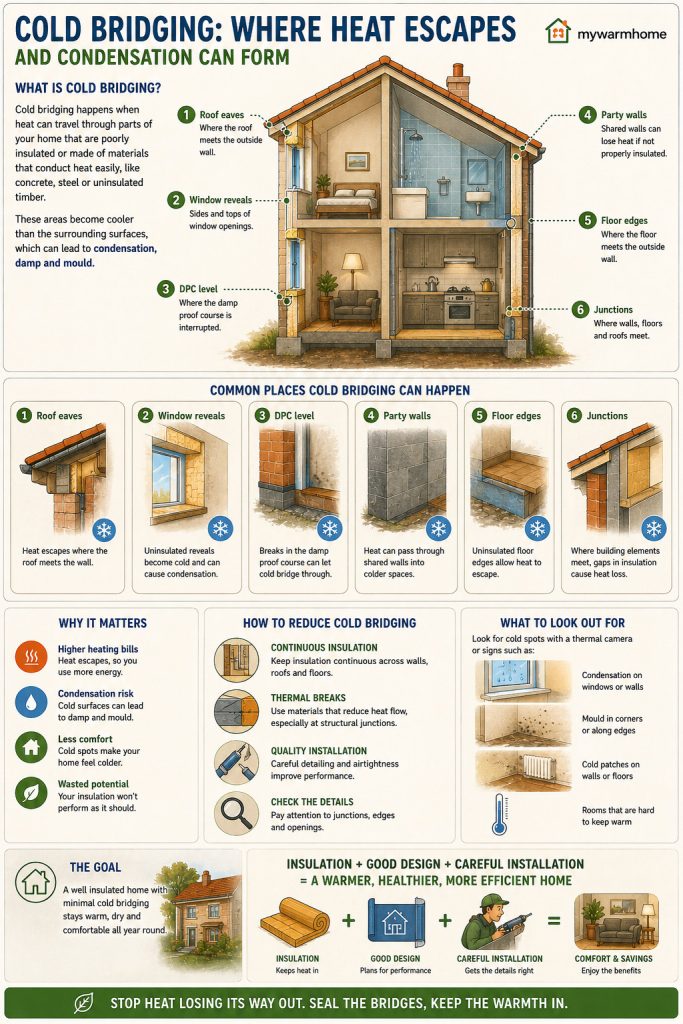
Mitigation of cold spots/thermal bridges.
External wall insulation also helps deal with cold spots, often referred to as thermal bridges. These are areas where heat can escape more easily, typically around features like window reveals, door frames, corners, and where different building elements meet.
To reduce this, insulation should be applied as a continuous layer around the outside of the home, rather than in sections. This helps “wrap” the building evenly and prevents breaks in the insulation where heat could leak out. Particular care should be taken around openings like windows and doors, ensuring these areas are properly detailed and insulated to avoid cold patches forming internally.
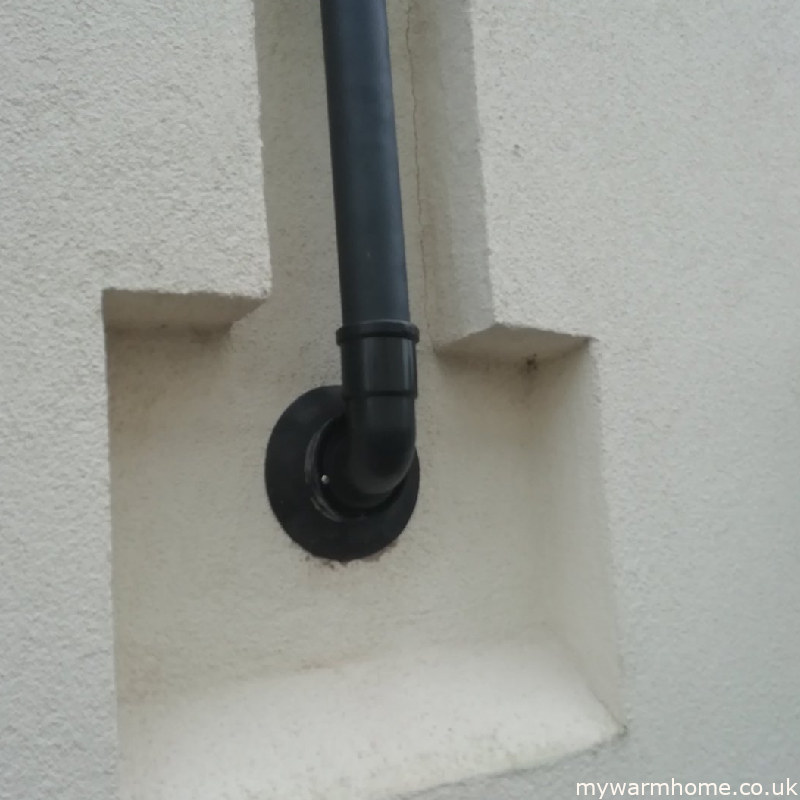
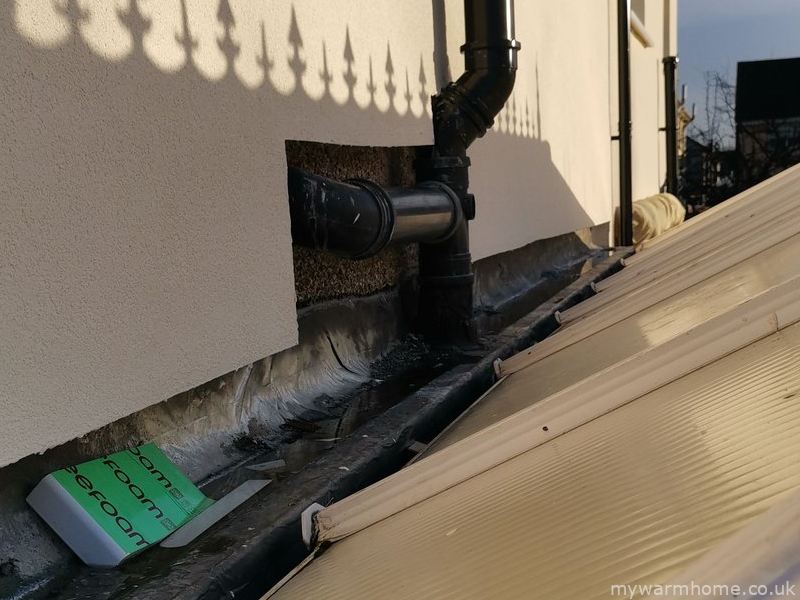
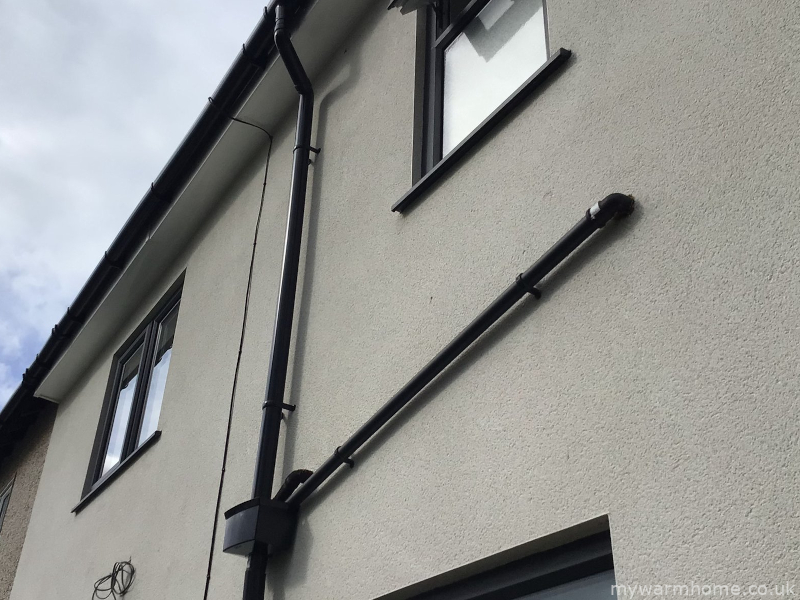
Where possible, the goal is to achieve full coverage of the external walls so there are no gaps or weak points. Any existing features attached to the walls, such as pipework or fixtures, should be carefully adjusted or extended so the insulation can sit neatly behind them.
By addressing these thermal bridges during installation, you not only improve energy efficiency but also reduce the risk of condensation and mould forming on colder internal surfaces, making the home more comfortable and healthier to live in.
Poor DetailingPoor DetailingGood Detailing
Types of External Wall Insulation and How They’re Installed.
External wall insulation (EWI) isn’t a one-size-fits-all solution. There are different systems and finishes available, but they all follow the same basic idea—fixing an insulating layer to the outside of the property, then protecting it with a durable, weatherproof finish such as render or cladding.
Common insulation materials include expanded polystyrene (EPS), mineral wool, and more advanced breathable boards. The choice depends on the type of property and how it manages heat and moisture. Once the insulation boards are fixed to the wall (usually with adhesive and mechanical fixings), they are reinforced with a mesh layer and finished with render or another outer coating to protect against the elements and give the home a clean, updated appearance.
Insulation Approach, Getting the Design Right.
External wall insulation has come a long way over the years. It’s no longer just about “covering the walls to make the home warmer.” Today, there’s a much better understanding of how buildings handle heat, air, and moisture—and getting this right is essential.
Every property behaves differently. Factors like how it was built, its age, how it’s used, and its exposure to weather all play a part. For example, a small 1970s flat with two occupants will perform very differently to a large early-1900s family home. If the insulation system doesn’t take these differences into account, it can lead to problems such as trapped moisture, damp, or poor performance.
That’s why a proper assessment should always come first. Once the property has been fully understood, the most suitable insulation system and finish can be selected.
Key Things to Consider Before Installing EWI.
A good design will take into account:
Age of the property – when it was built and whether it has been upgraded over time.
Neighbours and surroundings – Permissions may be required.
Conservation restrictions – Listed buildings and restricions of what can and cannot be performed on our buildings.
Type of property – flat, house, bungalow, etc.
Wall construction – solid walls, cavity walls, timber frame, system-built, or solid brick.
Existing insulation – such as cavity wall fill, internal wall insulation, or specialist plasters. If a cavity wall then look at best practices for advice on dew points.
Access requirements – whether scaffolding is needed and how easy the site is to work on.
Storage on site – Insulation materials should be kept dry before installation.
Condition of services – including gutters and downpipes, which may need adjusting or replacing.
Telecoms and fixtures – such as cables, satellite dishes, and phone lines that may need repositioning.
Security systems – alarms and external sensors.
Heating appliances – boiler flues, vents, and chimneys must be correctly extended or adapted.
Damp-proof course (DPC) – its condition and height relative to the new insulation.
Existing damp issues – these should always be addressed before installation.
Ventilation – ensuring the home can still “breathe” properly after insulation.
Windows and doors – their condition and how they integrate with the new insulation layer
Taking the time to get these details right ensures the insulation performs as intended—keeping the home warmer, reducing energy bills, and avoiding issues down the line.
External Wall Insulation (EWI) Board Types.
Choosing the right External Wall Insulation (EWI) system is critical to ensuring energy efficiency, moisture control, fire safety, and long-term performance. Different insulation boards suit different property types, wall constructions, and site constraints.
This guide explains the main EWI insulation types used in the UK, when to use them, and which buildings they are best suited for.
EPS (Expanded Polystyrene).
EPS insulation boards are the go-to choice for most UK retrofit projects due to their affordability, ease of installation, and solid thermal performance.
Best for: Solid wall homes, post-war housing, and standard residential retrofits.
Typical properties: 1930s–1980s houses, system-built homes.
Why use it: Cost-effective, lightweight, widely approved.
Key consideration: EPS has lower fire resistance than mineral-based systems, so suitability depends on building height and regulations.
Made from raw materials like stone or silica that are heated until molten, then spun into a fibrous matt. Properties. Mineral wool is known for its thermal, fire, and acoustic properties. It’s a poor conductor of heat, which helps maintain a consistent temperature in buildings. It’s also resistant to fire and doesn’t release toxic gases when heated.
The primary and most widely used are.
Mineral wool. Sheep’s wool. Glass wool. PIR (Polyisocyanurate) and phenolic foam.
Excellent thermal and acoustic insulation.
Easy to install.
Relatively cheap.
Breathable (can prevent dampness from damaging wooden timbers).
Can sometimes irritate bare skin.
Will compress if you put weight on it.
Sheep’s wool.
Sheep wool insulation is a natural, sustainable, and versatile material that can be used for thermal and sound insulation in buildings. Sheep wool is a natural insulator that can be used in walls, floors, lofts, roofs, and underlays. It’s crimped, which traps air in millions of tiny air pockets.
Excellent thermal and acoustic insulation.
Easy to install.
Safe to touch.
Eco-friendly.
Breathable (can prevent dampness from damaging wooden timbers).
Expensive.
Glass wool.
Glass wool insulation, also known as fibreglass insulation, is a common material used to insulate homes and commercial buildings. It’s made from glass fibres that are bonded together to create a wool-like texture. The glass fibres trap air pockets, which act as barriers to prevent heat loss.
Fire-resistant.
Insect repent.
Eco-friendly (mostly made from recycled glass).
Most glass wool irritates the skin (protective clothing must be worn when handled).
Becomes less effective when wet.
PIR (Polyisocyanurate) and phenolic foam.
Polyisocyanurate (PIR) and phenolic foam are both types of plastic-based foam insulation boards used in construction: PIR. A rigid foam board made from a thermoset plastic that’s known for its high thermal resistance, low water absorption, and structural strength. PIR is often used for flat roofs because of its durability and compatibility with waterproofing methods. Phenolic foam. A popular choice for domestic floors that combines thermal efficiency with an economical price point. Phenolic foam may have slightly better thermal performance than PIR, but PIR is more economical.
Fire-resistant Can be cut to fit snugly between joists. Higher R-value, so can be thinner to achieve building regulations.
Takes longer to fit than rolled insulation.
Comes in large sheets.
Good to know.
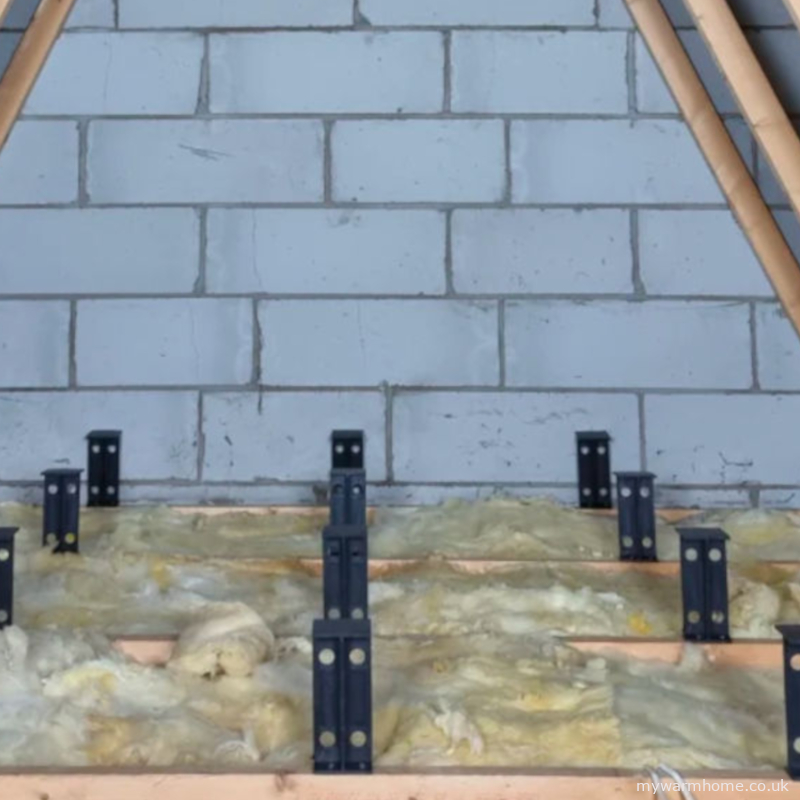
When insulating a loft at joist level, it’s important to consider both storage options and access control. Various hatches and ladder systems are available, and while some may look stylish, you should prioritize practicality and ease of use, especially as we age. If you want to create a storage space, avoid compressing the insulation, as this reduces its effectiveness. There are products available that raise the loft floor to provide storage space and create access walkways to essential items like boilers, water tanks, and solar inverters. Pay special attention to the hatch area, which needs to be draught-proofed and insulated. This is one of the weakest points in the insulation system because hot air rises and can escape quickly through a poorly insulated hatch, defeating the purpose of insulating in the first place.
Boarded Service AreaLoft Hatch PIRLoft Legs
Gas and open flued appliances.
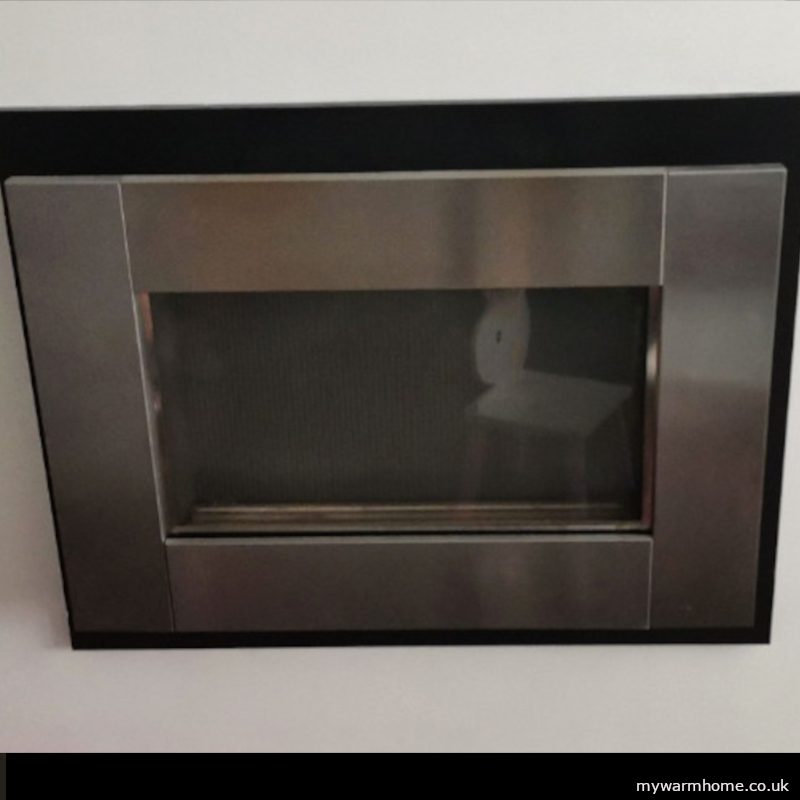
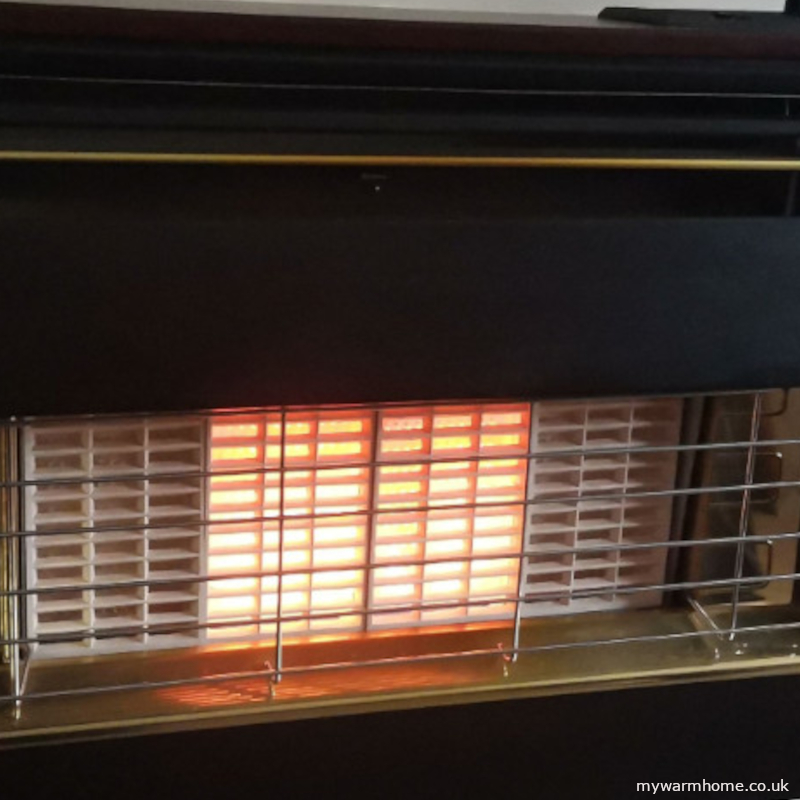
If the fabric of the property is being improved and open-flued gas appliances exist, then a gas spillage test should be carried out on each appliance by a suitably competent operative. Rules exist that give an average unimproved property a certain amount of leakiness (adventitious air) to allow open-flued appliances to operate safely. This all depends on how much fuel burns over a period of time, for example: 7.5kw/hr, 9kw/hr, 6.9kw/hr. You will see this on the data badge of the appliance (gas rating of an appliance here.). The more fuel used, the more leakiness is needed. Multifuel appliances are treated in roughly the same way but do not come under gas safe legislations. HETAS and building regulations govern multifuel installations and ventilation.
This is the reason combustion ventilation is sometimes needed. This allows the air to be replenished (with an open flued appliance we are burning the oxygen in the room that we use to breathe)
Data BadgeFlueless FireOpen Flue Fire
With the introduction of insulation, extraction ventilation should be installed as part of the process, we now have a different factor to add in with gas safety. Extraction fans either pulling or pushing air (PIV) can now effect the performance of the appliance.
Open flued gas appliances should be checked to prove they are not spilling products of combustion into the property. This is verified by performing a spillage test.
Part J states. “Extract fans lower the pressure in a building, which can cause the spillage of combustion products from open-flued appliances. This can occur even if the appliance and the fan are in different rooms”. Any funded insulation work now includes ventilation upgrades as part of the current PAS, so extract ventilation will be installed. This should have been factored in as part of any ventilation work carried out. A competent person is required to perform spillage tests.
Part B, 8(1) of the Gas Safety (Installation and Use) Regulations 1998 states that no person can make any changes to a premises that contains a gas fitting or storage vessel if the changes would compromise the safety of the fitting or vessel. This basically means if the fabric of the building (walls, floors, roofs) are being insulated then appliances need to be checked by a suitably competent and qualified person.
Below you will find links to UK regulations and other useful information. These links are to third party websites, and we cannot guarantee the validity or safety of the following sites. If you find any broken links or issues, we would love to know. Please read our disclaimer.