Author: AndyL

  • Regular and System boilers.

    Regular and System boilers.

    A combi boiler provides both central heating and hot water directly from the mains, functioning much like a powerful, on-demand kettle. 

    In contrast, a system or regular boiler works by heating a larger volume of water that is stored in a separate hot water cylinder. This stored hot water can then be supplied to multiple outlets at the same time, for example, when more than one shower or taps are running simultaneously. While this setup provides a consistent flow of hot water to larger households, it does require additional space for the cylinder (and, in the case of a regular boiler, a cold-water storage tank too).
    As a result, system and regular boilers are generally more suited to homes with higher hot water demand and ample storage space.

    System and regular boiler.

    Usually natural gas or LPG. (can be electric, oil or biomass)

    System and regular (or conventional) boilers are both heating systems with key differences in how they supply hot water and work with heating systems.

    Here’s a breakdown:

    System Boiler.

    Components. System boilers have most of the essential components built-in, like the pump, diverter valves and expansion vessel, meaning they don’t need a separate tank to maintain water pressure. They do, however, require a hot water storage cylinder.
    Operation. System boilers heat water and then store it in a hot water cylinder, making it ready for when you require it. The built-in components make them relatively easier and quicker to install compared to regular boilers.
    Space. This setup requires less space than a regular boiler because there’s no need for a cold water tank in the loft.
    Efficiency. System boilers are energy-efficient and can provide hot water at multiple taps simultaneously, ideal for homes with more than one bathroom.

    Regular (Conventional) Boiler.

    Components. Regular boilers have fewer components within the unit itself. They require both a hot water cylinder (usually stored in an airing cupboard) and a cold water storage tank, typically located in the loft. Pumps and diverter valves are located externally and need to be designed correctly to prevent circulation problems.
    Operation. Cold water is stored in the loft tank, fed to the boiler, and then heated to supply hot water to the cylinder. This design may be more complex to install but can be better suited to homes with an older heating system that already has a water tank setup.
    Space. Requires more space overall, due to the need for both a cold water storage tank and a hot water cylinder.
    Efficiency. Regular boilers are reliable and can handle large volumes of hot water, ideal for larger homes. However, they may not be as energy-efficient due to heat losses from the cylinder and pipework, which should be fully insulated to improve the efficiency.

    Handy notes. 
    The hot water delivery rate for regular boilers is down to the head of pressure, this means how high up your cold water tank is, as this forces pressure down into the hot water tank. When water is drawn from the taps or shower, this will dictate the hot water flow (this can also depend on pipe diameters). Usually if you require a good power shower then stored hot water can usually supply.

    The KW of system and regular boilers is down to the heating demand. Rule of thumb in the trade is treating each radiator as average 1.5kw, so 10 radiators would need a 15KW boiler! Then add 3kw for water heating. 

    A means of safely removing condensation from the boiler (soak away, drain etc). Condensate is acidic but not really dangerous (as acidic as lemon juice) but it can damage cement etc over time so it should terminate away from property walls.

    External condensate pipework to be insulated with a class 0 insulation and off ground. Condensate pipes can freeze in the winter. Protection using a class 0 insulation (usually black and can be UV protective) prevents the insulation soaking up water and becoming a block of ice! Ideally the manufacturer will state size of condensate pipe to be used, if outside keep off ground and best practice is to terminate indoors. Condensate regulations here.

    Benchmark to be competed by installer. This is in the manufacturer’s supplied service book. It needs to be filled in by the installer showing installers address, contact number, name, and business. It’s a tick box exercise to show the installer has signed off the installation.
    Flues should be at least 300 mm from openings into property (windows, doors etc). This is to stop products of combustion entering the property. A high level flue kit can be used in some circumstances to mitigate distance.
    Flues should be over 2m from ground. If not, then a flue guard is needed to protect from damage.

    Meeting current building regulations.

    Installation Requirements and regulations.

    All combustion appliances must be installed by a competent person
    Flues must be clear of openings to prevent products of combustion entering our dwellings. Below is a basic diagram showing flue clearances. Boiler manufacturer installation instructions will show correct clearances for each specific boiler and flueing arrangements (horizontal, vertical). The regulations sections has more information.
    Here is a link to a some Worcester literature which goes into more depth on flues.

    Flue regulations.

    All combustion appliances must be installed by a competent person
    Flues must be clear of openings to prevent products of combustion entering our dwellings. Below is a basic diagram showing flue clearances. Boiler manufacturer installation instructions will show correct clearances for each specific boiler and flueing arrangements (horizontal, vertical).
    The regulations sections has more information.

  • Trying best to improve to  “C”

    Trying best to improve to “C”

    Improving your EPC rating isn’t just a “box-ticking exercise” it brings real financial, comfort, legal, and long-term benefits.

    Improving your EPC rating isn’t just a “box-ticking exercise” — it brings real financial, comfort, legal, and long-term benefits. It matters because, as we progress through life, our habits, and priorities tend to shift. The carefree 20-year-old who stayed up all night and partied eventually becomes someone more conscious of energy use, the environment, and personal finances. Taking small steps to look after both the planet and our own future becomes part of that natural transition. Its not only landlords and developers who are being targeted to improve energy performance of where we live but it surly come to all of us as regulations tighten.

    Improving an EPC (Energy Performance Certificate) rating usually means reducing heat loss, increasing efficiency of heating systems, and incorporating low-carbon technologies. Here’s a clear, practical list of the most effective ways to improve an EPC rating in UK homes: If you NEED to improve the EPC for rental or other purposes then I would always suggest getting a qualified and experienced DEA or Retrofit assessor to perform a Pre EPC to highlight the improvements (modelling).

    1. Improve Insulation (Biggest, most cost-effective wins)

    Loft insulation.

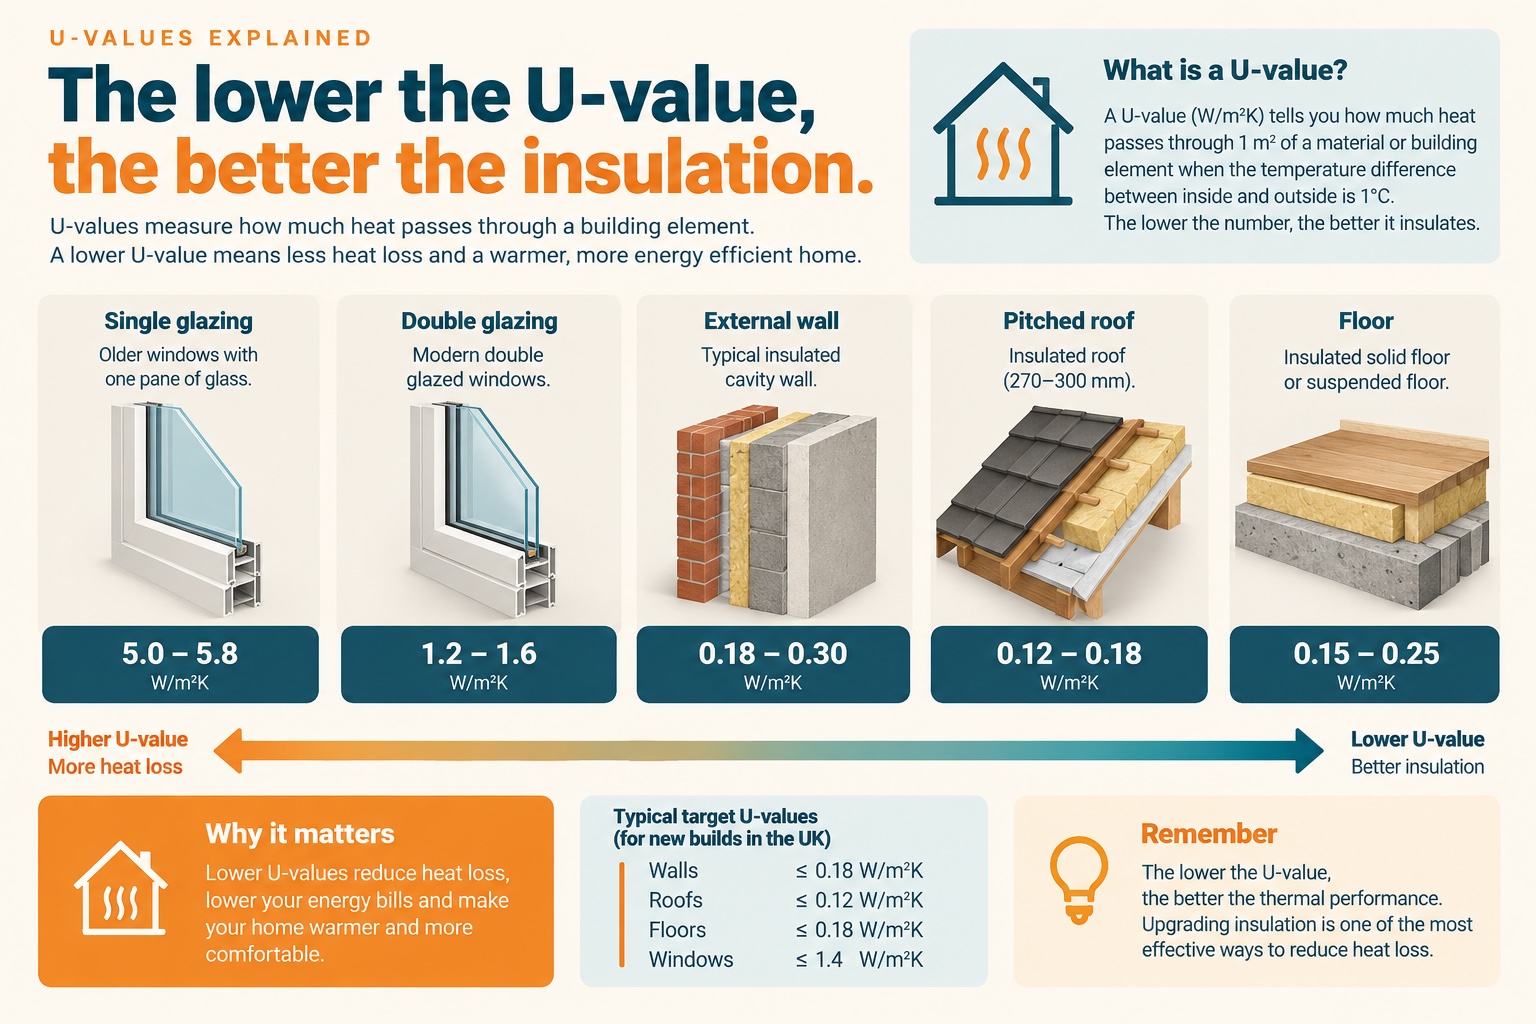
    • Upgrade to 270 mm (or more) thickness.
      Often the cheapest EPC improvement, but may need ventilation improvements within the loft space.

    Cavity wall insulation.

    • Ideal for homes built after 1920s with cavity walls.
    • Reduces heat loss by up to 33%.
      Not all cavity walls are suitable (location, depth of cavity, wall condition)

    Solid wall insulation.

    • External or internal insulation.
    • Large impact, higher cost.
      Strict rules to prevent mould, water ingress, condensation.

    Floor insulation.

    • Can be applied to suspended timber floors and solid floors
    • Reduces draughts and cold spots.
      Sometimes the installation method can be in a very small crawlspace.

    Draught-proofing.

    • Low-cost, fast EPC improvement that can easily be done on a DIY level.

    2. Upgrade Heating Systems.

    Replace the old gas boiler with a modern condensing boiler.

    • Increases efficiency to 90%+.
      This will be getting phased out as the UK moves away from gas boilers. Each elected government always changes the goal posts, so it’s always checking current legislation if replacing a fossil fuel heating source.

    Install a Heat Pump.

    • Air-source or ground-source.
      Both work especially well when combined with good insulation and low-flow radiators or underfloor heating.

    Improve heating controls.

    • Thermostatic radiator valves (TRVs).
    • Smart thermostat.
    • Zoned heating.
    • A very cost-effective EPC improvement.

    3. Improve Hot Water System.

    Swap old hot water cylinder.

    • Modern cylinders have better insulation and can hold the temperature of stored water for longer periods.
    • Replace with a heat battery, which removes standby losses and improves SAP scores (great with heat pumps and Solar)

    4. Replace Windows & Doors.

    Replacing old windows, especially wooden single glazed, to a more modern double/triple glazed unit can improve the EPC and also add value to the property through aesthetics and performance. Double and triple glazing can be very little difference on a EPC.
    You can usually tell the age of your glazing by looking for a date in the double-glazed gap or by the gap its self. Typically, the larger the gap, the newer the glazing.
    A good quality unit will typically have date stamped in the gap!

    5. Add Renewable Energy

    Solar PV.

    • The best way to uplift EPC, will need to be connected to grid for best rating.
    • Batteries can be installed to help store excess energy.
    • Heat batteries can be introduced to the property.

    Solar thermal.

    • Useful but less impactful in SAP than PV.

    6. Upgrade Lighting.

    100% LED lighting.

    • Small improvement, but easy to do.

    7. Improve Ventilation (Without Losing Heat)

    MVHR (Mechanical Ventilation with Heat Recovery)

    • Improves air quality and reduces heating demand.
    • Contributes positively to SAP if airtightness is good.

    Bonus: Measures with EPC Impact.

    • Battery storage (electric + heat battery)
    • Smart immersion diverter for solar.
    • Low-temperature heating distribution system (underfloor)
    • Insulated pipework & cylinder stat improvements.
    • Thermal bridging reductions (e.g., insulated reveals) need to be proven.
  • Why Putting Customers First Shouldn’t Need a new Charter.

    Why Putting Customers First Shouldn’t Need a new Charter.

    Why Putting Customers First Shouldn’t Need a new Charter.

    Consumer protection in the UK is built on clear principles: fair trading, honest communication, and accountability. Trading Standards exist to uphold these rights, stepping in where businesses fail to act responsibly or where consumers are misled, overcharged, or treated unfairly. Their role is vital — but in an ideal world, they shouldn’t need to be involved in most everyday installations.

    Putting the customer first is not optional, it’s fundamental.

    Whether it be government funded or a private job, the care, and quality should be the same.
    Clear advice, realistic expectations, fair pricing, and doing the job properly should be standard practice in any trade, not something that needs reinforcing through updated charters and commitments.

    That’s why it’s slightly disheartening that schemes now require formal customer commitments to spell out what should already be in place. Consumer protection, transparency, and quality should be embedded as default requirements — not corrective measures after poor behaviour has become widespread.

    Ultimately, the goal should be simple:

    If those principles were consistently followed, fewer charters would be needed — and Trading Standards could focus on the truly bad actors, rather than failures of basic professionalism.

    Customer first thinking shouldn’t be a policy. It should be the culture of every business.

  • Coastal Considerations.

    Coastal Considerations.

    Installing an Air-Source Heat Pump (ASHP) near the coast, what to know, rules to follow, and what manufacturers recommend.

    Living by the sea is lovely, but if you’re fond of sand dunes and salty air, you should consider some important guidance on siting a heat pump because chances are that your heat pump isn’t as fond of the salty air as you!. 

    Permitted development rules in England were changed in 2025 and now rely on MCS 020 (and its updates) for many domestic ASHP installs. (mcscertified.com).

    Regulations and planning, the essentials.

    From late May 2025 amendments to permitted development rules made it easier to install ASHPs without planning permission in many domestic cases, but the installation must comply with the Microgeneration Certification Scheme (MCS) planning/install standards (MCS-020 / MCS-020a) and other PD (Permitted Developments) conditions (size limits, noise, locations, etc.). Installers should demonstrate compliance with MCS documentation where PD is claimed. Always check for conservation areas/listed buildings/existing planning conditions which can still require consent. 

    Noise & siting: Latest MCS guidance contains sound-calculation and siting obligations installers will use to show an installation meets PD/no-nuisance rules. Where neighbours are close (typical in coastal terraces), installers often need to demonstrate predicted noise at neighbouring façades is acceptable. 

    What manufacturers say about coastal installations.

    Few manufacturers publish official minimum coastal setback distances, most talk about protecting units from direct sea winds or salt spray, not precise statutory distances. Its up to you to engage with the installer as your warranty could become null and void if the recommended distances are breached.

    Below is a quick snippet to what recommendations are from some manufacturers out there. Please do your own research, but hopefully these guides will help.

    • Mitsubishi (Ecodan) — offers coastal protection variants or finishes on outdoor units designed to reduce corrosion from salt spray. Some coastal models are explicitly designated by a suffix (e.g., “BS”) and are recommended for closer distances to the sea. If you live on an exposed shoreline, ask for a coastal model or treatment. (Mitsubishi)
    • Daikin — installer guidance and Daikin support note that additional treatments are available to protect heat-exchanger surfaces and external components; the UK support/solutions teams can advise on protective options for marine environments. Always follow the installation manual for clearances and service access. (Daikin)
    • Vaillant (aroTHERM) — the installation/operation manual highlights safe siting, condensate discharge (frost-free routing), and service access. The manual includes requirements for frost protection of condensate and clearances for maintenance — important in coastal locations where extra exposure may affect frost/condensate behaviour. (Vaillant Pro)
    • Grant – Newer Models (Aerona³ and Aerona 290): The most recent models are designed to be suitable for installation in coastal areas without any special anti-corrosion treatment required at the time of installation.
    • NIBE — stresses correct system design, insulation and pre-install site assessment; manufacturers commonly advise that coastal sites need more frequent checks and may benefit from coastal finishes or local corrosion protection applied to the heat exchanger and painted surfaces. The warranty statement says upto 1km from coast is classed as coastal.(NIBE)
    • Aftermarket corrosion protection — products like Blygold surface-coatings are commonly used by installers to give added protection to heat-exchangers and fins where manufacturer coastal options are not available or for retrofit protection. Discuss warranties and any effects on heat-transfer with supplier/installer before applying after market coatings. (blygold for example)

    Practical siting, mounting and flood considerations (coastal specifics).

    • Distance and exposure: “Close to the sea” What is this! 1 mile, 2 km, 100 yards?
      Manufacturers often publish guidance/diagrams showing recommended distances for untreated units, if you’re in the spray zone (wind-driven salt), insist on a coastal model or coating.
      Regulations may be in place that manufacturers specify distances from the coast, but If I’m having a heat pump installed, I think i can gauge if I’m near the sea! 

    Elevation for flood zones.

    If the property is at flood risk, raise the outdoor unit above the expected flood level (or base flood elevation). Industry guidance and consumer guides recommend elevating critical outdoor equipment on a secure platform at least above likely flood levels, this reduces risk of mechanical and electrical damage.
    The .GOV website can give you some useful info on potential flooding. (other areas of the UK are linked though the .gov site)

    Maintenance & service recommendations for coastal installations.

      • Just keep an eye on the unit, do not cover and hinder airflow. Ideally, get it serviced yearly, and the engineer should give it a good clean and check areas of potential corrosion.
      • Discuss warranty & service plans: Ask whether coastal exposure requires a different warranty or service plan. Some manufacturers’ standard warranties may exclude damage from excessive salt spray/unusual exposure unless a coastal variant or approved coating is used.

      A homeowner’s checklist (before you book the installation).

      1. Get a site survey from an MCS-certified installer who has experience with coastal sites. They should reference MCS-020 and local PD conditions.
      2. Ask the installer to confirm: Is a coastal model needed? If so, which model/suffix? If not, what protective measures will be used (manufacturer-approved coating, bespoke enclosure, maintenance plan)? Ask for manufacturer confirmation in writing. 
      3. Check flood risk (gov.uk flood maps / local authority). If at risk, include elevation and secure fixings in the design.
      4. Noise & neighbour check: Ask installer to provide predicted noise levels at neighbours and show compliance with PD / local rules (especially important in terraces and holiday areas).
      5. Warranty & coatings: Confirm that any after market coating (e.g., Blygold) is compatible with the unit and does not void warranty — ideally use manufacturer-approved options. 

       Example manufacturers / resources to check.

      • Mitsubishi Ecodan — coastal variants and documentation. (Living Environment Systems)
      • Daikin — UK installer manuals and national solutions support (coating options). (Daikin)
      • Vaillant (aroTHERM) — installation and condensate/frost guidance in manuals. (Vaillant Pro)
      • NIBE — homeowner guidance and advice on site assessment. (NIBE)
      • MCS & Planning Portal — check MCS-020 and local planning portal guidance when claiming permitted development. (mcscertified.com)

      Final notes.

      Coastal installations are more site-sensitive than inland ones. Your best outcomes come from:

      • A detailed site survey,
      • Written confirmation from installer/manufacturer about coastal protection options and warranty effects, and
      • A maintenance plan (including frequency of washing/inspection).
    1. Who is qualified?

      Who is qualified?

      Selecting a trustworthy installer for your heating, insulation, or renewable energy project requires careful research and due diligence.

      Hiring the right professional ensures your home is safe, efficient, and compliant with regulations, and helps protect warranties, insurance, and grant eligibility.

      Reputable installers are often accredited by recognised trade bodies or professional organisations. Accreditation confirms that the installer:

      • Meets industry standards
      • Has undergone proper training
      • Is legally authorised to perform specific types of work

      Check for Accreditation and Qualifications:

      Key UK accreditations to look for include:

      Find a Qualified Retrofit Installer

      Select the work you want carried out on your home. This guide shows the qualifications, certifications and governing bodies a competent installer should hold.

      Being registered with the above does not always mean the work is checked by the certification company, It usually shows competence within the field of current health & safety practices and current regulations. Remember that if you have any work carried out at your property either on a grant scheme or self financed you should be covered by consumer rights.
      The citizen’s advice is always a good place for information.

      Some of the below will help with your journey in finding trades.

      If you feel you are vulnerable.

      Try to get a family member or neighbour to sit in with you when getting quote visits, also maybe designate someone else to deal with the process.

      Ask for Recommendations.

       Seek recommendations from friends, family, or colleagues who have recently had similar work done. Personal recommendations can be invaluable in finding trustworthy installers.

      Read Reviews and Testimonials.

      Check online reviews and testimonials on platforms like Trustpilot, Checkatrade, or Which? Trusted traders and google reviews. These platforms often provide insights into the quality of work and customer satisfaction, But please be aware that not all reviews can be genuine!

      Obtain Multiple Quotes.

       Don’t settle for the first installation company you find. Obtain quotes from multiple companies for comparison. Be wary of quotes that are significantly lower than others, as they may indicate subpar workmanship or the use of inferior materials. If you are applying down a grant funded route, then be weary of being promised the earth or pushed into signing up. Any decent installation company should keep you at ease and answer all your questions honestly.

      Verify Insurance and Guarantees.

      Ensure that the installation company/individual has adequate insurance coverage, including public liability insurance, to protect you and your property in case of accidents or damage. Also, inquire about any guarantees or warranties offered for the work they perform.

      Check for Compliance with Regulations.

      Certain types of work, such as electrical or gas installations, require compliance with specific regulations and safety standards. Verify that the installers you choose are appropriately qualified and registered to carry out such work.

      Communicate Clearly.

      Communicate your expectations clearly, including timelines, budget constraints, and any specific requirements you may have. Reputable installers will be transparent and be responsive to your needs.

      Trust Your Instincts.

      If something feels off during your interactions with installers or if they seem unwilling to provide necessary information or documentation, trust your instincts and consider looking elsewhere.

      Get Everything in Writing.

      Once you’ve decided on an installation company, make sure to get all agreements, including costs, timelines, replacement of fixings (window sills, skirting etc) redecorating and scope of work, in writing. This helps protect both parties and ensures clarity and accountability throughout the project.

      Some questions to ask.

      External Wall Insulation (EWI)

      Preparation and Property Impact.

      External Wall Insulation can significantly change the look and function of your property, so it’s important to understand the process in detail before work begins. Confirm what insulation system will be used, its thickness, and the finish type (e.g. render, brick-slip, or cladding). Ask how the installers will deal with fixtures and features such as satellite dishes, alarm boxes, lights, air vents, overflow pipes, and external taps—these should all be properly removed, extended, and reinstated, not simply covered over.

      Openings and Details.

      Discuss how the system will accommodate windows, doors, and sills, as these may need to be extended or replaced to ensure proper sealing and to prevent water ingress. Check that drip beads, stop beads, and corner trims will be installed neatly and to specification for a high-quality, durable finish.

      Ventilation and Airflow.

      Make sure that ventilation and airbricks are not blocked or removed. Ask how they will be extended through the insulation system to maintain airflow and prevent damp or condensation. Obtain a clear ventilation specification, and ensure the finish matches or complements your property’s appearance.
      For homes with fireplaces or open flues, ask about spillage testing and combustion ventilation to ensure safety and compliance.

      Groundworks and Damp-Proof Course.

      Confirm that the insulation will finish above the damp-proof course (DPC) and that appropriate base trims and drainage channels will be installed. The system should not bridge the DPC unless designed to do so, as this can lead to moisture problems. Ensure that any existing damp or drainage issues—including blocked gutters or damaged downpipes—are addressed before insulation begins.

      Aesthetics and Boundaries.

      If your home is part of a terrace, semi-detached, or adjoins another property, ask how the system will terminate at party walls, fences, or neighbouring structures. Ensure that detailing will be neat and watertight.
      For listed buildings or properties in conservation areas, confirm that planning permission or building consent is in place. Regulations change so what may of been permitted last year may not be now, and visa versa!.

      Safety and Compliance.

      For homes with chimneys, fireplaces, or combustion appliances, ask about spillage tests and combustion ventilation to ensure safety after the installation.

      Documentation and Clean-Up.

      Request written details of all materials, fixings, and finishes, including manufacturer names and warranty information. Confirm that all waste and debris will be removed and agree on a timeline for completion and clean-up.

      Finally, ensure you have full contact information for everyone involved in the project, including the installation team, project or site manager, and—if installed through a UK grant scheme, the Retrofit Coordinator responsible for oversight and compliance.

      Internal Wall Insulation (IWI) and Room-in-Roof Considerations.

      Disruption and Reinstatement.

      Internal Wall Insulation can be highly disruptive, often requiring the removal of features such as skirting boards, window sills, coving, door frames, electrical sockets, light fittings, and radiators. Confirm that your installer will reinstate all removed items and specify whether they will be restored or replaced. Ensure that qualified tradespeople—such as joiners for woodwork and plumbers for wet work—will carry out these tasks, and get this commitment in writing.

      System and Detailing.

      Ask which insulation system will be used and how the installer plans to treat complex areas such as coving, cupboards, or meter locations. For room-in-roof spaces, confirm that any loft or eaves hatches will be properly insulated and professionally fitted, not simply boarded over. If you use roof storage, ensure this area remains accessible and structurally suitable for use once insulated.

      Check that all electrical, alarm, TV, satellite, and internet cables will be correctly routed through the insulation and fully reinstated afterwards.

      Ventilation and Safety.

      A ventilation system should be installed as part of the works. Obtain a detailed specification to confirm it meets high standards of performance and finish. For homes with fireplaces or open flues, ask about spillage testing and combustion ventilation to ensure safety and compliance.

      Pre-Installation Checks and Documentation.

      Before work begins, inspect the external walls, damp-proof course, gutters, and downpipes. Any existing issues must be identified and either rectified by the installer or formally agreed with you in writing, as they can compromise insulation performance and cause long-term problems.

      Finally, confirm that all debris will be cleared and agree on a timeline for completion and cleanup. Request full contact details for everyone involved, including the office manager, installation team (noting if subcontractors are used), and—if the work is part of a UK grant scheme—the Retrofit Coordinator overseeing the project.

      Cavity Wall Insulation considerations.

      Scope and Drilling.

      Confirm that all suitable wall areas will be insulated, which may involve internal drilling. Discuss in advance where drilling will occur and what materials will be used to fill and finish the holes afterwards to ensure a neat appearance.

      Garages and External Finishes.

      For attached but unheated garages, talk through insulation options—particularly if shelving, cupboards, or other fixtures will need to be removed or adjusted. When drilling into external walls, ask what colour of mortar will be used to fill the holes, especially on rendered or painted surfaces. Confirm whether installers will repaint or touch up the finish to match the existing façade.

      Material and Clean-Up.

      Find out exactly which insulation material is being used and take the time to research its properties and suitability for your home. Clarify whether the installation team will be responsible for cleaning up spills, dust, or debris, and have this commitment documented in writing. If you have outdoor features such as ponds or livestock areas, inform the installers so they can take precautions against overspill.

      Ventilation and Safety.

      If new ventilation is required, request a clear specification and ensure all installations are completed to a high standard of finish. For homes with fireplaces or open flues, ask about spillage tests and combustion ventilation to maintain safety and compliance.

      Pre-Installation Checks and Aftercare.

      Inspect external walls, damp-proof courses, gutters, and downpipes before work begins. Any existing damp or drainage issues must be resolved first, as they can undermine the effectiveness of the insulation and lead to long-term problems. Finally, confirm that all debris will be removed and agree on a clear timeline for completion and cleanup—especially important for removal and refill projects.

      Underfloor Insulation (UFI) considerations.

      Materials and Installation.

      It can be challenging to assess conditions beneath the floor unless you have a basement. Confirm the type, thickness, and support method of insulation being installed, and ensure all accessible areas will be covered. If floorboards need to be lifted, be aware this can cause damage—ask whether replacements will match the original boards to maintain appearance and consistency. Take pre-installation photographs for reference.

      Cross Ventilation.

      Adequate underfloor ventilation is essential. Make sure any existing vents or decorative grilles are retained or replaced with alternatives that are both functional and visually appropriate. Request written confirmation of how cross-flow ventilation will be maintained or improved, including details of the units being installed. The system should allow sufficient airflow to prevent moisture buildup and stop water ingress.

      Basement Insulation.

      If a basement is being insulated, ask about fire safety compliance and verify that all work adheres to current building regulations. It’s worth doing your own research for added assurance.

      Ventilation and Safety.

      If a ventilation system is included, obtain a detailed specification and confirm it will be installed to a high standard. For properties with fireplaces, request information on spillage tests and combustion ventilation to ensure safety and compliance.

      Pre-Installation Checks and Cleanup.

      Inspect external walls, damp-proof courses, subfloor ventilation, and rainwater systems (gutters, downpipes, etc.) before work begins. Any existing damp or drainage issues must be resolved first, as they could compromise the insulation and cause long-term damage. Finally, confirm that all debris and waste materials will be removed and agree on a clear timeline for completion and cleanup.

      Loft Insulation (LI)considerations.

      Materials and Impact.

      Ask which insulation materials will be used—such as spray foam, mineral wool, or PIR boards—and make sure you understand their limitations and how they may affect your property’s insurance or mortgage eligibility.

      Access and Storage.

      Discuss how the installation will impact access to essential services in the loft, such as boilers or solar inverters, and whether storage areas will still be usable or need adjustment.

      Electrical Safety.

      If you have recessed down lights, these must be properly protected to prevent air leakage and potential overheating. Suitable covers or fire-rated caps should be used. For electric showers or other circuits with cables running through the loft, ensure proof is provided that the cables are not buried within insulation, as this can cause overheating.

      Pipework and Loft Hatches.

      All exposed water pipes should be fully insulated. The loft hatch should also be insulated and drought-proofed to a professional standard—avoid makeshift solutions like loosely stapled insulation.

      Ventilation and Timber Protection.

      Adequate airflow in the loft is essential to prevent condensation and protect the roof timbers. Confirm that ventilation will be maintained or improved as part of the work.

      Whole-Home Ventilation and Safety.

      If a new ventilation system is being installed, request a clear specification to ensure it meets high-quality standards and finishes. For homes with open fireplaces, ask about spillage tests and combustion ventilation to ensure safety and compliance.

      Gas Boiler considerations.

      Gas Supply.

      Most combination boilers need a larger gas supply pipe than older systems, often requiring an upgrade from the meter. Before installation, confirm the planned gas pipe route to avoid unnecessary external runs if an internal route is possible. If the pipe must run outside, ensure it’s properly clipped and installed in line with regulations.

      Heating Controls.

      Discuss your heating controls and where the thermostat will be located. It should be positioned in a room without a thermostatic radiator valve (TRV) or any secondary heat source such as a fire or cooker, to ensure accurate temperature readings.

      Condensate Drainage.

      All condensing boilers produce condensate that must be drained safely. Ideally, this drainage point should be located indoors. If the condensate pipe must run externally, it needs to be insulated with Class 0 lagging. Confirm the type of insulation being used and how it will be secured and supported.

      System Clean and Preparation.

      Ensure all debris will be removed during installation and clarify when this will happen. Most boiler manufacturers require a full system flush before fitting the new unit—this is essential. Make sure the installer carries it out, and ideally, observe the process. The correct use of cleaning and inhibitor chemicals is vital for system health, and their use should be recorded in the Benchmark log (the boiler’s installation and service record). Ask for a copy for your files.

      Warranty and Guarantees.

      Confirm both the manufacturer’s warranty and the installer’s guarantee, particularly regarding leaks and workmanship. Once the boiler is installed, it’s a good idea to call the manufacturer directly after a few weeks to confirm that your warranty is fully registered and active.

      Solar PV (SPV) Considerations.

      Panel Direction.

      You may already know the direction your property faces, but installers might suggest positioning the panels differently. This could be due to access issues, roof condition, or other practical constraints. However, the optimum orientation delivers the best performance, so make sure your installer prioritises efficiency over convenience.

      Inverter Location.

      The inverter should be installed somewhere easy to access for inspection, servicing, and maintenance, while also being protected from the elements. Some models are suitable for outdoor installation, provided they’re shielded from direct sunlight and rain. If you live near the coast, ask about corrosion resistance and whether additional protection is needed.

      Monitoring Meter.

      The generation meter (monitoring meter)  should be positioned where it can be easily read and checked regularly. Make sure it’s visible enough to monitor energy production and detect early signs of faults (for example, if it isn’t blinking in daylight). Some installers may say it has to go in loft if inverter is also installed there, but dont allow, have it somewhere you can read and check.

      Paperwork and Certification.

      Confirm the expected timescales for all necessary documentation, including MCS certification, DNO approval, and any paperwork your energy supplier may require.

      Warranties and Guarantees.

      Clarify the warranty terms and guarantee lengths for all equipment. Make sure you know who to contact in case of faults or system failure.

      Get Everything in Writing.

      Once you’ve decided on a installation company, make sure to get all agreements, including costs, timelines, and scope of works, in writing. This helps protect both parties and ensures clarity and accountability throughout the project.

      Air source Heat Pumps. (ASHP)

      System Type and Design.

      Ask your installer to explain which make, model  of heat pump is being fitted and why it’s suitable for your property. Confirm that the system has been properly sized for your home, an undersized or oversized unit can reduce efficiency and increase running costs. Request a full design calculation (MCS or equivalent) showing heat loss per room, flow temperatures, and emitter sizing. Ask what refrigirant is used within the pump (R32, R290 etc). Ask about hybrid systems to help in the winter months.

      Outdoor Unit Location.

      The external unit should be positioned where airflow is unrestricted, but noise and vibration will not affect you or neighbours. It must sit on a stable, level base (often a concrete pad with anti-vibration plinth) and be clear of obstructions such as fences or foliage. If located near boundaries, confirm it meets local noise regulations and planning guidance. It should meet manufactures clearances for optimum airflow. For coastal or exposed locations, ask about corrosion-resistant finishes and protective coatings. (if within 2000m from the coast this is a must)

      Internal Components.

      Confirm where the indoor cylinder, buffer tank, and controls will be located. These should be easily accessible for servicing and maintenance, with pipework neatly installed and insulated. Discuss how existing systems—such as radiators or underfloor heating will be adapted or replaced, and ensure the flow and return pipe sizes are appropriate for the new system.

      Condensate and Drainage.

      Heat pumps produce condensate water, particularly in colder weather. This must be drained safely away from the base unit, ideally into a proper soakaway or drain. The pipework must not freeze, so confirm that suitable insulation and gradients are in place. The condensate produced is not the same a a combustion boiler so it is not acidic.

      Electrical and Controls.

      Ensure the electrical supply is adequate and compliant with regulations, with a dedicated isolator switch. Ask about the control system whether it will use smart thermostats, weather compensation, or load compensation and how to use these features for maximum efficiency.

      Groundworks and Protection.

      If installing a ground source heat pump, confirm the ground loop layout (horizontal trenches or boreholes), and request documentation of where pipes are buried for future reference. For air source units, confirm that rainwater runoff from roofs won’t drip onto the unit and that the area around the base remains well-drained and clear of standing water.

      Warranties, Maintenance, and Support.

      Ask for details of warranties and service agreements for both the equipment and installation. Heat pumps require annual servicing to maintain performance and warranty validity, so ensure you receive a maintenance schedule and the installer’s or manufacturer’s contact details.

      Paperwork and Certification.

      Ensure you receive all necessary documentation, including MCS certificates, DNO notifications, and user manuals. These are essential for warranty registration, grant schemes (such as the Boiler Upgrade Scheme), and resale value.

      Cleanup and Completion.

      Confirm that all debris and packaging will be removed and agree on a clear completion timeline. Obtain written contact details for the installation company, lead installer, and if installed through a UK grant scheme the Retrofit Coordinator responsible for the project.

    2. Awaab’s Law

      Awaab’s Law

      Awaab’s Law: What Social Housing Tenants & Landlords Need to Know (And Why It Matters for Damp, Mould & Energy Efficiency)

      From October 2025, a major new rule comes into force for social housing in England: Awaab’s Law.
      It’s one of the biggest changes to tenant safety and housing quality in years, and it was introduced after the tragic death of two year old Awaab Ishak, who died in 2020 from prolonged exposure to mould in his home.

      This Law is designed to make sure this never happens again.

      In this post, we cover what the new law means, how it affects landlords, what tenants can expect, and why it directly links to issues we discuss regularly.

      What Is Awaab’s Law?

      Awaab’s Law is a legal requirement for social landlords (housing associations and councils) to respond quickly when tenants report damp, mould, or other serious hazards. It Should be rolled out to private landlords in the near future.

      It introduces strict, legally enforceable timeframes for.

      • Investigating reported hazards,
      • Making the property safe,
      • Providing written updates to tenants,
      • Offering alternative accommodation if necessary,

      For decades, damp and mould issues were too often dismissed as “lifestyle problems”.
      Awaab’s Law formally ends that.

      The Key issues social Landlords Must adhere to are.

      1. Damp & Mould Hazards.

      2. Emergency Hazards.

      These key issues will be automatically written into all social housing tenancy agreements.
      If a landlord doesn’t comply, tenants can take legal action or escalate complaints to the Housing Ombudsman.

      Why Awaab’s Law Matters for Energy-Efficiency & Retrofit.

      • condensation
      • ventilation problems
      • cold bridging
      • poor insulation
      • underheating
      • moisture build-up

      Awaab’s Law is a game-changer because damp and mould aren’t just health hazards, they’re signs of a home that isn’t performing properly.

      Damp & mould most commonly occur when:

      • insulation is poor.
      • ventilation is inadequate.
      • heating is inconsistent or too expensive.
      • building fabric is damaged.
      • retrofit work was done badly.
      • extractor fans don’t work.
      • air can’t escape after insulation works.

      Better insulation + better ventilation = fewer mould cases.

      Awaab’s Law may push more landlords to:

      • upgrade ventilation systems to meet households needs.
      • improve insulation correctly and professionally
      • fix construction defects timely.
      • install appropriate heating that can hopefully be afforded by tenants.
      • ensure post-retrofit checks are done correctly by qualified personnel.

      Healthy homes are energy-efficient homes and vice-versa.

      What Tenants Should Do If They Spot Damp or Mould.

      If you live in social housing (council or housing association), you have new legal protection.

      You should:

      1. Report the issue formally. (email is best)
      2. Include photos and dates. (try to use a GPS camera, lots of free ones on online)
      3. Keep copies of everything.
      4. Allow the landlord access for inspections. (a good landlord will always have your best interest at heart, so try to oblige when they request access)

      If they don’t meet the Awaab’s Law time frames, you can escalate:

      Social landlords must now:

      • Have a damp & mould action plan.
      • Update repairs procedures
      • Train staff on moisture, ventilation, and building fabric
      • Monitor high-risk properties.
      • Keep written communication with tenants.
      • Ensure compliance with the new timeframes.

      This law requires a shift from “reactive repairs” to proactive housing management.

      The law is going to change and will add phases over the years, including,

      Phase 2 (2026–2027)

      Will likely expand to include:

      • Managing excess heat and cold.
      • Identification of electrical/fire risks.
      • Identification of structural problems.
      • Identification of hygiene hazards.

      This will raise the baseline standard for social housing significantly.

      Whether you’re a tenant, a homeowner, or researching Warmhomes/BUS/solar/insulation upgrades, the message is the same:

      Awaab’s Law highlights that:

      • Ventilation is essential
      • Insulation must be done properly
      • Properties need regular inspection
      • Moisture can’t be ignored
      • Housing quality is a health issue

    3. Gas Regulations.

      Gas Regulations.

      Boiler regulations are there to protect more than just the gas supply.

      If a funded standalone boiler installation is being installed and is not part of a funded government backed scheme , then this may not fall under the current PAS and will only need to follow gas safe and manufacturers instructions, unless a package that includes insulation has been developed as part of a funded scheme, this may change due to future legislation.

      Installation Requirements and regulations.

      Since 15 June 2022, fitting a magnetic filter is mandatory in the UK when replacing a boiler or installing a new central heating system. This requirement falls under Building Regulations Part L (Conservation of fuel and power) and complies with the BS 7593:2019 code of practice
      While there is no specific UK building regulation that mandates a shock arrestor simply because a boiler is close to a water meter, it is frequently required to meet Water Supply (Water Fittings) Regulations regarding pressure, and it is a strict requirement by most boiler manufacturers (MI – Manufacturer Instructions) to protect against damage.
      The homeowner should provide measures as a minimum for their own safety and so that gas engineers can work in a safe environment. There should be a permanent means of safe access to the appliance. For example, this could be a permanently fixed retractable ladder to enter and exit the loft, with a safety guard around the loft access, which should be secured to the building’s fabric. The strength and design of the ladder should be such as to maintain safety. There should also be adequate fixed lighting.
      Section 5 (specifically paragraph 5.20) of the Approved Document L, Volume 1: Dwellings, 2021 edition (incorporating 2023 amendments.
      The Gas Safety (Installation and Use) Regulations 1998 (GSIUR), specifically regarding safe installation and discharge. These must also comply with the Pressure Systems Safety Regulations 2000 (PSSR)
      Condensate pipework is primarily regulated by BS 6798:2014 (Specification for installation and maintenance of gas-fired boilers), alongside UK Building Regulations and manufacturer instructions.
      The primary regulation for boiler programmers in the UK is Part L of the Building Regulations (Conservation of fuel and power), which was significantly updated in 2018 (Boiler Plus) and again in 2022 to improve energy efficiency
      Boiler interlock, which ensures the boiler and pump turn off when there is no demand for heating or hot water, is required under Part L of the Building Regulations in England and Wales, specifically enforced through the Boiler Plus standards introduced in April 2018. It is mandatory for all new gas and oil boiler installations in existing homes to have this control functionality to improve energy efficiency.
      Boiler pipework insulation in the UK is governed by Building Regulations Approved Document L (Conservation of Fuel and Power), specifically requiring compliance with BS 5422:2023. All primary circulation pipes for heating and hot water, including those in voids, must be insulated to reduce energy loss.
      Gas boiler installation is governed primarily by the Gas Safety (Installation and Use) Regulations 1998 (GSIUR), which legally mandate that only a Gas Safe registered engineer can install, repair, or maintain gas appliances.
      Flues in voids must allow for inspection along their entire length to comply with the Gas Safety (Installation and Use) Regulations 1998 (GSIUR 26(9)) and Technical Bulletin 008.
      Boiler condensate removal is primarily regulated by BS 6798:2014 (Specification for installation of gas-fired boilers) in the UK, which dictates that condensate must be discharged to an internal foul water system to prevent freezing. If external termination is required, pipes must be at least 30mm diameter and insulated.
      While the “Benchmark Scheme” itself is an industry-led code of practice, it is recognized by the government as a means of demonstrating compliance with mandatory Building Regulations. Unfilled benchmarks can void warranty and class the installation as Uncommissioned and unsafe.
      Gas flue regulations in the UK (Building Regulations Approved Document J, BS 5440) require terminals to be at least 300mm–600mm away from doors/windows and 2m below roof levels to prevent exhaust reentry. Concealed flues in voids must have inspection hatches for safety checks
    4. Heat Pumps

      Heat Pumps

      Installing Air Source Heat Pumps. Homeowners Guide.

      Installation Guide.

      The manufacturer’s instructions will highlight any regulations that are required. Currently, all electrical regulations need to be followed and documented, as is the set out by MCS if installed on a government funded scheme. Requirements are that properties are well insulated prior to the installation (fabric first approach) and full heat loss calculations are carried out to provide information to install the system to best practice.

      Installing a Heat Pump to Best Practice.

      A well-installed heat pump should run efficiently, quietly, and comfortably for many years. Good design, careful installation, and proper commissioning are just as important as the heat pump itself.

      1. Plan and Assess the Property.

      Before installation begins, the home should be properly assessed to make sure the system is suitable and correctly sized.

      Key checks:

      • Carry out a full heat loss calculation.
      • Assess insulation levels and airtightness.
      • Check radiator sizes and suitability.
      • Consider hot water demand.
      • Identify the best location for indoor and outdoor units.
      • Ensure adequate electrical supply capacity.

      Why it matters:

      2. Install the Outdoor Unit Correctly.

      The outdoor unit needs good airflow, stable mounting, and careful positioning.

      Best practice:

      • Install on a solid, level base.
      • Allow sufficient clearance around the unit.
      • Avoid enclosed spaces or restricted airflow.
      • Minimise vibration and noise transmission.
      • Position away from bedroom windows where possible.
      • Ensure easy servicing access.
      • All pipework to be fully insulated with a UV protection class of insulation.

      Why it matters:

      3. Install Indoor Components with Care.

      Pipework and internal components should be installed neatly and efficiently.

      Best practice:

      • Keep pipe runs as short as possible.
      • Insulate all heating pipework properly.
      • Avoid unnecessary bends and fittings.
      • Install quality valves and controls.
      • Ensure condensate drainage is correct.
      • Mount components securely and accessibly.

      Why it matters:

      4. Integrate Properly with the Heating System.

      The heat pump should work smoothly with the home’s emitters and controls.

      Best practice:

      • Balance radiator and underfloor circuits.
      • Set correct flow rates.
      • Remove air from the system thoroughly.
      • Use hydraulic separation or buffers only when needed.
      • Configure weather compensation correctly.
      • Optimise flow temperatures for efficiency.

      Why it matters:

      5. Commission the System Thoroughly.

      Commissioning ensures the heat pump operates as designed.

      Key commissioning checks:

      • Verify flow and return temperatures
      • Check refrigerant and system pressures
      • Test pumps, valves, and sensors
      • Confirm weather compensation settings
      • Check defrost operation
      • Measure system performance
      • Record all commissioning data

      Why it matters:

      6. Handover and Aftercare

      Homeowners should understand how the system works and how to run it efficiently.

      Best practice:

      • Explain controls clearly.
      • Advise against frequent on/off adjustments.
      • Provide user manuals and documentation.
      • Register warranties.
      • Discuss servicing requirements.
      • Offer ongoing support if needed.

      Why it matters:

      Best Practice Checklist.

      • Correct heat loss calculation.
      • Properly sized heat pump.
      • Good airflow around outdoor unit.
      • Well-insulated pipework.
      • Balanced heating system.
      • Weather compensation enabled.
      • Low flow temperatures configured.
      • Full commissioning completed.
      • Homeowner guidance provided.
      • Regular servicing planned.
      • All warranties and registration complete.

      The Benefits of Best Practice Installation.

      When installed properly, a heat pump can provide:

      • Lower running costs
      • Better comfort
      • Stable indoor temperatures
      • Quiet operation
      • Improved efficiency
      • Longer system lifespan
      • Reduced maintenance issues
      • Lower carbon emissions

      If hot water is being heated in storage tanks by the heat pump then steps need to be taken to protect from legionella. Stored hot water systems connected to heat pumps have cycles to heat the water at given times and a given temperature to stop the growth of Legionella bacteria.

      Electrical certificates.

      The two types of electrical certificates you will come across as a customer who is having any electrical work as part of installing EEM’s (energy efficient measures)

      • Electrical Installation.
      • Minor Works Certificate.

      Electrical Installation Certificate.

      An electrical installation certificate is the type of certificate a customer receives after an electrician has installed one or more new circuits. Other examples include a complete rewire, a replacement consumer unit or an additional consumer unit. Generally, any time electrical work is done at the consumer unit, a new installation certificate will be issued.

      Minor Works Certificate.

      A minor works certificate is issued after an electrician has made an alteration to an existing circuit. Minor works certificates are often used to certify work such as adding additional sockets to an existing circuit or increasing the number of light fittings in a room. It can also be where a fused spur has been installed for an appliance or boiler connection.

      Final Thought.

    5. Homeowners guide to heat pumps.

      Homeowners guide to heat pumps.

      Homeowner Guide: Understanding and Running Your Heat Pump.

      This guide is for homeowners who are considering a heat pump or who already have one installed. It explains how heat pumps work, how to run them correctly, and what good installation practice looks like.

      Whether your system is air source, ground source, or water source, the principles are the same. The only difference is where the heat comes from and how it’s delivered into our homes.

      One System, Different Heat Sources

      • Air source: collects heat from outside air.
      • Ground source: collects heat from the ground via buried pipes.
      • Water source: collects heat from rivers, lakes, or groundwater.
      • Heat is upgraded using electricity.
      • Heat is delivered to radiators, underfloor heating, blower unit or to heat water.
      • The system runs slowly and efficiently.

      How a Heat Pump Should Be Run.

      Best practice.

      • Leave the system running continuously during cold weather.
      • Use lower flow temperatures than a boiler.
      • Avoid frequent on/off cycling.
      • Let the controls do the work.

      If your home feels warm, but the radiators are only warm to the touch, that’s normal and correct.

      1. Run Low and Steady.

      A heat pump works best when it runs continuously at a low output rather than blasting heat in short bursts. Unlike traditional boilers, heat pumps are designed to maintain a stable indoor temperature over time. Steady operation improves comfort, reduces energy use, and puts less strain on the system.

      2. Avoid Constant On/Off Cycling.

      Frequent stopping and starting reduces efficiency and increases wear on components. A well-designed heat pump should modulate its output to match the home’s heat loss instead of repeatedly switching on and off. Longer run times at lower power are healthier for the system and cheaper to run.

      3. Lower Flow Temperatures Improve Efficiency.

      Heat pumps become more efficient at lower flow temperatures. Running your system at 35–45°C instead of “high boiler” style temperatures allows the heat pump to operate at its best performance. Larger radiators or underfloor heating help deliver comfortable warmth even at these lower temperatures.

      4. Let the Controls Do the Work.

      Smart controls and weather compensation are key to efficient heat pump operation. The system should automatically adjust its output based on outdoor conditions and the home’s heating demand. Constantly turning thermostats up and down can actually reduce efficiency and comfort.

      5. Comfort Comes from Consistency.

      A properly designed heat pump system delivers an even, gentle warmth throughout the home. Instead of dramatic temperature swings, you get stable comfort, lower running costs, quieter operation, and a system that lasts longer. The goal is not fast heat, it’s efficient, balanced comfort all day long.

      Heating Curve (Flow Temperature Settings)

      The heating curve controls how hot the water is that flows to your heating system, based on outdoor temperature. You will find your heating curve on the heat pump control panel or external monitoring devices if installed. Always discuss with installers and ask to be shown how to use/control.

      Typical Curve.
      • Colder outside = slightly hotter water
      • Milder outside = cooler water

      Why this matters.

      • Lower temperatures = higher efficiency
      • Higher temperatures = higher running costs

      A well-set heating curve.

      • Keeps rooms comfortable
      • Avoids overheating
      • Maximises efficiency

      This is usually set during commissioning and may need fine-tuning once you’ve lived with the system.

      Weather Compensation

      Weather compensation is what allows a heat pump to think ahead. An outdoor sensor monitors temperature and automatically adjusts the heating curve.

      Most modern air source heat pumps come with built-in sensors on the outdoor unit to monitor ambient temperature for efficient operation, such as managing defrost cycles. While these built-in sensors measure conditions at the unit, they are often affected by the machine’s own heat, making external, wall-mounted sensors more accurate for weather compensation. 

      • More stable indoor temperatures
      • No sudden hot or cold swings
      • Better comfort and lower running costs

      What this means in practice.

      On a cold day (around –5°C), the system might send water out at ~45°C.

      On a mild day (around 15°C), it may only need ~25°C.

      The system adjusts continuously, not in jumps.

      Outdoor Unit Location (Avoiding Recirculation)

      For air source heat pumps, correct positioning is critical.

      The unit must.

      • Have clear airflow in front and behind.
      • Be away from walls, corners, or enclosed spaces.
      • Avoid recycling its cold exhaust air.

      Poor positioning can cause recirculation, where cold air is pulled back into the unit, reducing performance and increasing noise and running costs.

      Pipework: Type and Lagging

      Heat pump pipework should be.

      • Correctly sized for low-temperature heating.
      • Designed to minimise pressure loss.
      • Installed with gentle bends, not tight elbows.

      Pipe Lagging (Insulation)

      External pipework must be.

      • Fully insulated end-to-end.
      • UV-resistant.
      • Weatherproof and sealed at joints.
      • Fully sealed as it basses through property.

      Poor or missing lagging leads to.

      • Heat loss.
      • Freezing risk.
      • Reduced system efficiency.

      Shut-Off Valves (Isolation Valves).

      Isolation valves are essential for maintenance and safety.

      You should have:

      • Valves on flow and return pipes.
      • Valves near the heat pump.
      • Valves near key components (buffer, cylinder).

      These allow:

      • Easier servicing.
      • Fault isolation.
      • Reduced disruption if work is needed.

      Missing or inaccessible valves are a common quality issue.

      MCS Standards , What Homeowners Should Expect.

      In the UK, heat pumps installed under grants (BUS, ECO4) must meet MCS standards.

      This includes:

      • Proper system design and heat loss calculations.
      • Correct heat pump sizing.
      • Suitable radiator or underfloor heating upgrades.
      • Weather compensation enabled.
      • Commissioning and handover documentation.

      You should receive:

      • MCS certificate
      • User controls explanation
      • System settings at handover

      Microgeneration Certification Scheme (MCS) is a UK-based “stamp of approval” for small-scale renewable energy technology. It acts as a quality mark, confirming that products (like solar panels or heat pumps) and installers meet strict standards for safety, performance, and reliability. The MCS stamp is certifying the installers, just like Gas Safe would certify a gas engineer.

      The Big Picture

      Heat pumps are not just a new appliance, they are a different way of heating a home.

      They work best when:

      • Insulation is good
      • Ventilation is considered
      • Controls are understood
      • The system is allowed to run steadily

      Once set up properly, all heat pumps, air, ground, or water deliver the same result:

      Efficient, low-carbon, comfortable heating for modern homes.

    6. MPAN and DNO.

      MPAN and DNO.

      Meters need to be equipped with a unique reference to allow the collection of bills.

      MPAN (Meter Point Administration Number) sometimes called an “Electricity Supply Number” is a unique 12-digit number that identifies the specific electricity supply point for a property in the UK. It’s used by electricity suppliers and network operators to ensure energy is correctly tracked and billed.

      DNO (Distribution Network operator)
      Is a company that owns and manages the local infrastructurelike power lines, underground cables, and substations that deliver electricity to homes and businesses. Unlike your energy supplier, which sends your bill, the DNO is responsible for maintaining the physical network, fixing power outages, and handling new connections.

      What an MPAN number does.

      It tells energy companies exactly where electricity is delivered, similar to an address for your power connection.
      It will appear on your electricity bill and will usually be found in a box labelled “MPAN” or “Supply Number,” typically in the bottom section of your bill.
      This number is issued by your local Distribution Network Operator (DNO)
      Each DNO manages supply points in its region.

      What is a DNO?

      Across the UK, the electricity network is separated into individual regional areas, with each regional electricity grid controlled by the local Distribution Network Operator (DNO). Each regional grid is connected to the main National Grid.
      Within their respective areas, each DNO controls and operates substations that transmit electrical power to all users, including homes and businesses. When we generate power through solar, or we are taking from the network with the likes of heat pumps, the DNO needs to make sure we are not sucking too much power or pushing too much power back down the power lines.

      Who are the UK’s DNOs?

      Energy Networks Association, highlights how the UK’s electricity network is divided. The seven DNOs are as follows: