Author: AndyL

  • Pas 2030/35

    Pas 2030/35

    Pas 2030 and 2035 Basics.

    PAS 2030/2019 here. Pas 2035/2023 here.

    A Publicly Available Specification (PAS) is a document that defines good practice standards for a product, service, or process. PAS 2035/2030 are linked frameworks that outline best practices for retrofitting homes in the UK to enhance energy efficiency. While PAS 2030 focuses on the quality of the installation processes, PAS 2035 ensures that the retrofit is appropriate for the building as a whole. Current PAS documents can be downloaded here. It’s a crucial component of the UK government’s strategy to boost building efficiency and reduce carbon emissions. Adopting a “whole house” approach, PAS 2035 considers the home’s environment, occupancy, and the homeowner’s objectives, ensuring that retrofit projects address key aspects such as insulation, ventilation, occupancy, and building fabric to support long-term sustainability. Although not a regulation, PAS 2035 is a publicly available specification (PAS), developed to address shortcomings of previous schemes following the Each Home Counts Review.

    PAS 2035 compliance is mandatory for all publicly funded projects, including those supported by the Energy Company Obligation (ECO), and Warm Home Fund. We also have a route called licence plus which is run by Trustmark which does not need coordination as part of its process!. This is mainly aimed at self funding retrofit but using installers that are roughly following the current PAS process. Whichever mechanism is to be used, the property occupier should request details of which route the process follows pre-install.

    PAS 2035 has its strengths, but also notable limitations. If everyone in the supply chain, assessors, coordinators, designers, and installers adheres strictly to the process, the framework should work effectively.
    However, lapses in monitoring and inspection can lead to issues. Unfortunately, “technical monitoring” for most UK schemes is minimal, and no longer performed by Ofgem, meaning that failings can go unnoticed, leaving property occupiers unaware of potential problems. Hopefully this will change with future consultations. 

    The retrofit process involves a range of participants, including canvassers, lead generators, social marketeers, assessors, designers, coordinators, installers, and a limited number of technical monitoring agents. This complexity, along with regulations, updates to rules and red tape, can create confusion and drive up costs.

    The standard will transition from PAS 2035:2019 to PAS 2035:2023 in March 2025.

    Protecting the Property Occupier?

    PAS 2035 outlines several requirements for both pre- and post-installation stages. One of its most valuable aspects is the involvement of a retrofit coordinator throughout the process. The coordinator’s primary role is to safeguard the interests of the property and its occupants, ensuring the retrofit is carried out effectively and sustainably.
    In an ideal scenario, the retrofit coordinator would operate independently, free from any conflicts of interest. However, this level of impartiality is often difficult to achieve in practice. 

    By understanding the processes outlined below, you’ll hopefully gain the knowledge needed to ask informed questions and engage with some confidence at various stages of your retrofit journey.

    Successful retrofit process.

    Social housing and councils may have their own ways of engagement, with separate routes for ECO funding.
    Within this sector, retrofit is usually done en-mass and with consultation with tenants and housing officers. The below is assuming you are not a social housing or council tenant, but the PAS should still be followed within these organisations to protect the property and the occupiers.

    It will all start with a knock on the door, a social media campaign, a referral, or housing provider intervention (landlord). You may be offered funded insulation or heating upgrades, sometimes windows and doors. You may fill a form in from an advertised link you have followed, or you may enquire to see if you qualify from a canvasser. 

    This information is typically passed on to the installation companies (lead generation) or the installation companies are involved in the marketing campaign directly.

    It’s always exciting to get something for free! However, while promises may seem grand, it’s important to remember that you are entering into a works contract with the installation company. To ensure you get what was offered, make sure everything aligns with current regulations, OFGEM guidance, and the latest PAS standards.

    In practice.

    If the property / occupants have met the requirements of a funded scheme, then the installation or funding company will arrange for a retrofit coordinator to instruct a visit from a retrofit assessor. The coordinator is the first in the process as this is the stage that the property classification is usually identified (traditional, non-traditional etc.)

    The assessor should try to get a picture of what the typical energy use entails and also what is expected by improving the property. Lots of photographs will be taken as an EPR (energy performance report) will be produced at the end.
    This is basically a reference EPC (energy performance certificate) but does not get published on the central register. (when EEM work is completed, a new EPC should be produced, ideally the original assessor as they will have the original data)

    Some quick guidance on what the assessment entails and why!

    • First things are age and condition. This is to allow a retrofit coordinator to classify the property and create a plan that allows a fabric first approach that works with the natural balance of the property and highlights all potential issues.
    • Existing Ventilation in wet rooms photographed and noted.
      This is because all insulation packages require moisture to be controlled post installation. Some insulation situations require upgrades due to the design and current regulations.
    • Existing background ventilation photographed and noted.
      This is because all insulation packages require the replenishment of air post installation. Some insulation situations require upgrades due to the design and current regulations. Installers may use a pulse or blower test may be performed to validate if upgrades to background ventilation are necessary.
    • Fuel burning appliances noted.
      This is especially relevant with open flued appliances like gas, wood/coal burning fires etc. Ventilation requirements for combustion may need to be installed or verified adequate.
    • Whole footprint of property measured, including all windows/glazed doors.
      This allows to distinguish what is a “heat loss area” in more detail, and also potential solar gains.
    • Plenty of images of outside. This is to show the condition of building elements, including damp course and drainage services (gutters, downpipes, soil pipes).

    Access to all rooms are required as is the loft space, basements and visual inspections of all external walls and areas. All ventilation present will be recorded and door undercut measurements should be taken.
    The assessment can take longer if more than one installation is being carried out, i.e. wall insulation, loft, and heating.

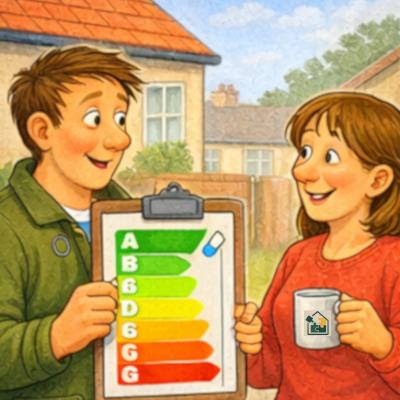
    A report is then generated to give a rating of the properties’ energy performance from “A (very good) to a (G) very poor”. Information is then made available to the retrofit coordinator. All data is uploaded to the *Trustmark data warehouse, which forms a property plan and can be accessed by involved parties.

    The coordinator will then look at all the data to see if improvements need any special design attention and intervention due to condition, age of property and location. If all looks OK then a ventilation strategy will be put in place depending on installation requirements. Some other documents are required, like a medium term improvement plan, which will create future scenario’s for improvements. 

    A retrofit designer will need to be consulted to design the proposed installation measure(s) if deemed necessary.
    We can take designers of certain measures as being members of a trade body. For example, a Gas Safe engineer installing a gas boiler, a SWIP trained installer performing IWI to a traditional non-heritage building, MCS accredited installer for solar and heat pumps. 

    A professional member of a Chartered Institute will be required, especially on buildings with heritage values or interacting insulation systems (wall and floor insulation being installed together, for example).
    It is up to the retrofit coordinator to validate that the designers and installers are all suitably qualified.

    * The TrustMark Data Warehouse was created to address several recommendations in the Each Home Counts review  commissioned by the Government in 2015.

    The retrofit plan is executed. This is what the installers are expected to perform to meet the current PAS. Each measure (installation or improvement) will have its own route and requirements, and brief information be found on each section within this site.
    The plan will provide steps for the current and potentially future improvements. A fabric first approach is always used, this means insulation before any heating works need to be carried out. Soft touches should also be part of the fabric first approach like heating controls, draught proofing and low energy lighting.

    The occupants should be informed of all work. It should be the co-ordinator and installers who contact the occupiers to inform them of the process that the retrofit project will follow. Dates, times, and conditions required will need to be discussed and agreed upon. 
    This may include removal of furniture to prevent damage or the arrangement of alternative living arrangements throughout the works (especially on internal wall insulation). It may include preinstall remedial works to the property structure or minor repairs like broken windows, failing of rainwater removal (poor guttering) and wall pointing.

    Get all this information in writing or in an email to reference at a later date if required. 
    Make notes of Installers contact details, coordinators, and assessors names and numbers. This can be invaluable if you need to contact anyone involved in the process.
    You can do research on installers, co-ordinators, assessors and designers here as they all need to be Trustmark registered.

    The Installation.

    Once agreed and a plan has been discussed, the installation will begin. If an insulation measure is being installed, then validation is required that either the current ventilation is sufficient or insufficient. The assessment would have highlighted any shortfalls, and the installers may ask to perform an air tightness test.  This can be carried out using a pulse test, this may be performed to allow installers a way of emitting undercuts and background ventilation from the installation, but controlled ventilation is always a good way to control moisture. 
    The ventilation should always be installed or upgraded first, or at least core vents and wiring set in place if wall insulation being installed. The *retrofit coordinator should make a site visit if the measure is deemed high risk which includes IWI, EWI, UFI, FRI, PHI and RIR. (*this will be a mandatory requirement from early 2025)
    The next stage will be the installation phase of the main improvements. 

    *Due to time and location factors, the retrofit co-ordinator may employ a remote coordinator to feedback information after or during site visit. 

    The Handover.

    Depending on the complexity of the installation, the duration can range from a single day to several weeks. This timeline should have been discussed and documented during the early planning stages.
    Before signing off on the work completed by the installation company, ensure you are fully satisfied that all agreed tasks have been completed to your expectations. Additionally, verify that any damages have been repaired or compensated. Make sure you have received all necessary handover documents, including warranties, guarantees, compliance certificates, insurance policies, gas certificates, and electrical certificates. Some certificates and warranties may come via post or email after the installation, if this is the case then ask for written clarification that they will be provided. All these documents are part of the works and may be needed if selling the property or for insurance purposes.

    Insurance Backed.

    To be PAS 2030 certified, installers must have an Insurance Backed Guarantee provider to ensure their customers are protected. They must also have adequate insurance coverage, including liability insurance, to protect homeowners.

    What is an insurance backed guarantee? Installers will provide their own written workmanship guarantee (this is very important to get a copy of in case of any poor installations). This will outline a guarantee period, during which the installer will return and fix any faults resulting from faulty workmanship.
    The insurance backed guarantee only comes into effect if the original installation company ceases trading through lets say bankruptcy!. Ask for details of the company providing the guarantee, and then do your research. 

    All Insulation installed under PAS.

    Each insulation installation will follow the same route as regards with ventilation on PAS. This should be explained by the retrofit coordinator and the installers. The basics are that background ventilation (usually trickle vents) will be provided unless an air permeability test is performed and validates the need to omit from the installation.
    Wet room ventilation is always required, but can vary with different insulation situations. (see below)
    If PIV (positive input ventilation) is being installed, then request details of why this choice is being taken, installers or retrofit coordinator will be able to guide you. (PIV will need maintenance, and it is placed in your loft space).

    Some insulation situations like the property not being 100% insulated (bathrooms and kitchens being omitted due to fixture removal difficulty) then the extract ventilation may need to be a dMEV system to mitigate risks of condensation.

    Pre-installation building inspection (PIBI)

    The Retrofit Installer should undertake a pre-installation inspection using a competent person, this means a person or persons who have relevant industry qualifications.
    The inspection shall be undertaken at a level of detail sufficient to confirm that the specified energy efficient measure can be safely and effectively installed at the designated location. Particular attention shall be given to potential moisture build up as a result of the installation and taking into account the fire safety of the dwelling and the functionality and/or safety of installed services (gas, electricity, water, telecommunications, etc.)

    Technical Monitoring.

    Technical monitoring is a form of auditing that highlights a set of given questions on compliance. This is not performed by the installation company, but they may have their own regime of quality control. The funders (energy companies) will use these reports to highlight and hopefully rectify failing. Sadly, this shows that even with all the rules and hierarchy within the process of PAS, failing still arise. More on technical monitoring here.

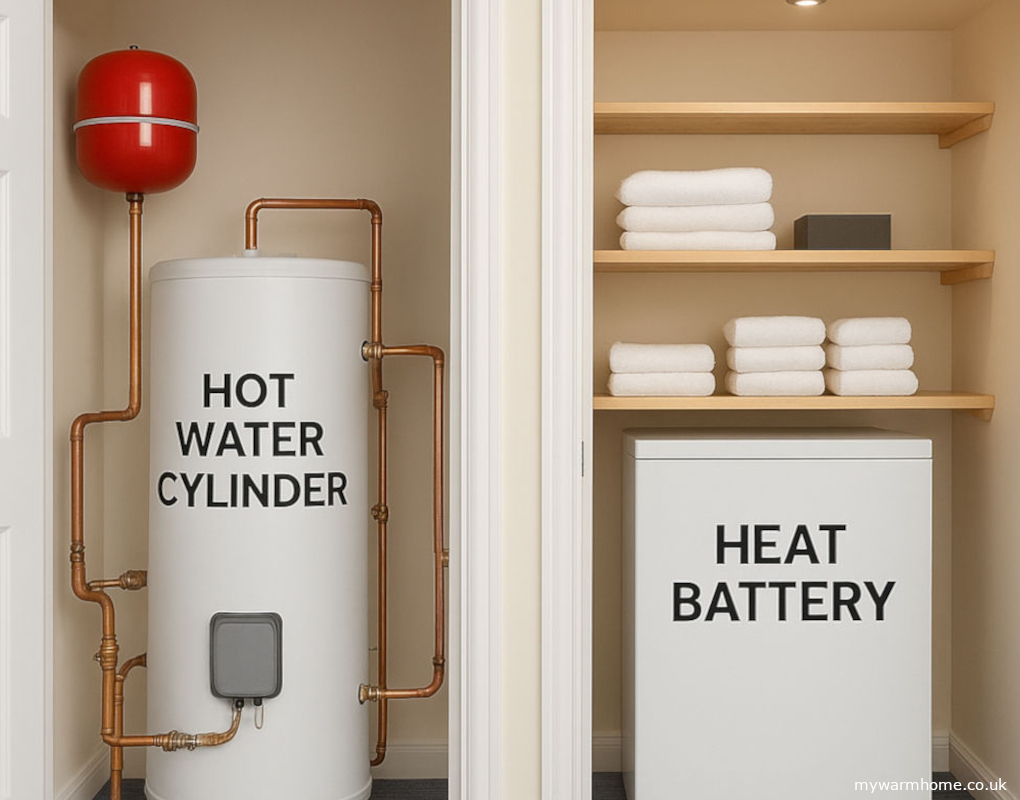
  • Heat Batteries

    Heat Batteries

    A heat battery is a device that stores heat energy and releases it when your home needs it.

    As the UK moves towards cleaner and smarter ways to heat our homes, one technology is starting to make a name for itself: heat batteries.

    You might have seen them mentioned alongside heat pumps in recent government home upgrade plans. But what exactly are they, and why are they becoming popular?

    You’ve probably heard of old type electric storage heaters maybe you’ve even come across one before. They store heat inside metal cabinets using heavy bricks, using cheaper electricity at night when most people were asleep and demand was low.

    Heat batteries work on a similar idea, but with modern materials and smarter design. They store energy as heat when electricity is cheaper or more available, and then release it later when you need hot water or heating.
    Below is a video from sunamp.Heating battery basics.

    So what is a heat battery?.

    A heat battery is a device that stores heat energy and releases it when your home needs it.
    Think of it as a modern alternative to a hot water cylinder, but smaller, faster, and far more efficient.

    Instead of storing litres of hot water, a heat battery stores energy using materials like phase-change materials (PCMs) or ceramic blocks. These absorb and hold heat at high temperatures, then release it on demand to heat water or contribute to space heating.

    How Does a Heat Battery Work?

    A heat battery typically works in three simple steps:

    • Charge.

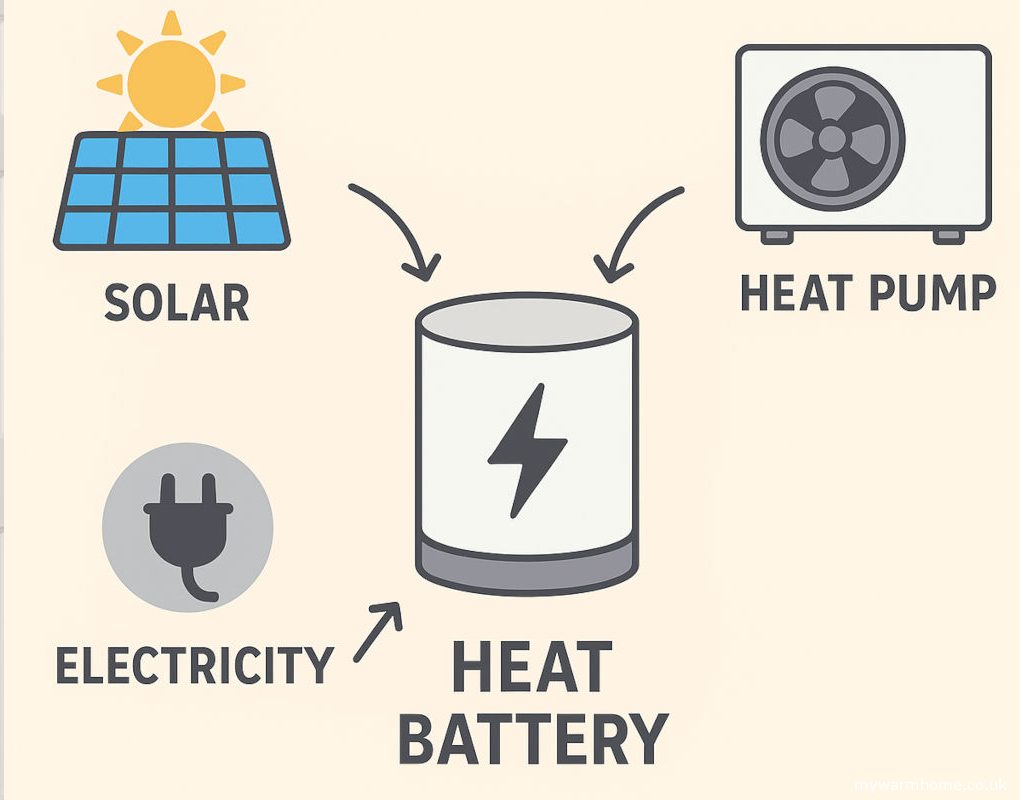
    The battery is heated using electricity from your heat pump, solar PV, or the grid — often at off-peak times when energy is cheaper and cleaner.

    • Store.

    The system holds that heat with minimal loss, often for many hours.
    Phase-change batteries “lock in” heat as they melt and solidify, similar to how ice packs work — just at much higher temperatures.

    • Delivery.

    When you open a tap or your heating system calls for hot water, the battery releases stored heat instantly.
    You get quick, consistent hot water without waiting for a tank to warm up.

    Why Are Heat Batteries Becoming Popular?

    • Smaller Footprint.

    A heat battery can be up to 5–10 times smaller than a traditional hot-water cylinder.
    Great for flats, small homes, or anywhere space is tight.

    • Faster Recovery

    They recharge quickly, making them ideal for busy households needing lots of hot water.

    • Works well With Heat Pumps.

    Heat pumps run best at steady, low-demand times.
    Heat batteries let you store heat produced overnight or when your heat pump is running efficiently.

    • Perfect with Solar Panels.

    Solar PV can charge the battery during the day, giving you almost-free hot water in the evening.

    • Lower Bills with Smart Charging.

    Pairing a heat battery with:

    • off-peak tariffs
    • smart meters
    • solar generation can significantly cut running costs.

    What Can a Heat Battery Replace?

    In many homes, a heat battery can replace:

    • Traditional hot water cylinder
    • An immersion heater
    • In some setups, parts of a boiler system

    They are particularly useful in heat-pump-only homes or homes switching to low-carbon heating.

    Are They Eligible for Grants?

    Yes, the government recently confirmed that heat batteries now qualify for a £2,500 grant under the Boiler Upgrade Scheme.
    This brings their upfront cost down significantly and makes them competitive with traditional hot-water systems.

    Should You Install One?

    A heat battery is ideal if:

    • You have (or plan to install) a heat pump
    • You want to save space
    • You’re looking to manage energy costs using solar PV or off-peak tariffs
    • Your home has high hot-water demand
    • You want a future-proofed, low-maintenance system
    • You need to improve a EPC rating on a property using old storage types.

    They’re less suited to very large households with extreme hot-water usage — a large cylinder may still be a better fit in those cases.

    Final Thoughts.

    Heat batteries are one of the most exciting upgrades currently available for UK homes.
    They’re compact, efficient, low carbon, and cost-effective — and with the new grant support, they’re more accessible than ever.

    Some Heat Battery manufacturers.

  • Solar Tariffs.

    Solar Tariffs.

    Store or use, the supplier will pay less for the power return.

    Having solar panels on our properties allows us to generate electricity when the British weather cooperates, of course! How we use that electricity depends on our needs and what we can afford to optimize. While batteries are an excellent way to store and use solar energy efficiently, they can be expensive, making them inaccessible to many.

    For those without battery storage, making the most of solar energy means using appliances at the right time or selling excess electricity back to the grid. For example, if we generate 1.6 kW per hour on a sunny day and run a 1.4 kW washing machine, we get a free wash, avoiding the import cost of around 34p per kWh. If we don’t use the energy and instead sell it back via the Smart Export Guarantee (SEG), we might only receive 15p per kWh. That means using our own power saves us 19p per kWh.
    Since it’s not always feasible to perfectly match generation and usage, finding the right balance between importing and exporting electricity is key to maximizing savings and efficiency.

    Finding the best solar tariffs (Smart Export Guarantee or SEG tariffs) for exporting electricity can be a bit of a minefield.  Octopus, Good Energy, OVO Energy, E.ON, British Gas all have their own tariffs based on their export rates of price per kilowatt-hour (p/kWh). Some offer incentives for using energy at certain times during the day, so working out what the “sell value” is compared to the “use value” can be different with each supplier and can either be of benefit or a drawback. Prices do change, so it’s worth doing research. Citizens advice has a great calculator to work out energy use of household appliances.

  • Solar in Depth.

    Solar in Depth.

    The light energy frees electrons, creating a Direct Current (DC) flow of electricity.

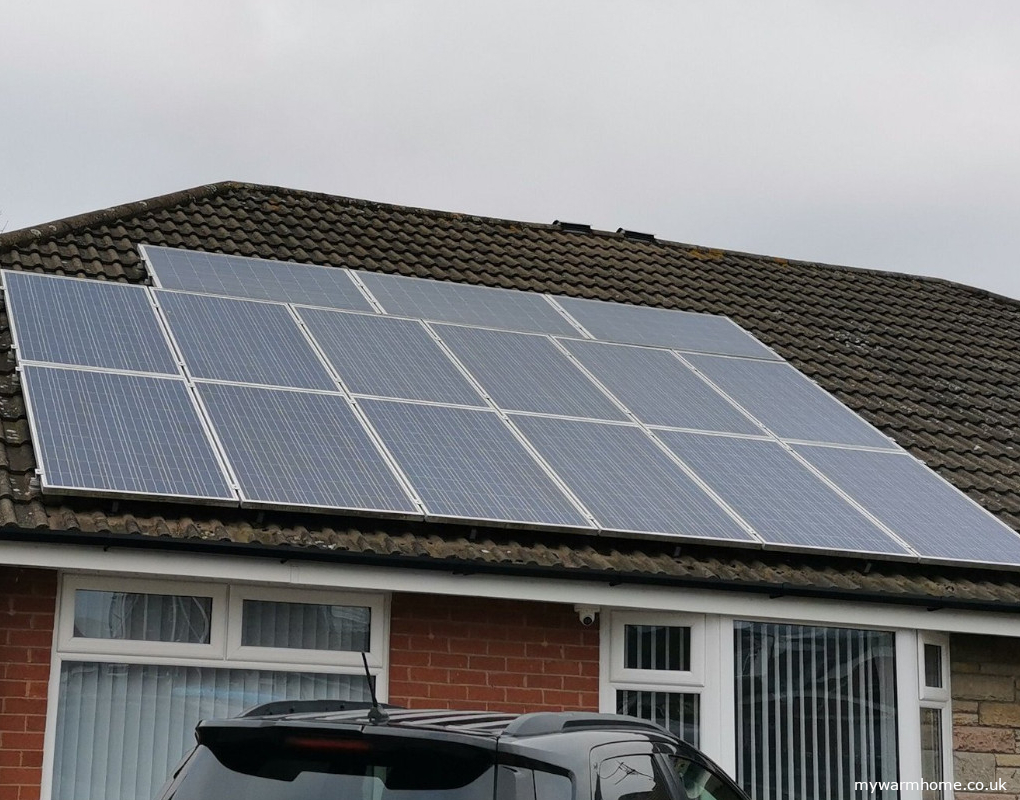
    A photovoltaic system consists of PV cells, which are grouped into modules (solar panels) and arranged into arrays.

    They contain cells, usually made of silicon, that release electrons when hit by sunlight, creating a flow of electricity. An inverter converts this power into the standard electricity used for appliances, helping lower energy bills

    Solar PV basics.

    Solar panels provide an eco-friendly and sustainable method for power generation, as they harness sunlight and produce no direct greenhouse gas emissions during use. They are utilized globally to lower electricity costs, reduce dependence on fossil fuels, and minimize the carbon footprint associated with energy production.

    Over the past 20 years, solar power has seen significant advancements in both affordability and technology, including improved energy transfer and storage capabilities. For solar energy to be truly beneficial in the UK, it is essential to either store the generated energy using batteries or feed the excess power back into the grid through energy providers.The system gathers that heat, boosts it, and releases it indoors.

    Different types of solar panels.

    Solar PV (Photovoltaics).
    This is the technology that converts sunlight directly into electricity using photovoltaic cells. These cells are typically made from semiconductor materials, such as silicon, which absorb photons from sunlight and release electrons. This flow of electrons generates direct current (DC) electricity, which can be converted to alternating current (AC) using an inverter for use in homes.
    Solar PV systems can vary in scale from small residential rooftop installations to large solar farms. They are a key component of renewable energy strategies, helping to reduce reliance on fossil fuels and decrease greenhouse gas emissions.

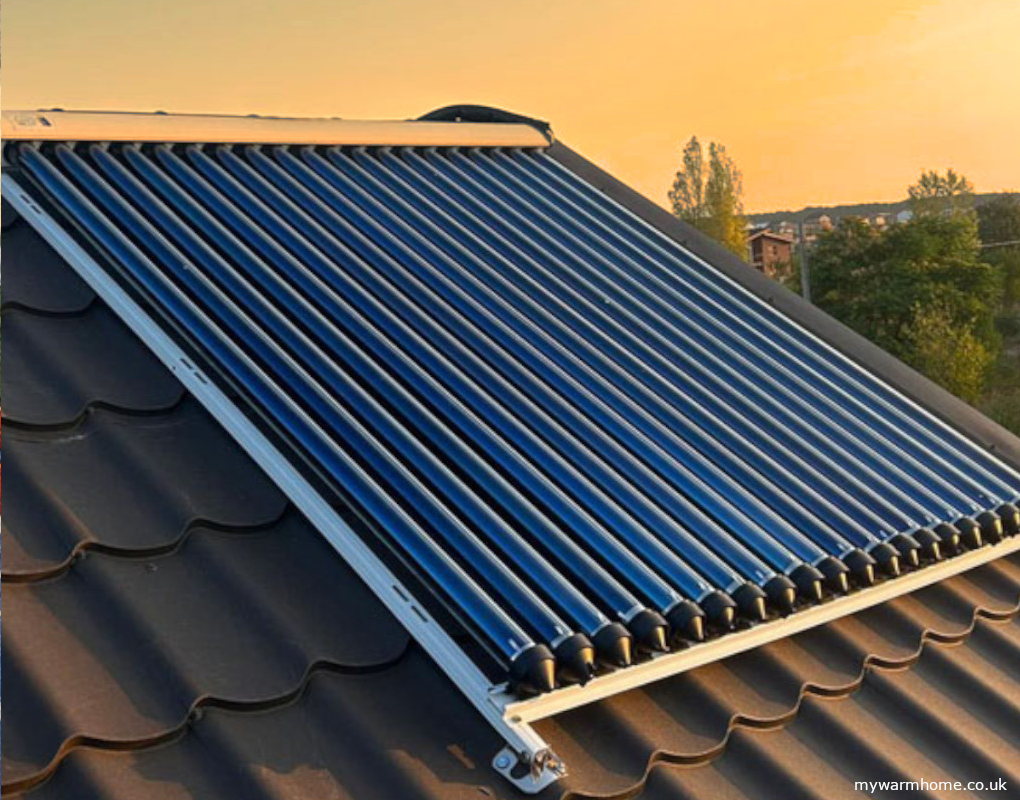
    Solar thermal. This is the technology that harnesses sunlight to produce heat, which can be used directly for heating our water, it can be used commercially to generate steam for industry, but we are looking at domestic systems here. 

    Solar thermal technology is valued for its efficiency in directly using the sun’s energy for heating applications, contributing to lower energy bills and reduced reliance on conventional fuel sources.
    The panels used either have a dark absorbing surface made from polymers or evacuated tubes which look like fluorescent tubes. The evacuated tubes are more efficient in cold climates but can overheat if too hot.

    Installation Guide.

    For any renewable heating or solar project, whether funded privately or through a UK grant scheme, the current best practices, manufacturer’s instructions and relevant building regulations should be strictly adhered to.
    If installed on a UK grant scheme then a quality assurance program that certifies small-scale renewable energy systems and installers need to be followed, currently this is supplied by MCS.

    It is also advised to use MCS installers to mitigate any problems with planning and safety compliance.

    Other companies like the IAA offer microgeneration guarantees too. Most of the time when applying for renewable funding the installation company usually has the mechanism to set up the funding and this should be explained from the start.

    You should NOT have to pay anything upfront or post install unless extras are quoted and agreed. 

    These extras could be, for instance, extra panels, battery connected inverter’s, batteries and possibly EV chargers.
    Get your installers to confirm the process of connecting to your grid supply, which is detailed below. 

    Currently, there are various funding streams, but are typically means tested.
    Have a look at the funding area of the site for more information.

    To achieve effective solar panel installation in line with best practices, MCS standards, and building regulations, please review the following installation and operation guidelines.

    Pre-install.

    Before connecting a solar power system, you must submit a DNO application to the relevant distribution network operator.
    This ensures they can assess and manage the required *electricity capacity. The documentation needed depends on the system’s size, larger systems generally require more paperwork before installation.
    For solar power systems, the standard threshold is 16 amps per phase, determined by the inverter’s AC output. If you’re unsure of the amp rating, consult the installation company’s electricians for guidance.

    Systems with an AC output under 16 amps per phase (less than 3.68kw) can be registered with a G98 form, usually allowing immediate installation. 
    Systems exceeding 16 amps per phase (more than 3.68kw)are classified as large and require prior approval and a G99 form from the DNO before installation.

    Informing your supplier.

    If you’re trying to set up a Smart Export Guarantee with a supplier, they will require documentation like a DNO letter, they may also want a G98 or G99 approval and MCS certificate, They will require an export MPAN (they can usually request this from your DNO). Email your electricity supplier to inform them of the solar installation, give them the exact date of installation even if you have not received your MCS or other documentation. They will then confirm in return and hopefully guide you with the process.

    What is an export MPAN?
    An export Meter Point Administrator Number (MPAN) is an industry reference for a unique 12 or 13-digit reference number to identify where electricity is fed into the grid. It helps to ensure exported electricity is measured accurately and payments/credits owed are assigned to the correct account. This can take your supplier many weeks to retrieve from your DNO. This number is different from your standard MPAN 21-digit number on your bill. We have a section in the blog to explain more.
    More details here.

    Post-install.

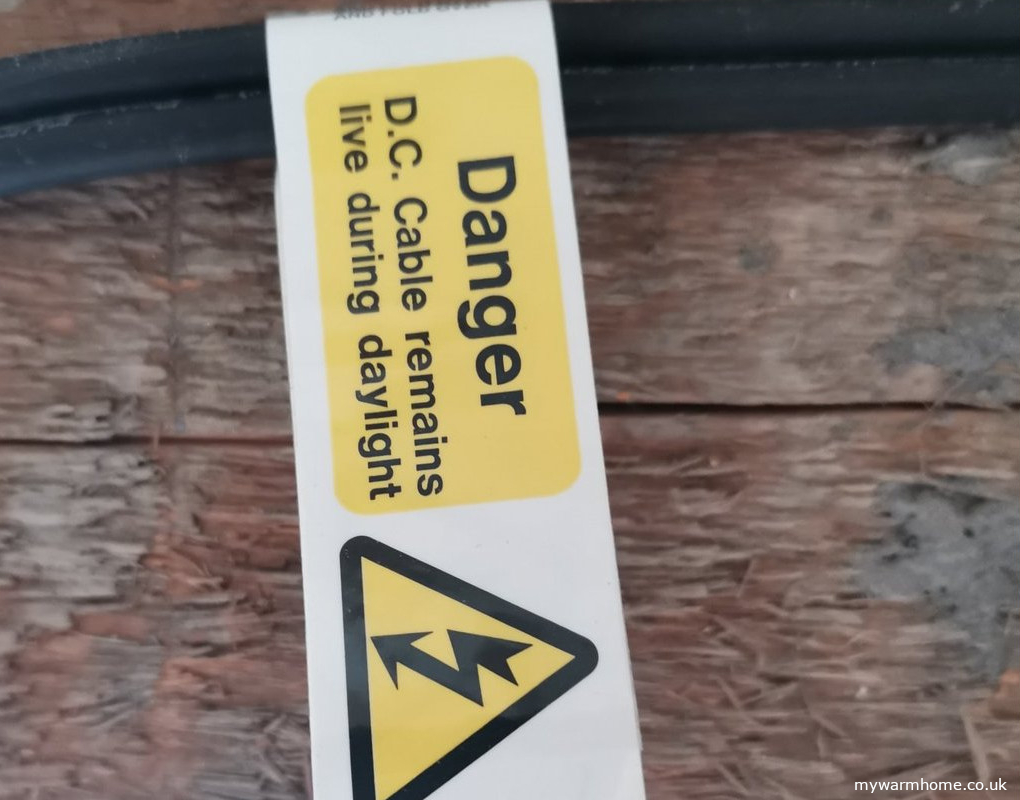
    All DC and AC solar cables and isolators Should be labelled throughout the installation. This is a MCS guideline, which we know is not a regulation, but any good installer should complete all the tasks mentioned. 
    Ask the installers if your supplier is being informed. The installers may inform your supplier and pass on the necessary documentation but personally contact your energy supplier by email to confirm.
    PV cables under the panels. These should be secured, so the wiring is not touching the roof. This is to prevent failure, snagging and build up of debris.
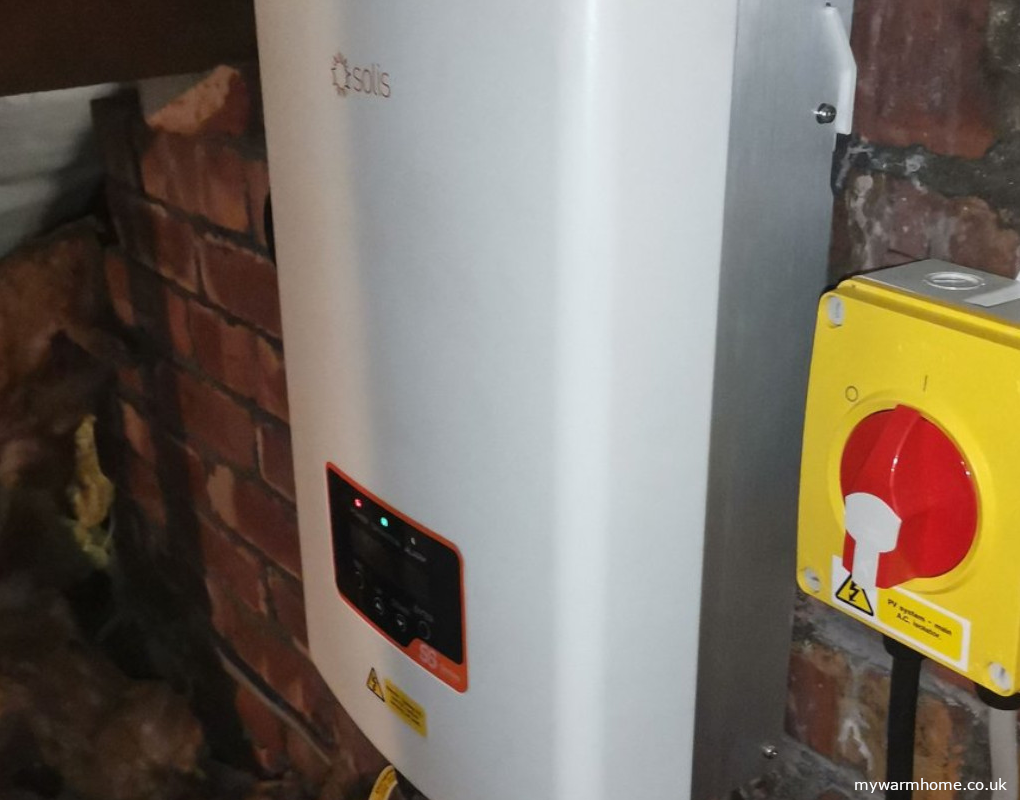
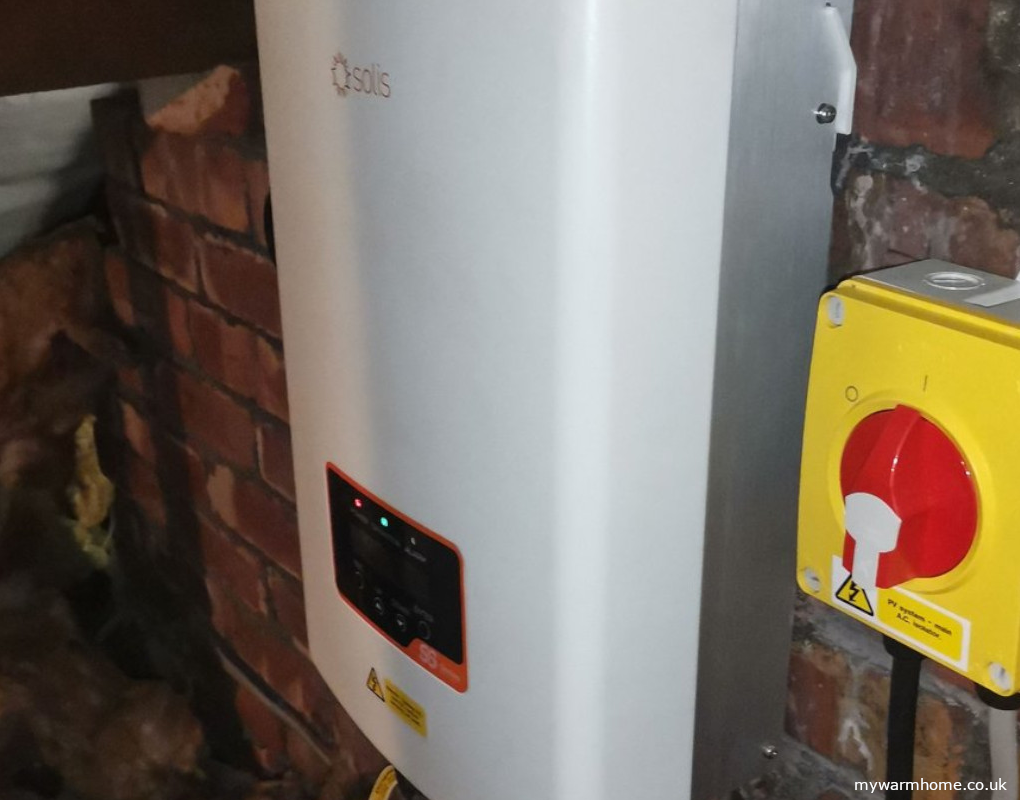
    Safe lockable isolation at inverter. DC (black) and AC (red)
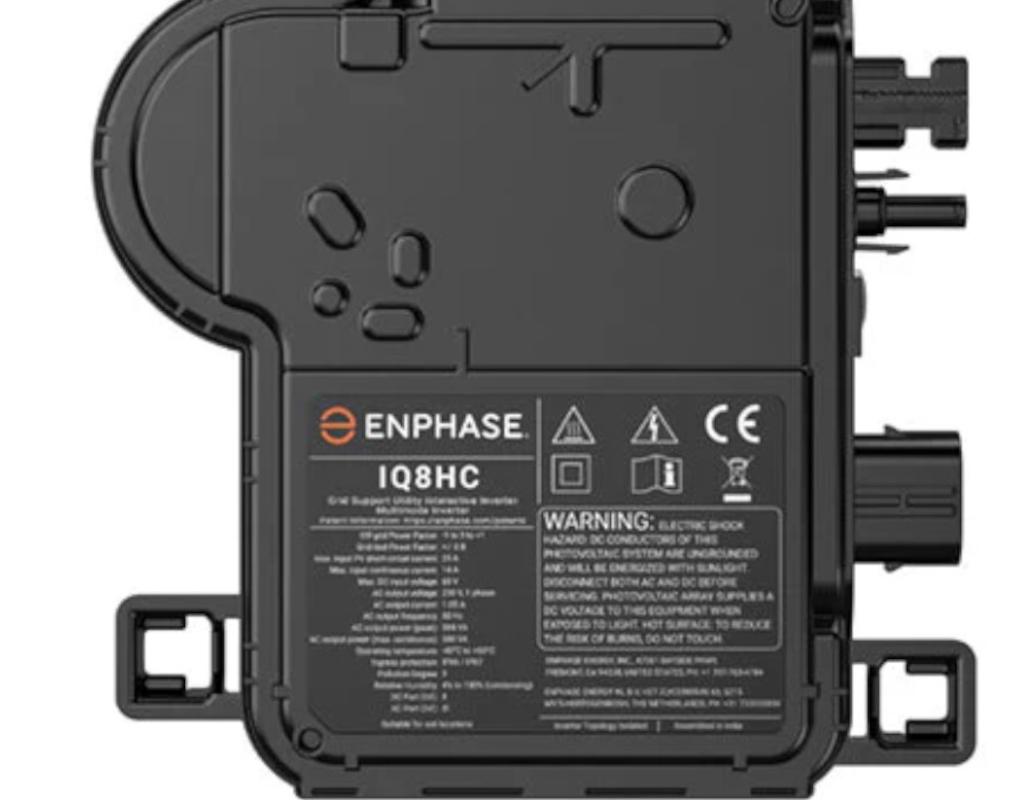
    Correct fixing of inverter. Manufactures will state surface mount requirements (fireproof etc).
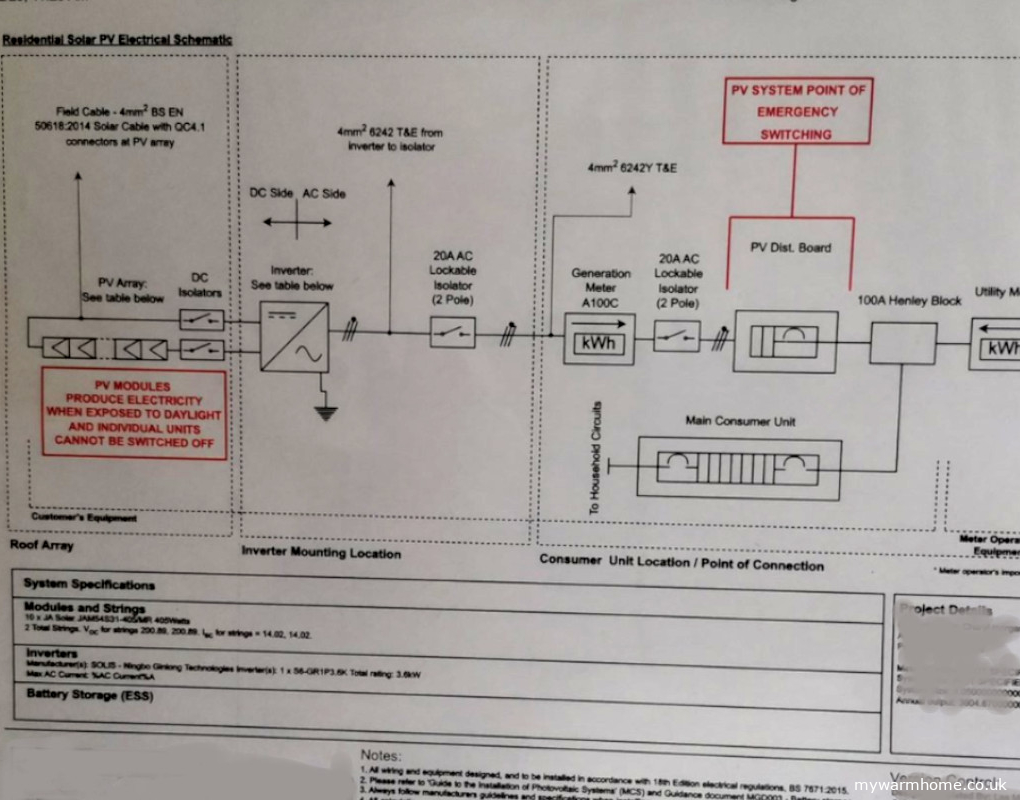
    Clear diagrams of system to be placed near inverter (schematic diagram). This shows the setup of the system for maintenance and electrical circuits.
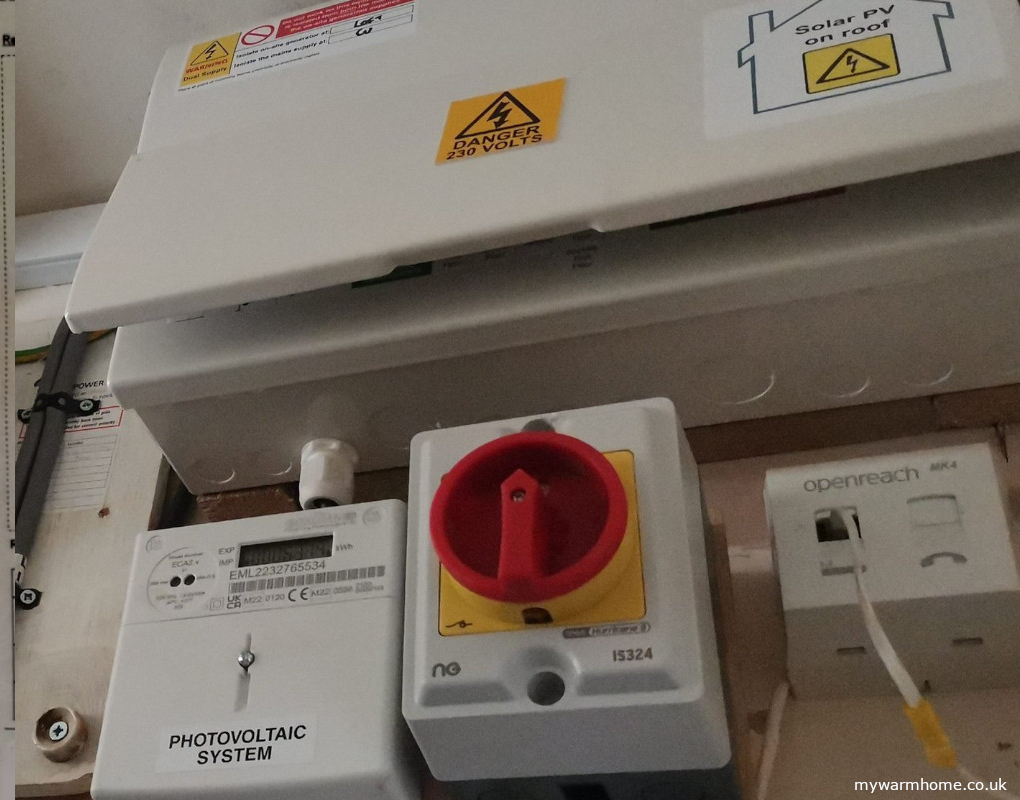
    Solar on roof label to be close to main fuse. This is mainly to inform emergency services that DC exists on the roof.
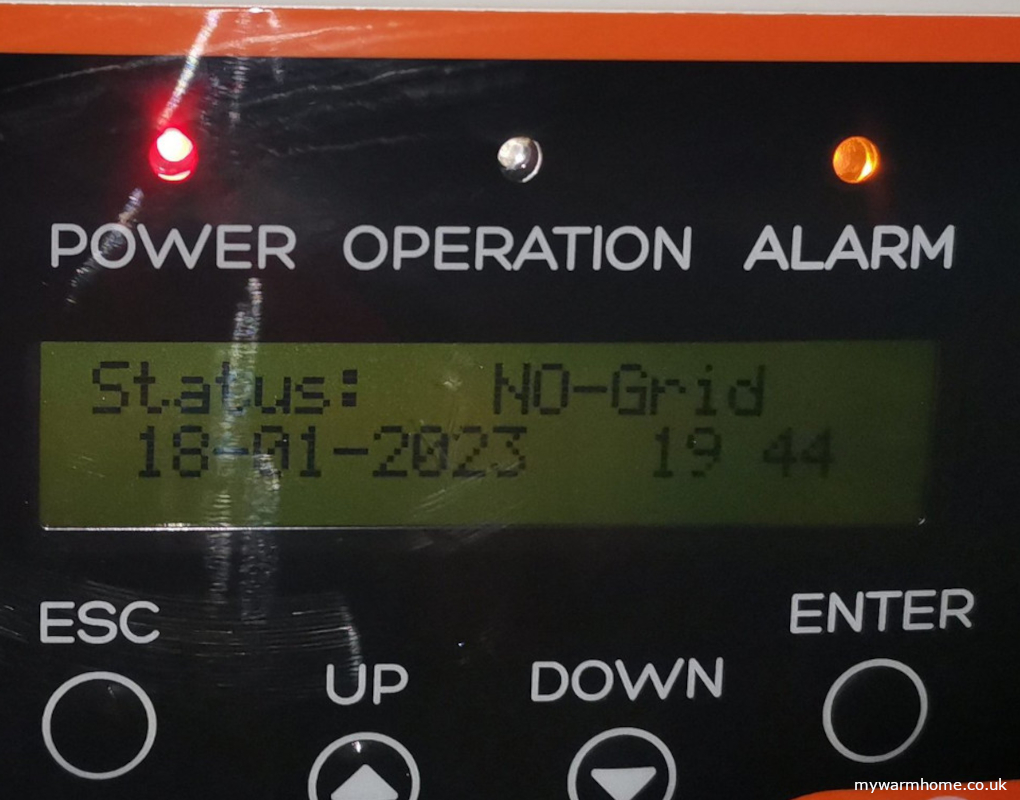
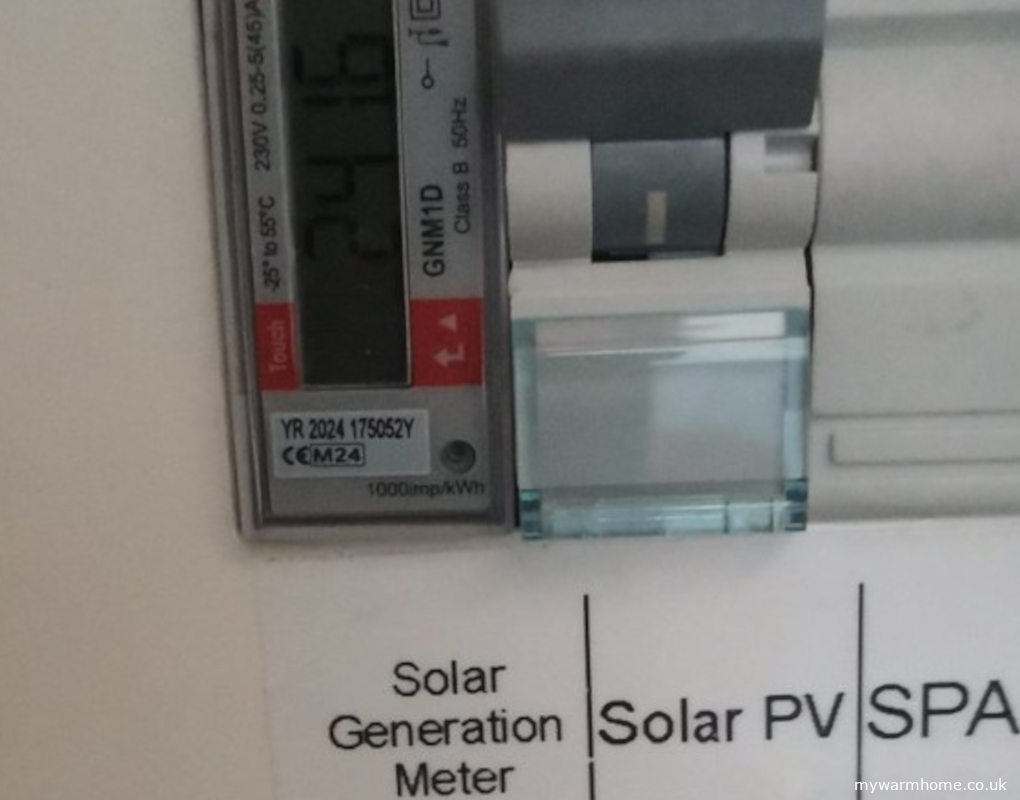
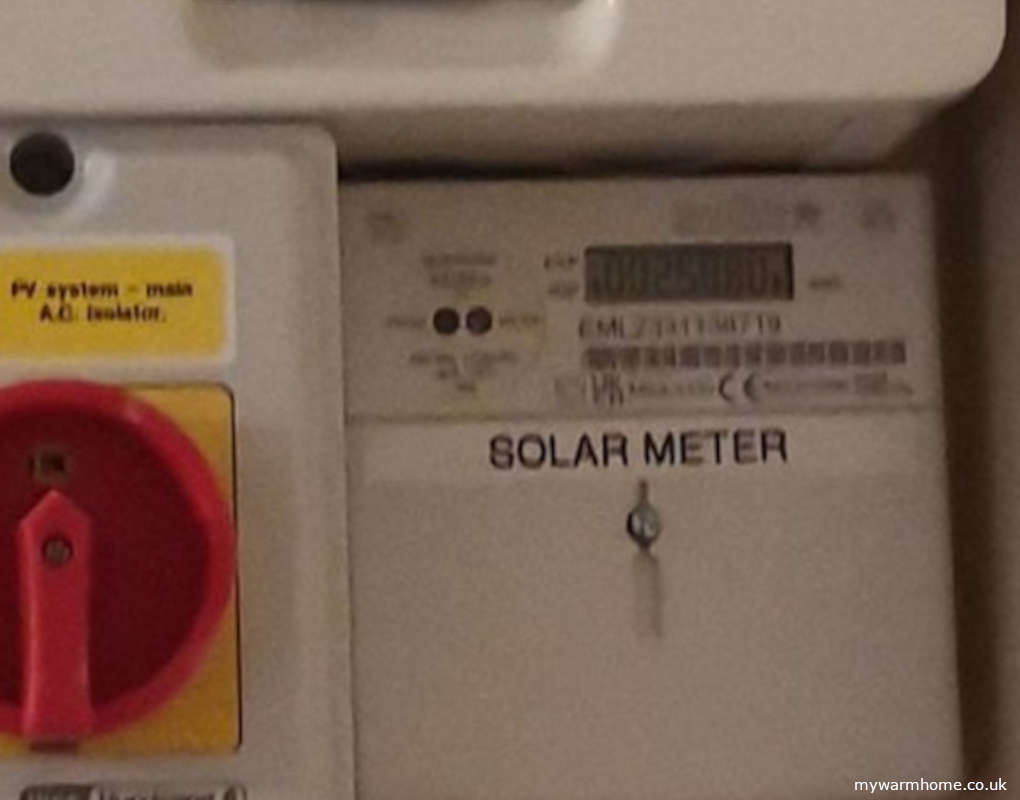
    Monitor meter. Should be installed in a location for ease of access and allow the occupier to be able to monitor the system to check for generation and faults (can be installed into consumer unit). The generation meter light should be blinking in the daylight, if not could be failure, check for warning on inverter. Some inverters are remotely monitored for failure, this should be explained and monitoring contact information left on site.
    Check that your meter is suitable for selling on excess energy. This usually has to be a smart meter and your energy supplier can guide you.
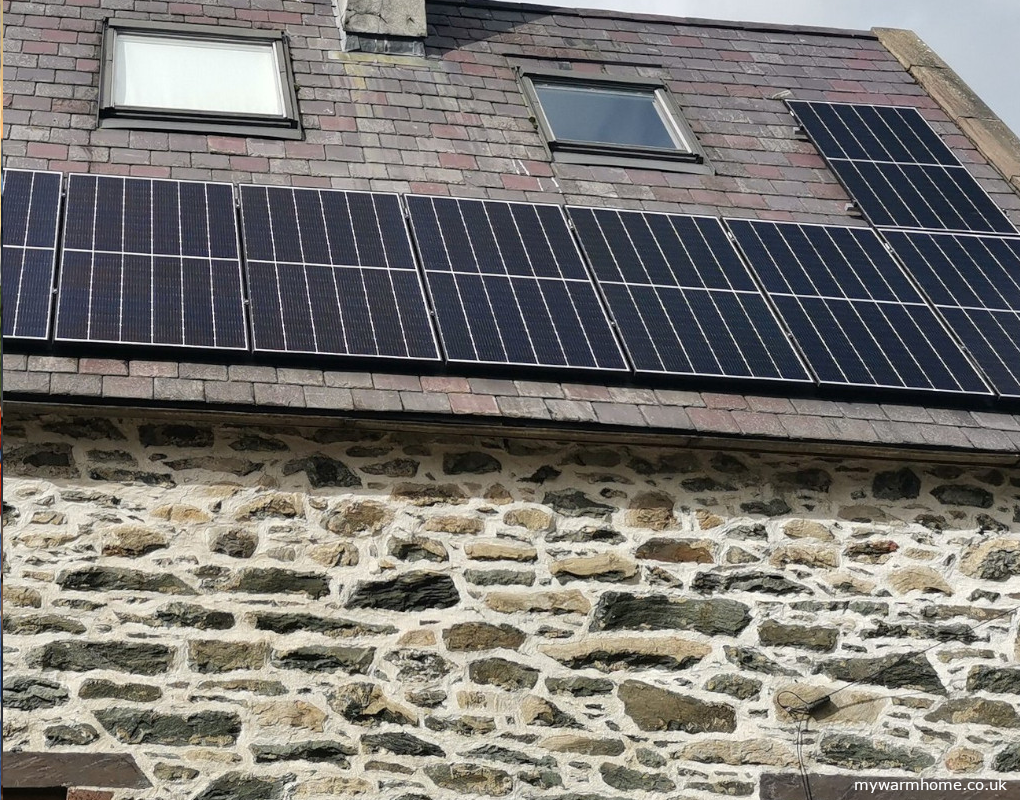
    Panel position. Solar panels should be installed to optimize daylight and eliminate shading, this is typically at a 35° angle facing south. Panels should not extend more than 200 mm from the roof surface and be minimum 400mm from the edge to prevent uplift, latest regulations, MCS guidance and manufacturer installation information should be followed. Flat roofs and pitched roofs have different installation techniques and parameters.
    Solar wizard, a good place to start to check orientation.
    Panel Type. Ask what configuration panels are.
    They could be in series or parallel.
    Protection. Panels may need to be protected from nesting birds or vermin.
    Labels. Cables should be labelled with DC warnings, and this should ideally be visible on each internal and external run.
    All meters and isolation switches should be labelled.
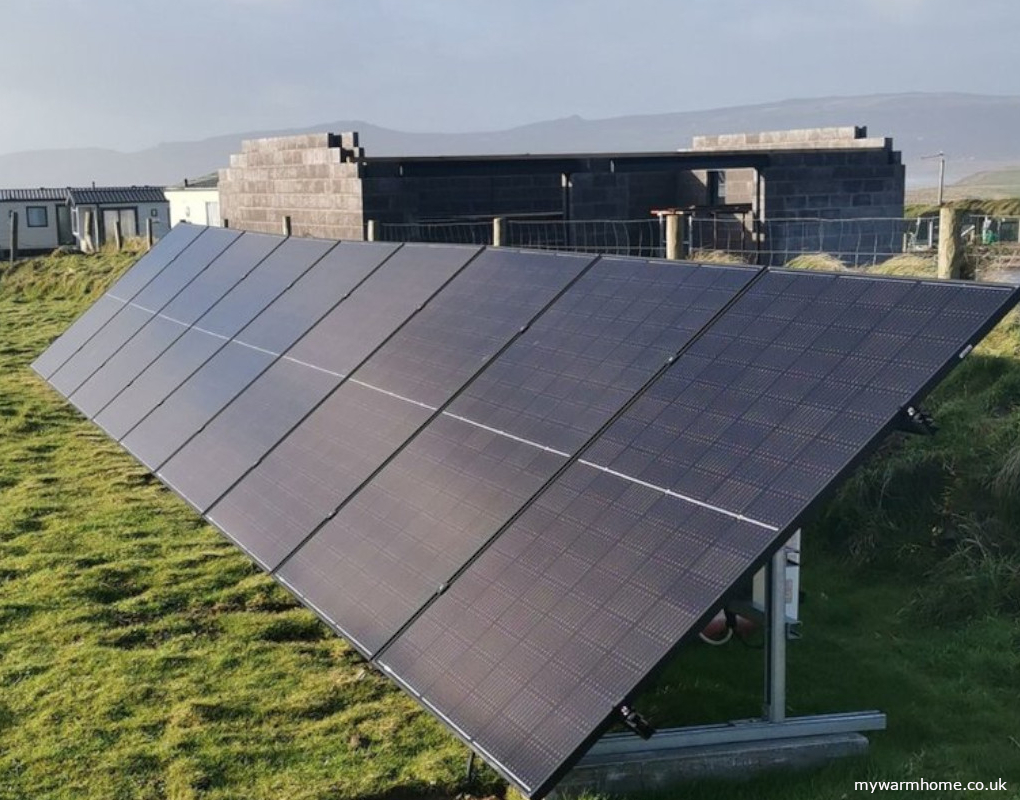
    Ground Panels. If panels are ground mounted, then cables to inverters should be safely and securely routed and labelled. Typically, in ground trenches at a minimum 500 mm. Ground mounted panels should be secured to prevent wind lift. Weighted and secured.
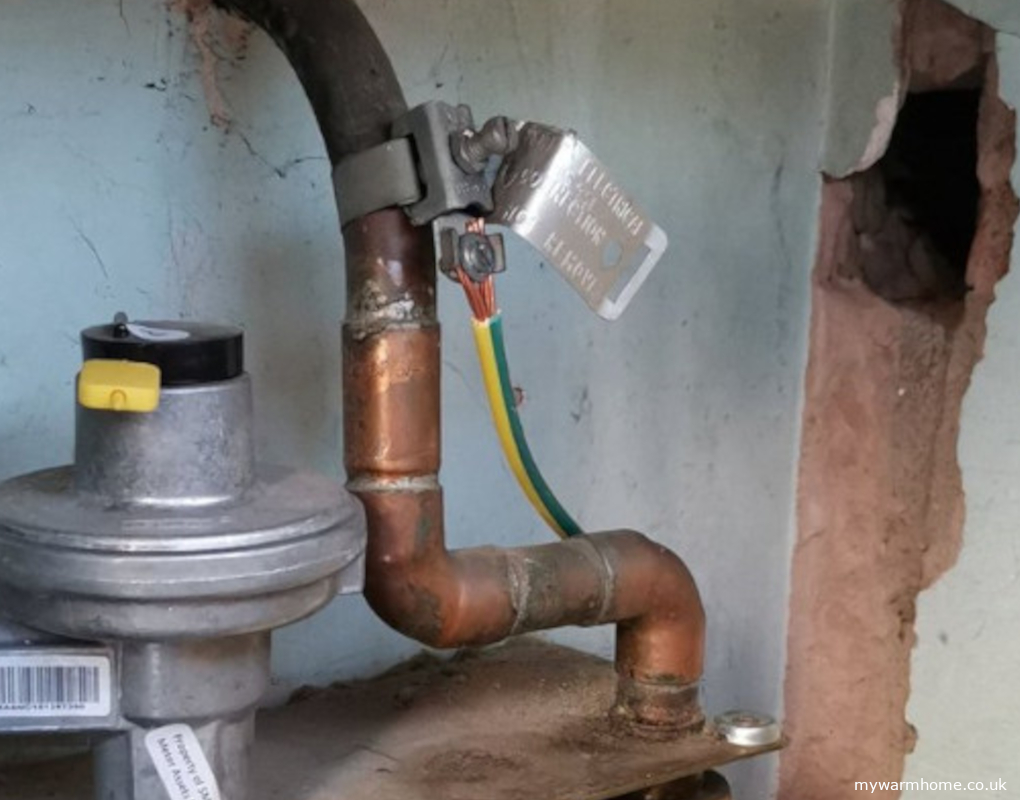
    Earth wires (bonding). Should be fitted to gas meters and water stopcocks. To prevent any electrical current moving to uninsulated pipework in case of failure or damage to the system.
    Planning permission. Typically, not required for domestic solar panel installations. However, planning permission may be required for listed buildings and conservation areas. If using an MCS registered installer, this should be verified for you.

    Series or Parallel.

    Series connection. 

    • Increases voltage, but keeps amperage the same
    • Suitable for high-voltage applications
    • Optimal output at the beginning and end of the day
    • Easier to work on, and requires less expensive wire
    • Sensitive to shading
    • A disruption in a series connection affects the entire system

    Parallel connection.

    • Increases amperage, but keeps voltage the same
    • Suitable for systems with high current requirements
    • Better shading tolerance
    • Panels continue to work independently of each other
    • May require larger cables and additional equipment
    • May increase upfront costs for materials and installation

    Batteries.

    Solar batteries store the extra electricity generated by solar panels, much like how car batteries hold the charge produced by alternators. These batteries allow homeowners to keep surplus energy for later use, increasing energy independence and reliability. They can power household appliances and charge electric vehicles, providing a convenient and sustainable energy solution. Batteries come in different sizes and make-ups. The most popular are lithium-ion, which uses lithium mined from countries like Argentina and Brazil. These batteries have a longer lifespan, store more power in a smaller space and are very efficient.

    Lead-acid batteries can be used, but due to size and poor efficiency, we don’t really see them now on UK systems.
    A new kid on the block is the saltwater batteries, which are an eco-friendly option but have lower power density compared to chemical batteries.

    Benefits.
    When your solar panels produce more electricity than your home or building needs, the excess energy flows into the solar battery instead of being sent back to the grid. This stored energy can be drawn upon when the panels aren’t generating enough power. While the initial cost of solar batteries can be high, they can offer long-term savings by reducing the need to buy electricity from the grid, making them a worthwhile investment if within budget.

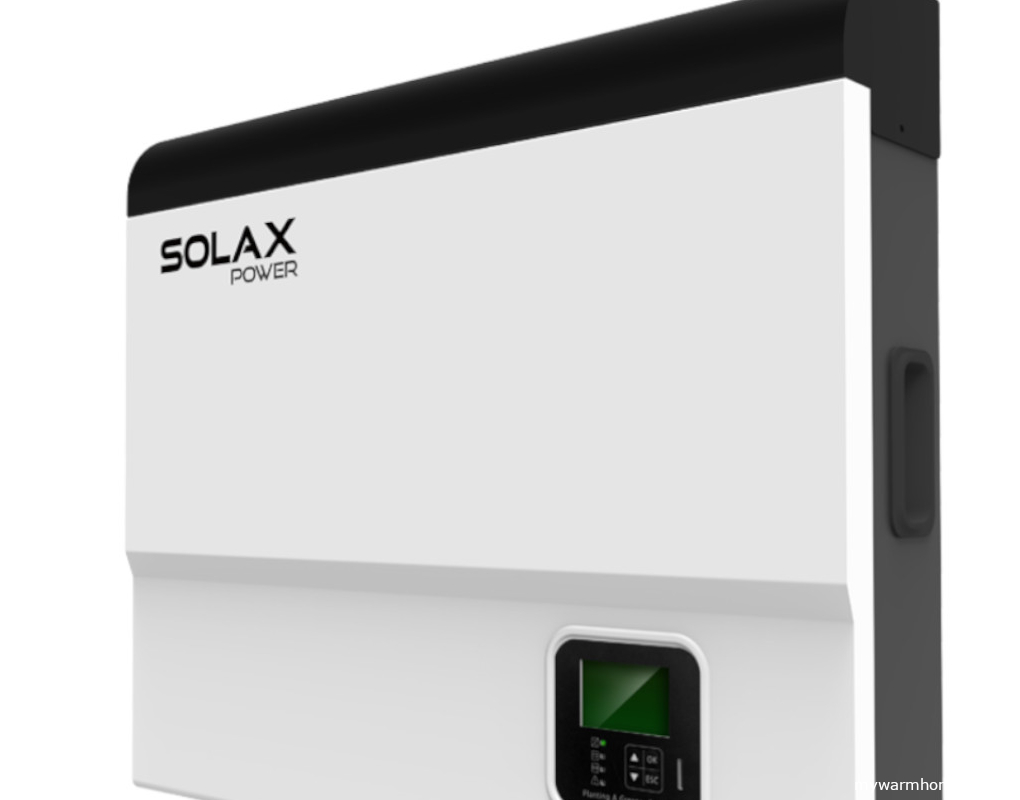
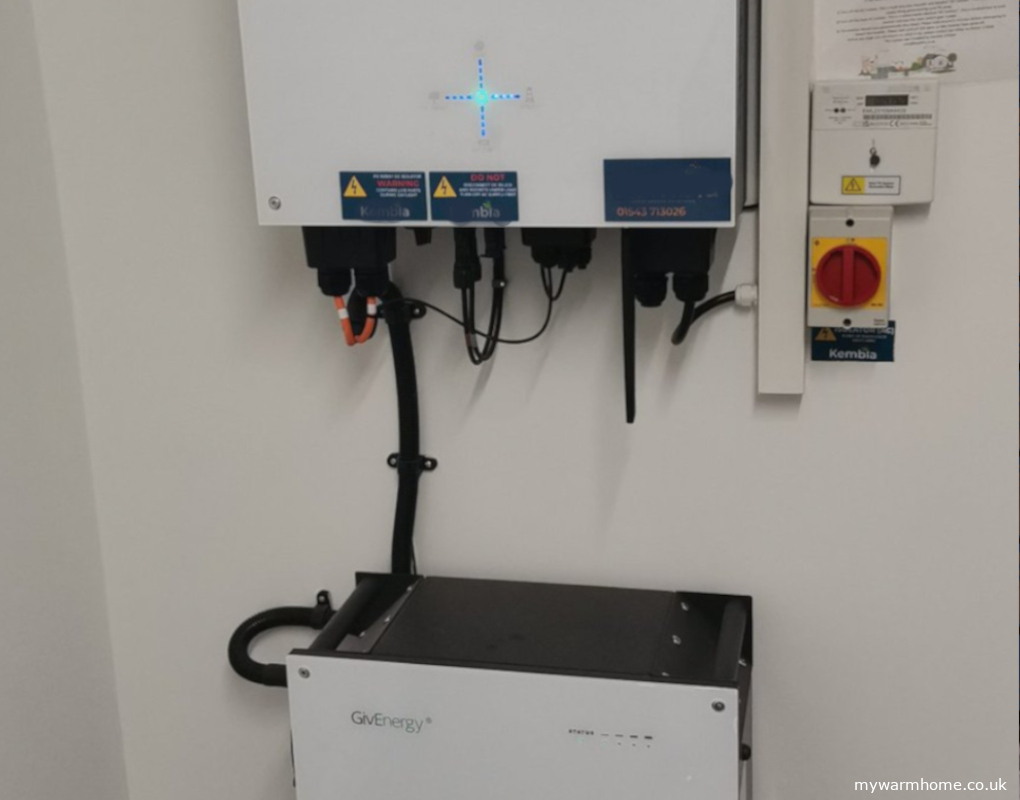
    Solar battery systems are usually paired with hybrid inverters, which manage the flow of energy between the solar panels, batteries, and the grid. While initially more costly, they offer significant long-term savings and resilience, particularly valuable in areas prone to outages or with fluctuating energy cost.

    Under the new P63100 standard regarding battery location, the basic premise is that the best place for storage batteries is outside the dwellings and away from habitable rooms. Where it is not practicable to locate batteries outdoors, some basic requirements are provided in P63100
    Batteries shall not be installed in any of the following locations:

    • rooms in which persons are intended to sleep
    • routes used as a means of escape that are not defined as protected escape routes including landings, staircases, and corridors
    • corridors, shafts, stairs, or lobbies or protected escape routes
    • firefighting lobbies or staircases
    • storage cupboards, enclosures, or spaces opening into rooms which persons are intended to sleep;
    • outdoors within 1m of escape routes, doors, windows, or ventilation ports
    • voids, roof spaces or lofts
    • within 2m of stored flammable materials and fuel storage tanks or cylinders; and
    • cellars or basements that have no access to the outside of the building

    Power diverters.

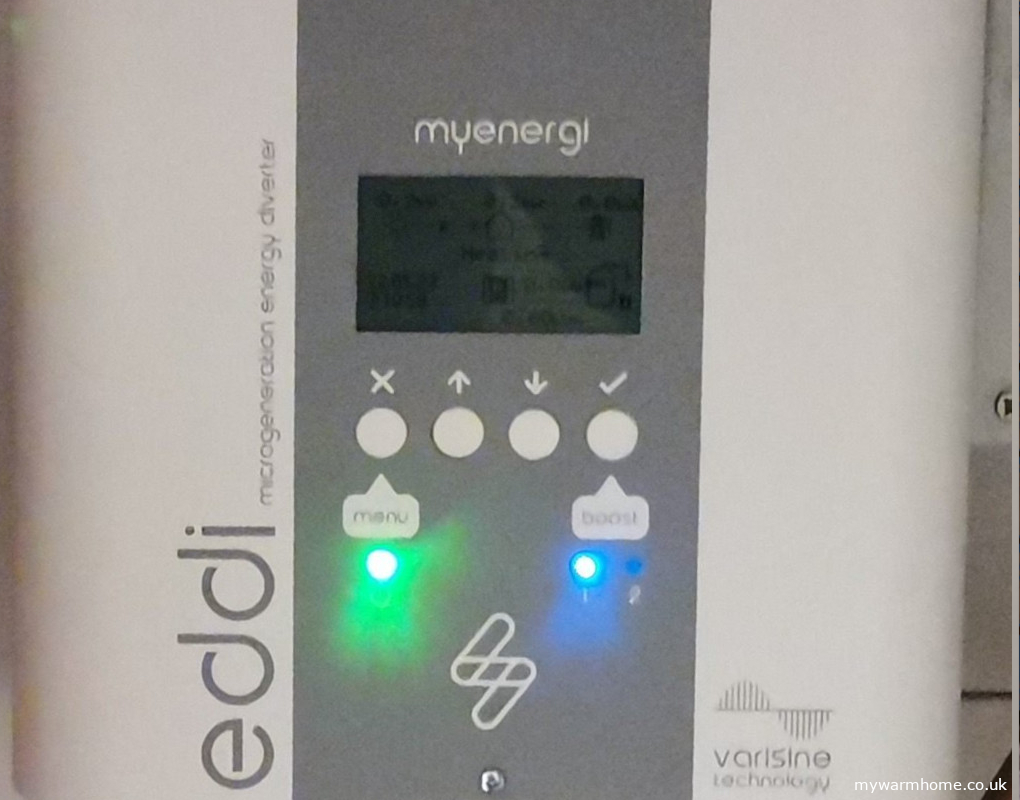
    A power diverter is a device used in solar energy systems to redirect surplus electricity generated by solar panels to power specific appliances in your home, rather than sending it back to the grid. This allows you use of the solar power you generate by directing it to energy-intensive devices. 

    How it works.
    When your solar panels produce more electricity than your home is currently using, the power diverter detects this excess energy and automatically redirects it to a designated appliance (most commonly an immersion heater for hot water).

    This prevents surplus energy from being exported to the grid, where compensation rates can be lower than the cost of grid electricity. Power diverters are usually affordable and easy to install compared to batteries, making them a popular choice for homeowners who want to improve their solar energy efficiency without a large upfront investment like batteries.

    1. Heat is collected from outside (air, ground, or water).
    2. That heat is compressed to raise its temperature.
    3. The warmed heat is delivered to radiators, underfloor heating, blower units, or hot water.
    4. The cycle repeats, quietly and continuously.

    Electrical certificates.

    The two types of electrical certificates you will come across as a customer who is having any electrical work as part of installing EEM’s (energy efficient measures)

    • Electrical Installation.
    • Minor Works Certificate.

    Electrical Installation Certificate.

    An electrical installation certificate is the type of certificate a customer receives after an electrician has installed one or more new circuits. Other examples include a complete rewire, a replacement consumer unit or an additional consumer unit. Generally, any time electrical work is done at the consumer unit, a new installation certificate will be issued.

    Minor Works Certificate.

    A minor works certificate is issued after an electrician has made an alteration to an existing circuit. Minor works certificates are often used to certify work such as adding additional sockets to an existing circuit or increasing the number of light fittings in a room. It can also be where a fused spur has been installed for an appliance or boiler connection.

    Click here for more on regulations.

    Health and safety.

    You may need specialist advice from tradespeople and professionals regarding things like,
    Nesting. Bees, wasps, bats.
    Vermin. Rats, mice, squirrels
    Asbestos. Flues, guttering, facia boards etc.
    If squirrels, rats, or pigeons etc have the potential to nest or shelter under panels then protection will be required. Not only can they damage the panels, but they also tend to gnaw and pull on cables.

    Some older houses may contain asbestos, which only a trained eye can recognise. Never disturb anything you’re unsure about. The health and safety section has more details.

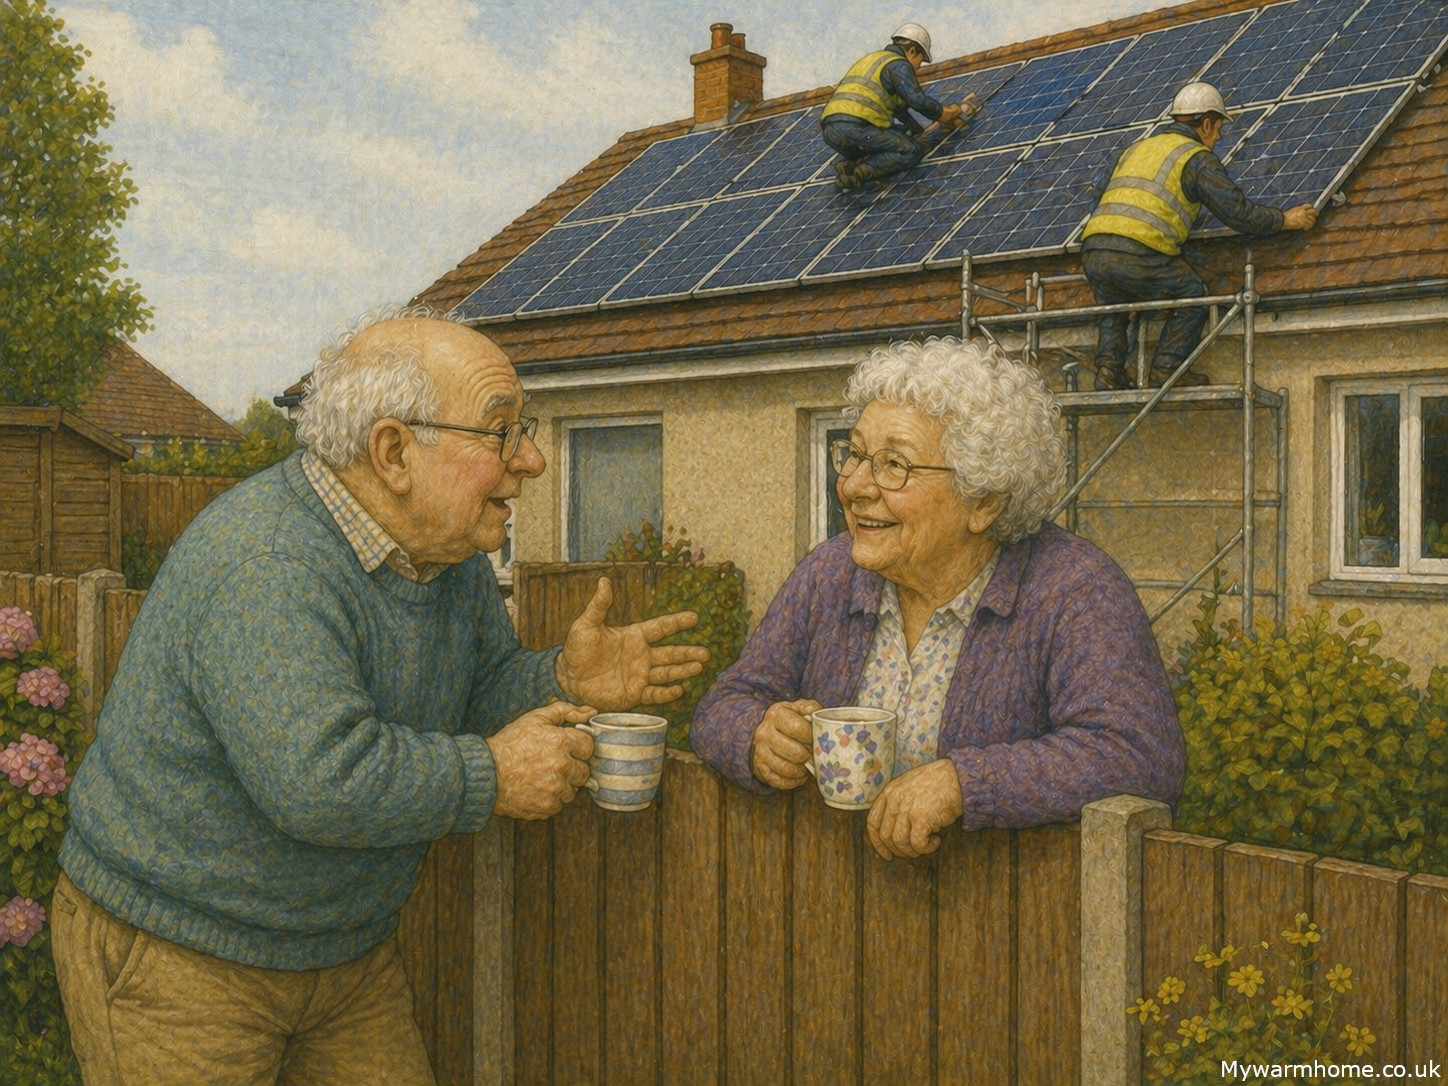
    Your property will have ladders and possibly scaffolding during installation of solar panels so it’s crucial for safety guidelines to be in place, warning signs, pavement ramps etc. Contractors should always explain the dangers and inform you of any changes. 
    If you have close neighbours, then permissions may be needed for access and also approval for works in regard to noise and nuisance during installation (always polite anyway). Gas appliances and ventilation requirements should be carefully considered during the work, especially vertical flues and tile vents for loft ventilation. 

  • UK Property History.

    UK Property History.

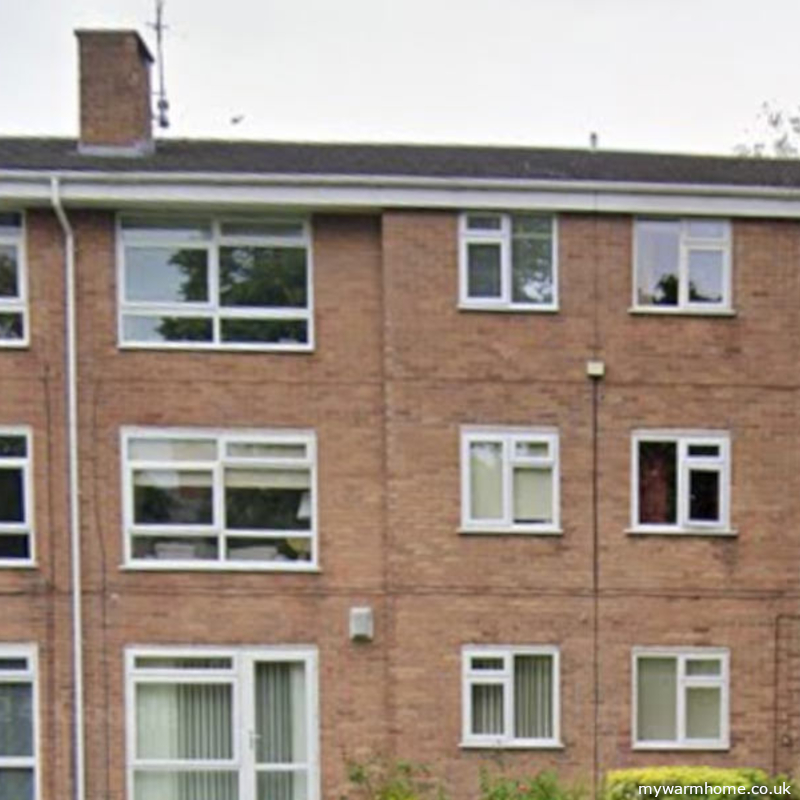
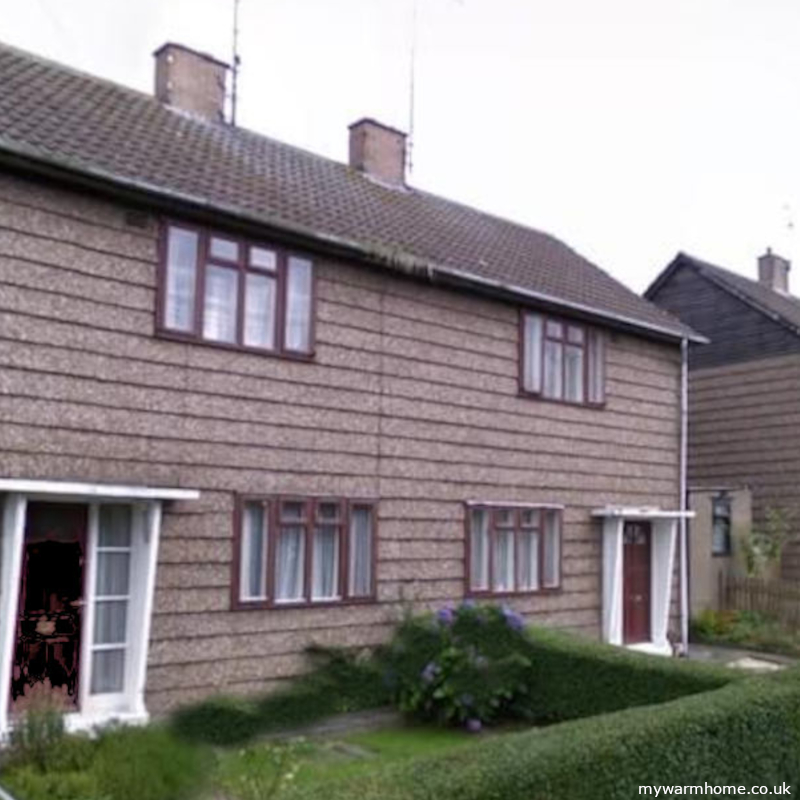
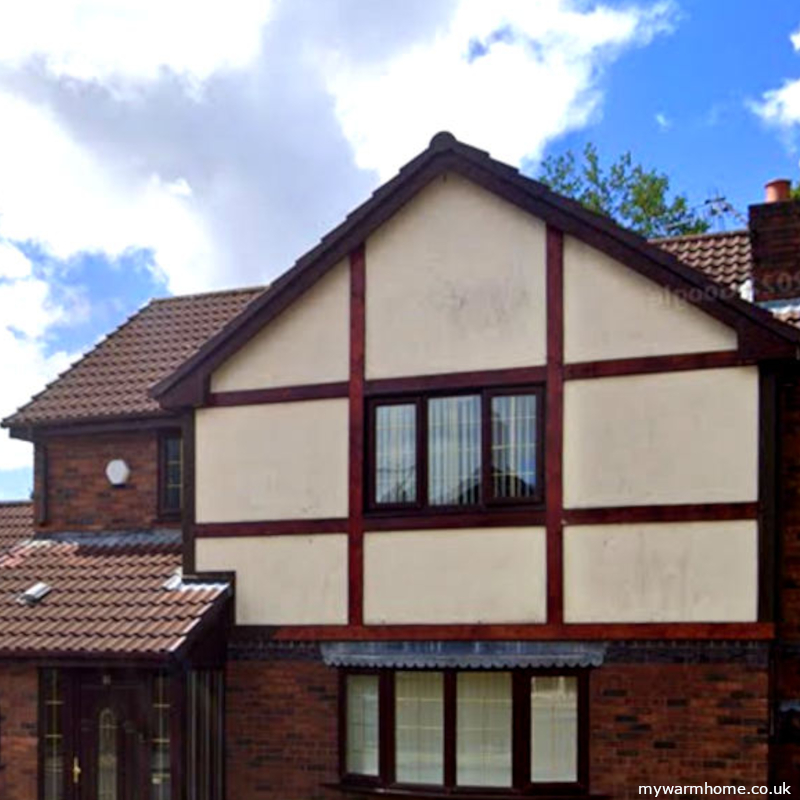
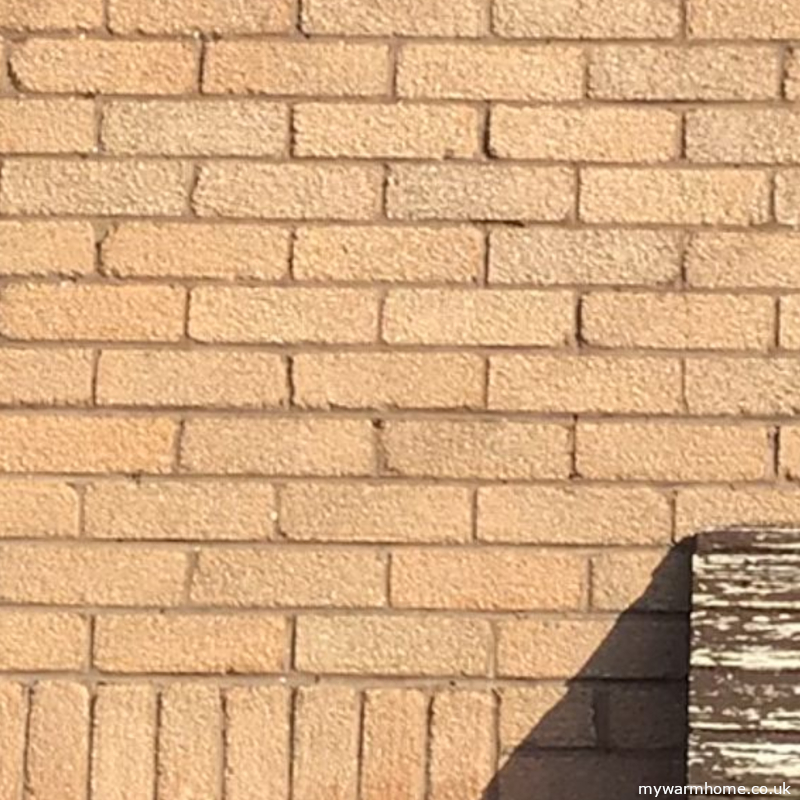
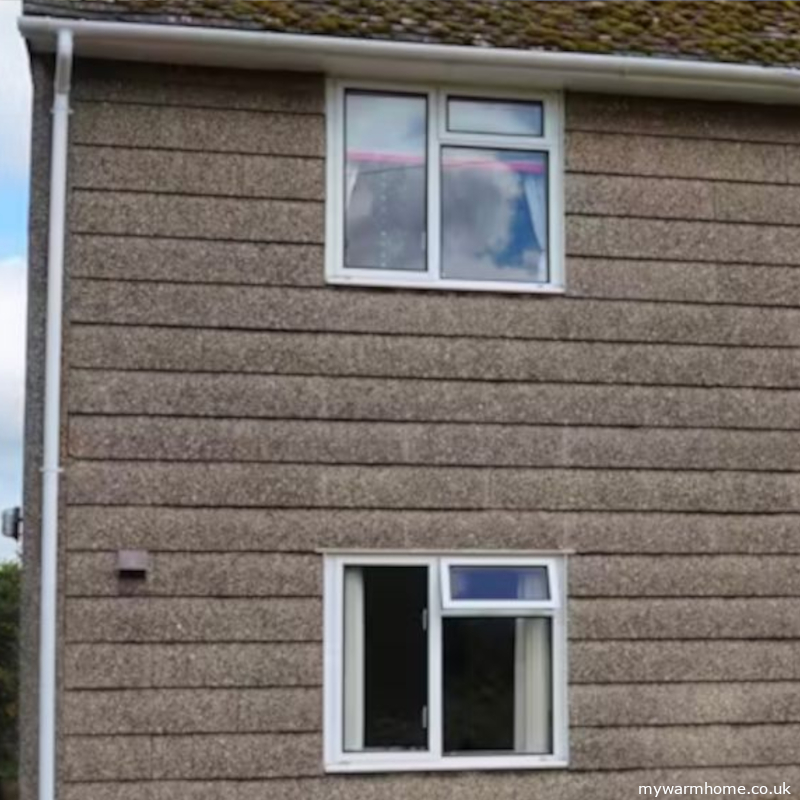
    Over the years, many homes have been layered with materials like non-breathable paints, renders, pebble dashing.

    Homes built in the UK before the 1980s often lack adequate insulation or have none at all. While building regulations at the time may have included some insulation standards, they were typically not enforced in practice. When planning insulation upgrades, it’s crucial to consider a range of “what if” scenarios and apply the latest  insights (both scientific and lessons learned), as the field has advanced significantly.
    Any retrofit project should begin with a data-driven approach, starting with the property’s age and condition, which can offer valuable insights into how the process is likely to progress.

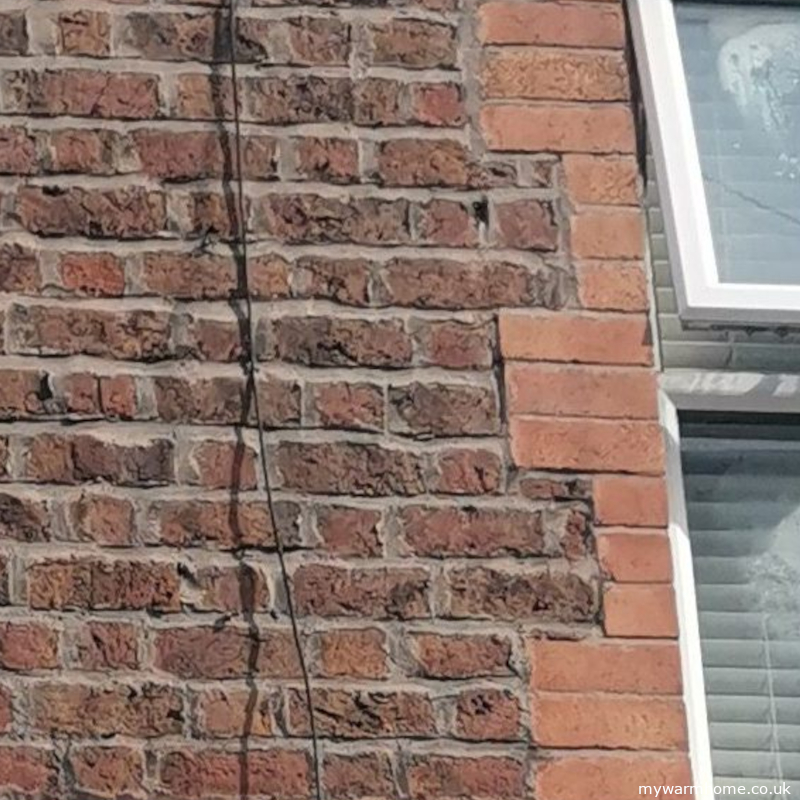
    Over the years, many homes have been layered with materials like non-breathable paints, renders, pebble dashing, modern plaster finishes, and wallpapers. These additions can interfere with how the property breathes and manages moisture throughout the seasons. Addressing these complexities is essential when planning an insulation retrofit to ensure a balanced and effective outcome.

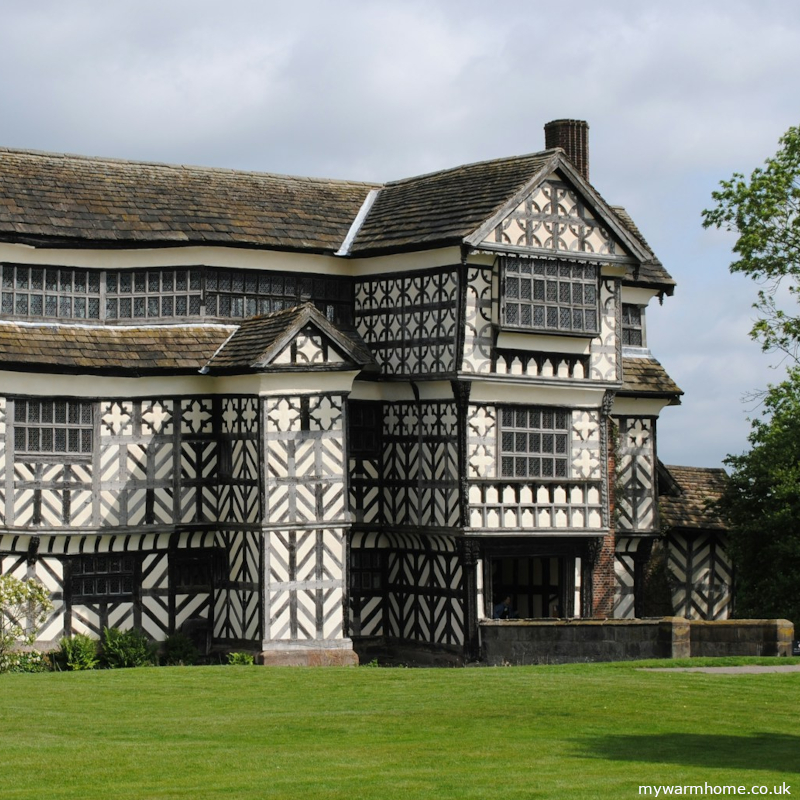
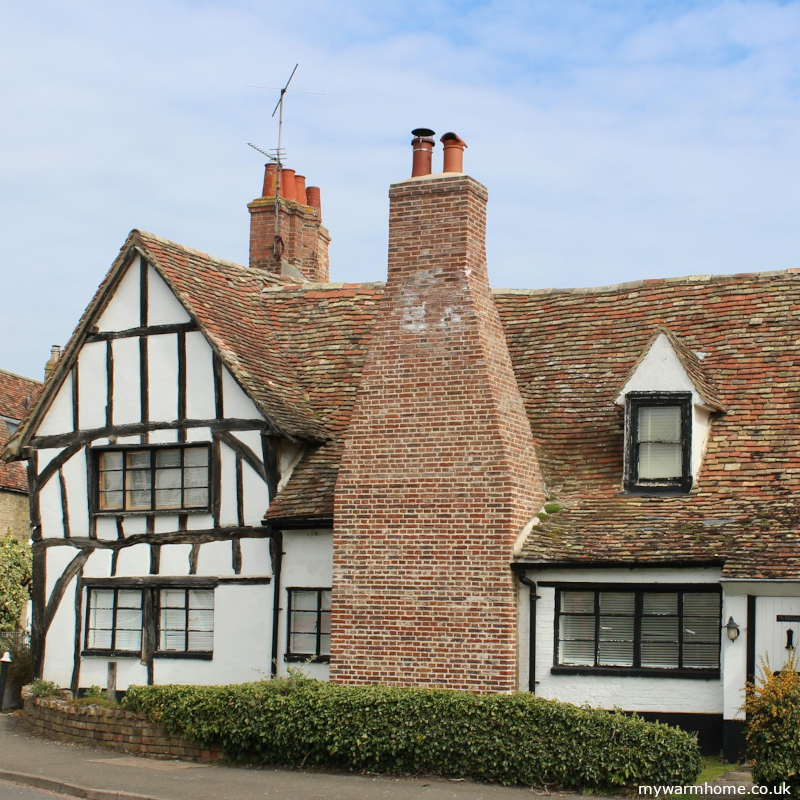
    1300-1700 (Tudor era).

    Timber-framed houses with thatched or tiled roofs were common in the early days (13/17th century), especially in rural areas. Vernacular techniques used local materials like timber, stone, or brick, varying by region.

    Wealthier homes, particularly during the late 15th to early 17th centuries, featured brick, stone, steep gable roofs, and large chimneys. These types of properties need specialist insight when looking at a retrofit plan, as in most cases they will be of a significant interest and need an organic way to control moisture. The National Trust and English Heritage have some great information on the Tudor era.

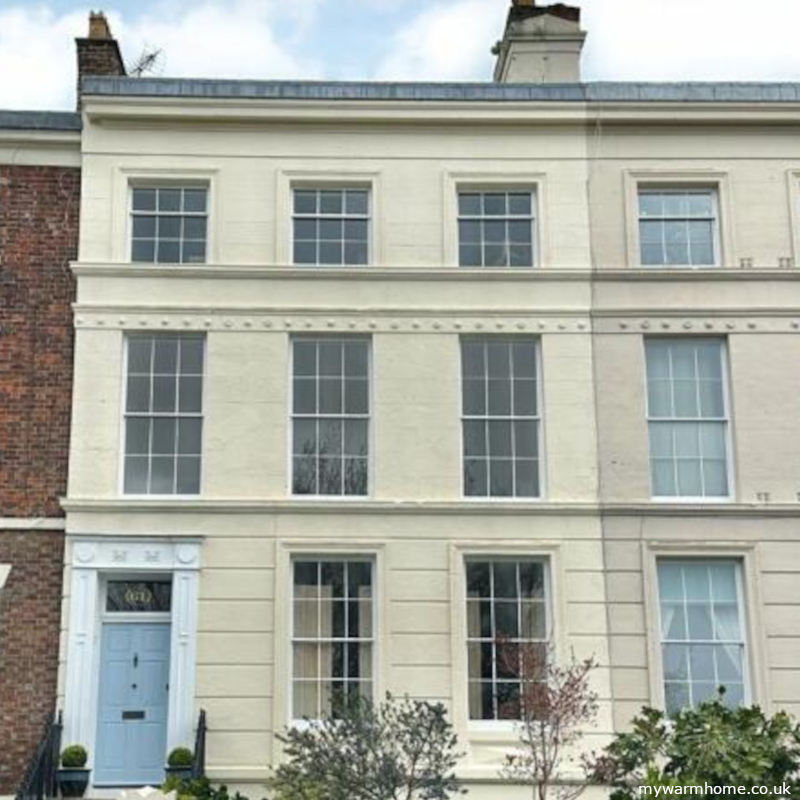
    1714-1837 (Georgian era).

    Georgian architecture emphasised symmetry, proportion, and classical features, with terraced town houses becoming widespread in urban areas. Influenced by Palladian design (think the Royal Crescent in Bath), homes often had brick exteriors, sash windows, and decorative cornices. Rooms had high ceilings on 1st and 2nd floors and were also spacious. These properties like earlier techniques again need special attention and greater understanding when proposing a retrofit plan.

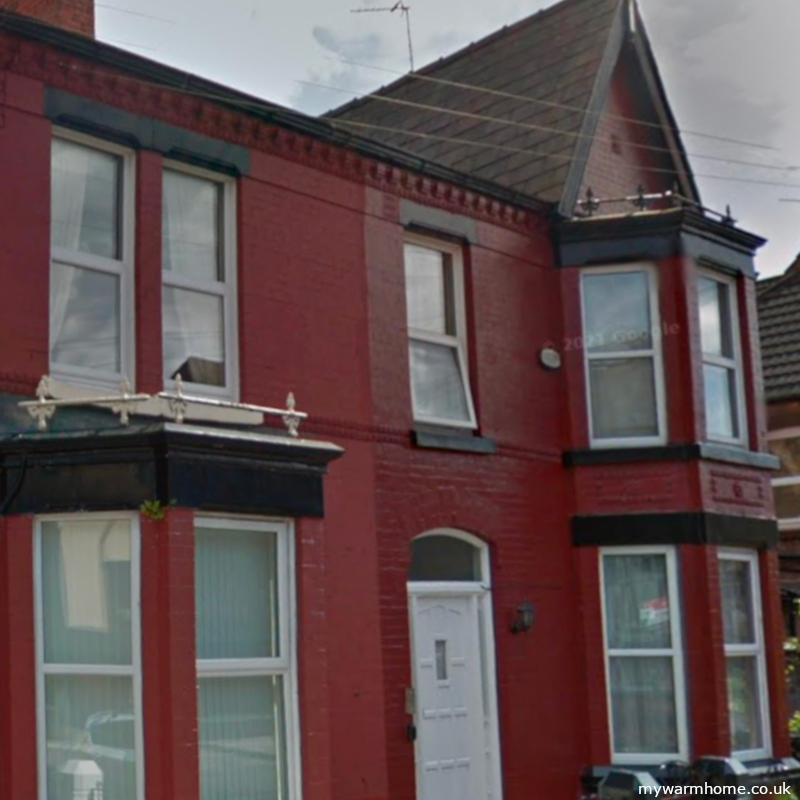
    1837-1901 (Victorian era).

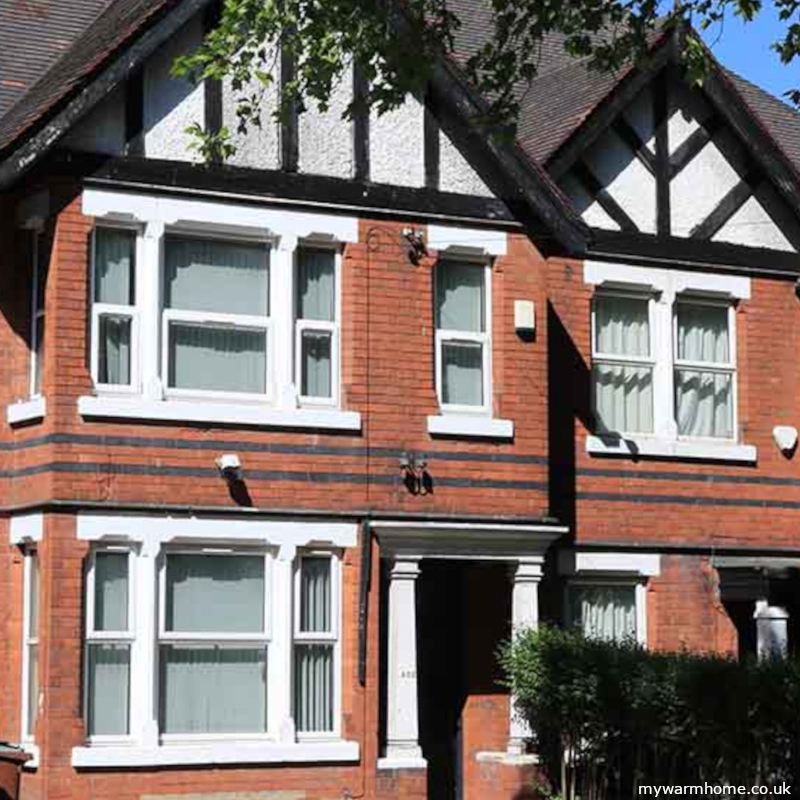
    Rapid industrialization in the Victorian days led to mass construction of red-brick terraced housing for workers, particularly near factories. Middle-class homes were often larger, with ornate detailing like bay windows, plaster coving and decorative gables, reflecting Gothic Revival and Italianate influences. A lot of properties had cellars and coal chutes.

    The first cavity walls were constructed in Roman times, but it was in the Victorian era that cavity walls began to be used again, especially along the coast where properties would have high exposure to the elements. 

    1901-1914 (Edwardian era).

    The Edwardian period followed, presenting larger, more spacious houses especially in suburbia reflecting the growing middle classes who wanted space and front gardens. These properties were more in line with the arts and craft movement and had a mix of cavity walls, possibly solid wall, timber framing and bay windows.

    1914 and beyond (entering the modern era).

    After the first world war, the government promoted the “homes fit for heroes” campaign and the Addison act was introduced.
    This act amended the law related to the housing of the working classes, town planning and the acquisition by local authorities of small dwellings. The Act imposed a duty on every local authority to survey housing needs and to make and carry out plans. It also guaranteed a state subsidy.
    The Addison Act was the start of a long tradition in the UK of housing provided by the state for the people.
    Old maps research can help with dating. This era was the birth of council housing and a move from mass private rental.
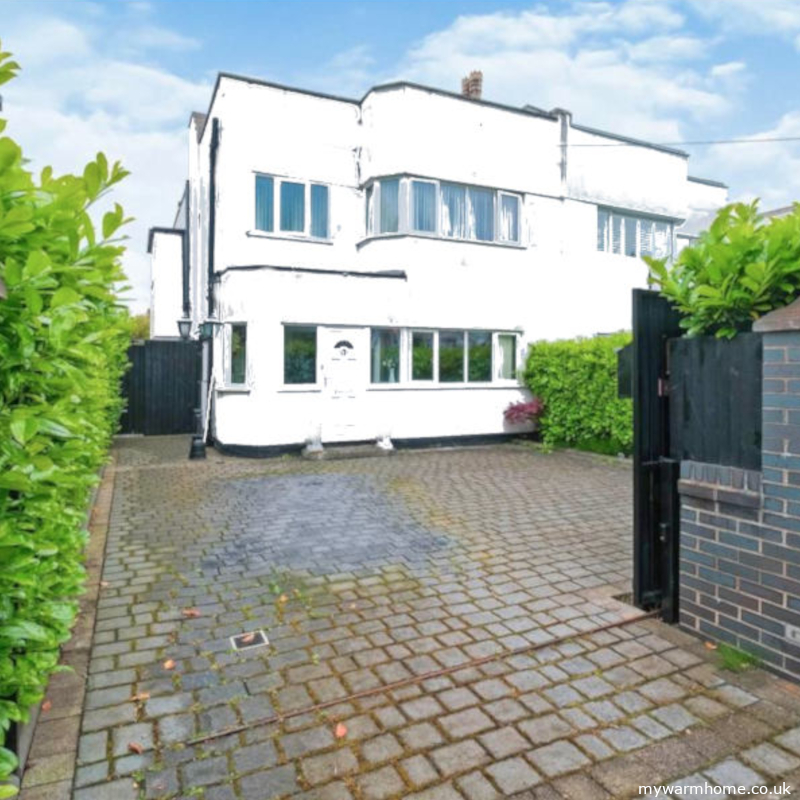
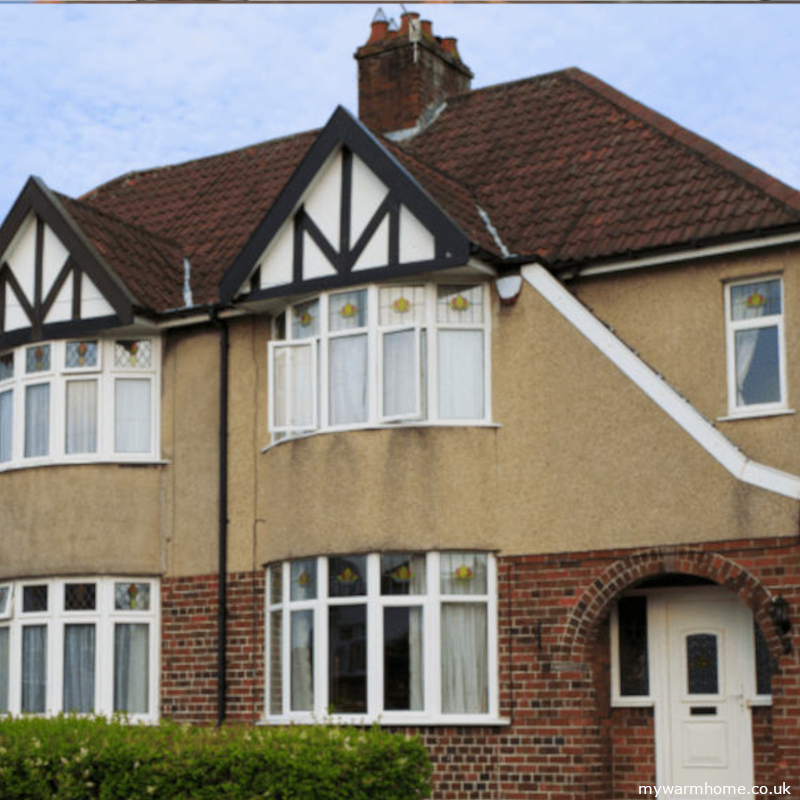
    Properties up to the second world war were a mix of bow windowed (some metal framed), bay windowed, art deco and some extravagant.

    1945-1970 (Modern era).

    After the mass house building of the past 20 years, the second world war then destroyed over 2 million homes. Most of the homes destroyed, and those left standing, still had outside lavatories and were heated by solid fuel. The councils began to build large estates and prefabricated houses to provide social housing to alleviate the housing crisis. This developed into high rise blocks that were built with steel, blocks and poured concrete.

    1970-Present.

    As ownership was encouraged by the government at the time, a lot of the cavity wall built council houses were now moving to private ownership. At the same time large out-of-town estates were being built by private developers and these too were mainly cavity wall (with no insulation). In recent years, there has been renewed focus on sustainable building and the development of high-density housing in urban areas due to rising property prices, population and environmental concerns. Mixed-use developments and flats have become more common in city centres. 

    Types of construction.

    UK homes are typically classified into three different types of wall construction.

    • Solid Wall.
    • Cavity Wall.
    • Non-Standard Construction (System-Built).

    Identifying the type of construction is essential for determining the best approach to installing insulation and controlling moisture.

    Solid Wall.

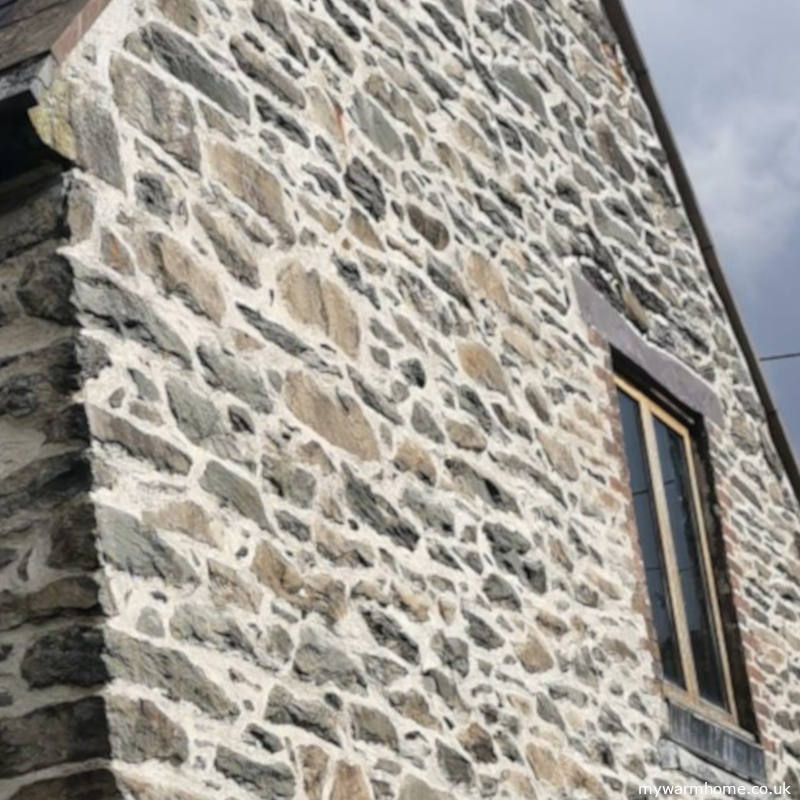
    Usually found in homes built before the 1920s. No cavity between the walls.
    Construction pattern (Flemish, English, common). Can vary in wall thickness from single brick at 150mm, to stone up to 500mm or more!
    Insulation Approach. Internal Wall Insulation (IWI). Insulation boards or stud walls filled with insulation material are installed on the inside of the external walls. More detail in the relevant insulation section. 
    External Wall Insulation (EWI). Insulation material is fixed to the outside of the property and then covered with a protective render or cladding. More detail in the relevant insulation section.

    Cavity Wall.

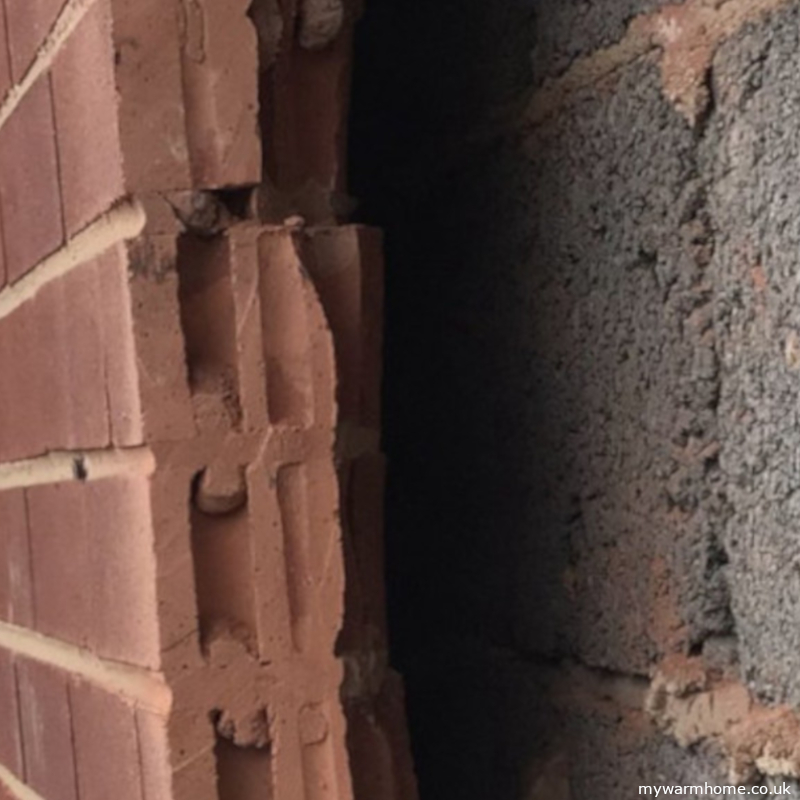
    A cavity wall construction property has a cavity between the inner and outer walls. Common in homes built from the 1920s onwards. Consists of two parallel walls (inner and outer leaves) with a gap (cavity) in between.
    Originally, the cavity was designed to prevent moisture penetration, not for insulation. Cavity ties (what join the two leaves together) were either stone or later made of metal.

    Insulation Approach. Cavity Wall Insulation (CWI). The cavity can be filled with insulation materials such as polystyrene beads, foam, or mineral wool. This is done by drilling small holes in the external wall and injecting the insulation. More detail in the relevant insulation section.

    Non-Standard Construction Houses (System).

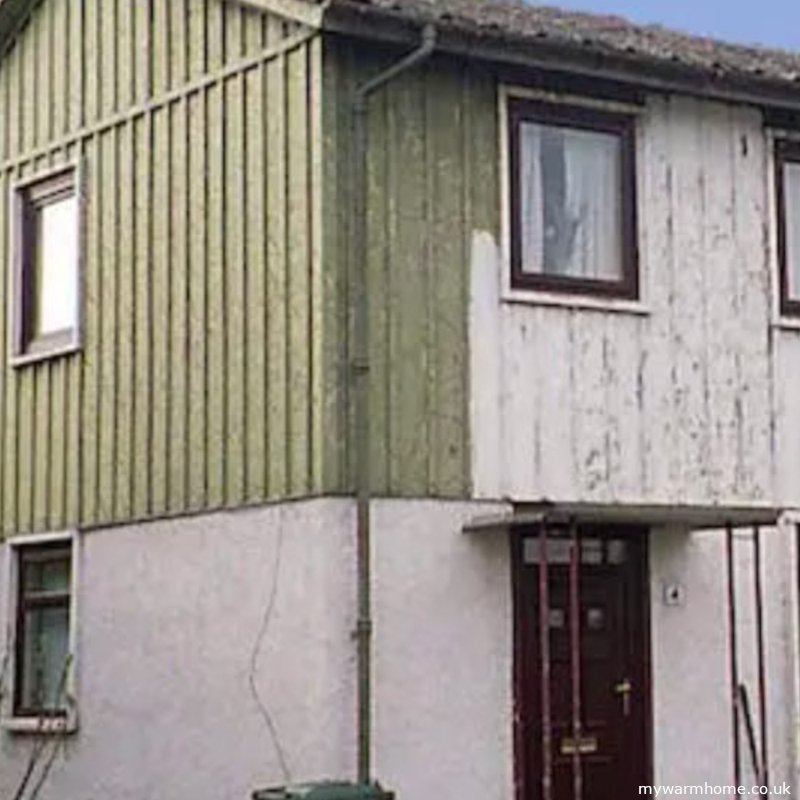
    A non-standard construction house is any house that is not built of traditional materials such as brick or stone. These properties use alternative materials and construction methods.

    Timber Frame.

    Houses with a wooden structural framework, often with external cladding.

    Advantages. Quick to construct, flexible design.
    Considerations. Potential issues with moisture and decay if not properly maintained.

    Concrete Construction.

    Houses with block concrete or poured, typically with external cladding.

    Precast Concrete. Large concrete panels or blocks assembled on-site.
    In-Situ Concrete. Concrete is poured into frameworks directly on-site.

    Advantages. Strong and durable.
    Considerations. Potential for thermal bridging, can be difficult to insulate.

    Steel Frame.

    Structural framework made of steel.
    Advantages. Strong and lightweight, allowing for large open spaces within the building.
    Considerations. Can be prone to corrosion if not properly protected.

    Prefab (Prefabricated) Housing.

    Sections of the house are manufactured off-site and then assembled on-site.
    Advantages. Rapid construction, consistent quality.
    Considerations. Joint integrity and insulation can be challenging.

    Airey Houses.

    Prefabricated concrete post-war homes were named after Sir Edwin Airey, who designed them.

    Advantages. Quick to construct.
    Considerations. Many have since deteriorated and require significant maintenance or replacement.

    Wimpey No-Fines.

    Constructed with concrete made from large aggregates and no fine particles, designed by the construction company Wimpey.
    Advantages. Strong and provides good thermal mass.
    Considerations. Difficult to retrofit with insulation.

  • MPAN and DNO.

    MPAN and DNO.

    Meters need to be equipped with a unique reference to allow the collection of bills.

    MPAN (Meter Point Administration Number) sometimes called an “Electricity Supply Number” is a unique 12-digit number that identifies the specific electricity supply point for a property in the UK. It’s used by electricity suppliers and network operators to ensure energy is correctly tracked and billed.

    DNO (Distribution Network operator)
    Is a company that owns and manages the local infrastructurelike power lines, underground cables, and substations that deliver electricity to homes and businesses. Unlike your energy supplier, which sends your bill, the DNO is responsible for maintaining the physical network, fixing power outages, and handling new connections.

    What an MPAN number does.

    It tells energy companies exactly where electricity is delivered, similar to an address for your power connection.
    It will appear on your electricity bill and will usually be found in a box labelled “MPAN” or “Supply Number,” typically in the bottom section of your bill.
    This number is issued by your local Distribution Network Operator (DNO)
    Each DNO manages supply points in its region.

    What is a DNO?

    Across the UK, the electricity network is separated into individual regional areas, with each regional electricity grid controlled by the local Distribution Network Operator (DNO). Each regional grid is connected to the main National Grid.
    Within their respective areas, each DNO controls and operates substations that transmit electrical power to all users, including homes and businesses. When we generate power through solar, or we are taking from the network with the likes of heat pumps, the DNO needs to make sure we are not sucking too much power or pushing too much power back down the power lines.

    Who are the UK’s DNOs?

    Energy Networks Association, highlights how the UK’s electricity network is divided. The seven DNOs are as follows: 

  • Allowing Homes To Breathe.

    Allowing Homes To Breathe.

    When we insulate or upgrade a property, the original construction is just as important as the finished result.

    Trying to achieve the unachievable often leads to failure and when it comes to improving our homes, that’s especially true if we ignore how they were originally built.

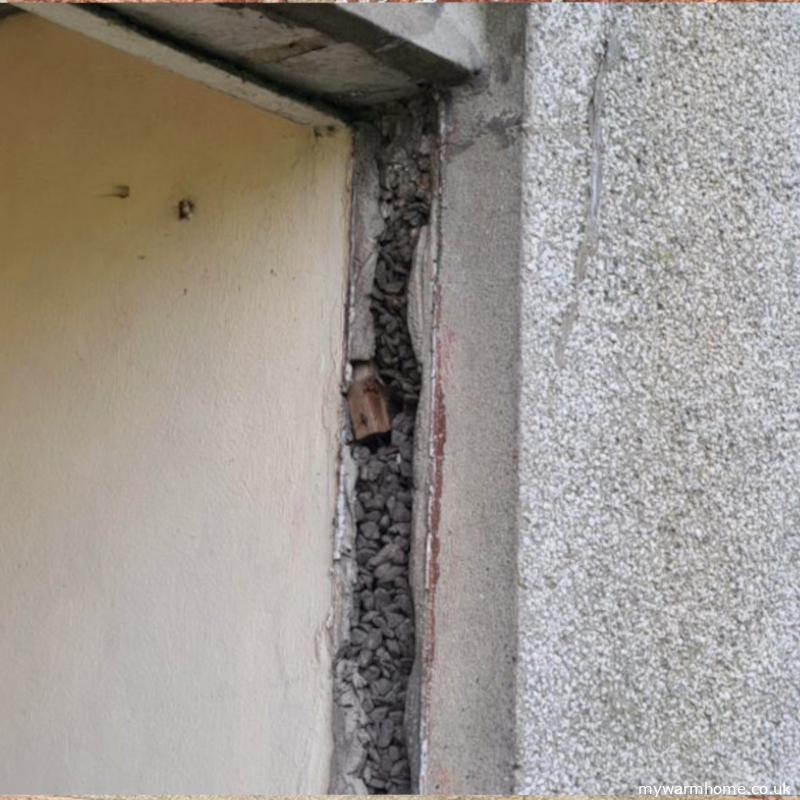
    When we insulate or upgrade a property, the original construction is just as important as the finished result. Over the years, insulation has been added to homes that should never have been insulated, or where the wrong type of insulation was used entirely.

    Old Homes Were Built to Breathe.​

    A typical Victorian house built around 1900 was designed very differently to the homes we build today.

    • Foundations were modest, often sitting on clay or mixed ground.
    • Damp courses were made from slate, bitumen, or engineering brick.
    • Mortars, plasters, and paints were lime-based, fully breathable.
    • Windows were single glazed timber-framed, and floors were usually suspended timber.
    • Each room had a fireplace, creating natural airflow through the chimneys.
    • And there were gaps, many gaps around windows, doors, floors etc.

    Back then, heating revolved around open fireplaces burning solid fuels like coal and wood. Fireplaces not only warmed the room but also provided essential ventilation, drawing moisture and stale air out of the house.

    Many homes even shared a single heat source, cooking in the kitchen typically provided much of the warmth and recreation.
    These homes were designed to breathe naturally, to dry out during warmer months and absorb some moisture during winter.

    When we insulate or upgrade a property, the original construction is just as important as the finished result. Over the years, I’ve seen insulation added to homes that should never have been insulated, or where the wrong type of insulation was used entirely.

    Today, the market is flooded with products, installers, and most of all funding.
    It’s easy to get swept up in the promise of “free” home upgrades, especially when companies that once specialised in one trade now offer everything from solar panels to external wall insulation. But not every measure suits every home.

    Modern Living, Modern Heating.​

    Fast-forward over a century, and everything has changed.
    We’ve sealed, insulated, and upgraded our homes with new materials, plastic membranes, synthetic renders, dense boards, foams, and chemical coatings.
    We’ve replaced original windows with double/triple glazing, blocked up chimneys, and paved over soak aways (front gardens) for parking. 

    All of these change how our homes manage the movement of heat and moisture.
    We’ve also changed how we heat our homes:

    • Gas boilers became the norm through the mid to late 20th century, offering central heating at the touch of a thermostat.
    • Electric heating followed, from storage heaters to modern infrared panels.
    • Renewable systems are now taking the stage — air source and ground source heat pumps, solar PV, and hybrid systems.

    Each of these heating methods interacts differently with the building fabric.
    For older homes, especially those built before 1930, installing insulation or modern heating without considering breathability can lead to damp, mould, and even structural damage.

    Why Every Home Needs a Tailored Approach.

    Before adding insulation or changing your heating system, it’s essential to understand how your home was meant to perform.
    A Victorian solid wall house behaves very differently from a modern cavity wall home, and what works brilliantly for one can cause real problems for the other.

    The Key to a Warm, Healthy, Efficient Home.​

    When upgrading, the goal isn’t just efficiency, it’s balance.
    We need to make homes warmer and greener without disrupting how they naturally manage moisture and airflow.

    By respecting your home’s original design, using the right materials, and combining insulation with proper ventilation, you can achieve comfort, efficiency, and longevity.

  • Thermal Values explained.

    Thermal Values explained.

    Some quick values.

    U-values for existing dwellings.

    • Roofs: 0.16 W/m²K
    • Walls: 0.30 W/m²K
    • Floors: 0.25 W/m²K

    U-values for windows and doors.

    • Doors with over 60% glazing: 1.2 W/m²K
    • Other doors: 1.0 W/m²K, with a limiting value of 1.6 W/m²K
    • Replacement windows: 1.4 W/m²K or a B for its window energy rating (WER)

    Insulation basics.

    When insulating our homes, there are crucial factors to consider, ensuring optimal energy efficiency, comfort, maintaining moisture balance and compliance with building regulations.
    Effective insulation can significantly reduce energy costs, enhance indoor comfort, and contribute to environmental sustainability. However, selecting the right insulation involves more than just picking a material off the shelf.

    Key considerations include understanding thermal values, moisture control, wall types, historical context and the specific properties of different insulation materials.

    By carefully evaluating these aspects, homeowners can make informed decisions that suit their unique needs and conditions, ultimately creating a well-insulated, energy-efficient living space. 

    The first approach to make our homes warmer and more sustainable is to insulate before we install or upgrade to a new heating system, this not only allows us to save money* but approaches the property as our own personal ecosystem that we need to understand and maintain. If employing a contractor to install insulation then make sure they have the right qualifications, assurances, insurances and ideally be a member of the National Insulation Authority.

    *Reducing the escape of heat from our properties, reduces the heating load, thus saving on fuel.

    Types of insulation.

    Insulation comes in all different shapes, sizes and composition, each performs to a required need and development is ongoing as we try to become more sustainable.

    Below is a very brief list. Each section throughout the site goes into more details.

    • Wall insulation. Can be applied, sprayed, filled, fixed and even wall papered! 
    • Floor insulation. Can be fitted, laid, filled and even sprayed by robots.
    • Loft insulation. Can be fitted, sprayed or rolled.
    • Pipe insulation. Can be pre fitted, wrapped, sleeved, waterproof and fireproofed.
    • Flat roof insulation. Can be laid, sprayed.

    Insulation can come as closed cell and open cell. Each section will go into more detail.

    Thermal Values.

    All insulation should have details of its R-value either on its packaging or specification information.
    By having the details of the R-Values, you can work out the U-values, which you usually need for calculating the building regulation compliance thresholds.

    R-Value.

    Definition. The R-value measures the resistance of a material’s thermal resistance. It’s very much like a TOG value we have with sleeping bags and duvets! 
    Higher Is Better. The higher the R-value, the better the material insulates.
    Usage. Used to rate the effectiveness of insulation materials. Commonly seen in products like fibreglass batts, loft roll insulation, foam boards, and spray foam insulation.
    Units. Typically, measured square meters Kelvin per watt  (m²·K/W)

    U-Value.

    Definition. The U-value, also known as thermal transmittance, measures how well a material or building element conducts heat (or insulates). It is the rate of heat transfer through combined materials or a structure.
    Lower Is Better. The lower the U-value, the better insulation.
    Usage. Used to rate the effectiveness of combined insulation and materials.
    Units. Typically measured in watts per meter per degree Kelvin (W/m²·K).

    K-Value.

    Definition. The K-value, also known as Lambda (λ) measures how well a material conducts heat. It is the rate of heat transfer through specific materials.
    Usage. Used to rate the effectiveness of materials, mainly used by material scientists and designers of products used in the building industry. 
    Units. Typically measured in watts per meter per degree Kelvin (W/m·K).

    Why is R-Value Important?

    Higher R-value means better insulation, which helps keep your home warmer in the winter and cooler in the summer. This can lead to lower energy bills because heating and cooling systems don’t have to work as hard.

    Comparing two insulations examples: 

    • 100mm mineral loft roll: Has an R-value of 2.50. (earthwool etc)
    • 100mm PIR rigid board: Has an R-value of 4.30. (kingspan etc)

    Rigid PIR boards can be installed at a reduced thickness, it insulates better because it has a higher R-value.

    Why is U-Value Important?

    The U-value, also known as thermal transmittance, measures how well a material or building element conducts heat.
    It is the rate of heat transfer through combined materials or a structure. The U-value is expressed in units of watts per square meter per degree Kelvin (W/m²·K).

    The U-value represents the overall heat transfer coefficient of an element, whether it be insulation, building fabric, or even air. It is calculated as the *reciprocal of the total thermal resistance (R-values) of all layers within the element.
    Lower U-values indicate better insulation performance. When we look at building regulations, it is usually the U-Value that needs to be met.

    Choosing Insulation.

    For a space with limited depth, like a suspended timber floor with 125mm joists we need to look at insulation products with a higher R value but a consideration to thickness, PIR boards would be a better choice for underfloor insulation because it provides better insulation in a thinner layer and would fit within the 125mm joists to meet regulations.
    If there’s more space, let’s say 250mm joists, mineral wool could be a good option, even though it needs to be thicker to meet the same insulation standards, it’s easier to fit and cheaper. 

    We may not be able to physically fit insulation around window reveals and doorways due to openings and possibly fire regulations, so thinner materials may need to be used like Aerogel. The insulation choice will usually be determined by cost and system design, but also by the makeup of the space we are trying to insulate, especially with older traditional buildings. 

    Understanding Heat Resistance.

    Everything around us has some resistance to heat transfer. The R-value is a way to measure this resistance, helping us choose the right materials to keep our homes comfortable and energy-efficient.

    How to calculate.

    To calculate the U-value of a building element, sum up the R-values of each layer and then take the reciprocal of the total resistance: 

    This process applies to all insulation materials, although U-value calculations can become more complex with multiple materials and if external / internal temperatures are involved.
    For example, walls and floors consist of various *layers with differing properties, these will require consideration of each layer’s R-value and any air gaps present. Additionally, noticeable temperature differences in different parts of the country must also be taken into account. A basic bit of maths should give you an idea what should and could be installed.

    * different layer examples are, wood, plasterboard, plaster coat, brick, thermal brick, air etc.

    Practical Example.

    Let’s consider insulating under a suspended floor to meet a regulation that specifies a U-value of 0.25 W/m²K.
    Using mineral loft roll with an R-value of 2.25 W/m²K and rigid PIR with an R value of 4.30 W/m²K.


    With 100mm of loft roll: 𝑈 value = 1 / 2.25=0.44 W/m²·K (not meeting regulations)
    With 150mm of loft roll: 𝑈 value = 1 / 3.40=0.29 W/m²·K (not meeting regulations)
    With 200mm: 𝑈 value = 1 / (2.25+2.25)=0.22 W/m²·K (exceeding building regulations)
    With 100mm of PIR between joists: 𝑈 value = 1 / 4.30=0.22W/m2KU (meeting building regulations)

    U value calculators are available from most suppliers, some are listed and linked below. Our own will be coming soon.
    Kingspan
    Knauf
    Ecotherm
    Superglass

    Pipe insulation.

    Pipe insulation is applied to pipes for the purpose of the following:
    Regulate temperature. Prevent heat loss or gain.
    Reduce energy costs. Pipework for heating and hot water loves to give off heat, so adding insulation reduces the heat loss, thus saving fuel.
    Frost protection. Pipework in unheated areas and condensate pipework.

    Pipe insulation is commonly used in residential, commercial, and industrial settings, with materials ranging from foam and rubber to fibreglass and mineral wool, tailored to specific applications and environmental conditions. We are only concerned with the pipe insulation we would use in our homes.

    Polyethylene foam pipe insulation.

    (Climaflex)

    Polyethylene foam pipe insulation is a lightweight, flexible material used to insulate pipes. It is made from closed-cell polyethylene foam. This type of insulation is commonly used in residential and commercial plumbing systems to reduce heat loss or gain, lower energy costs, and help prevent pipe corrosion.

    Polyethylene foam pipe insulation is easy to install, typically available as pre-slit tubes that can be wrapped around pipes, and comes in various diameters and thicknesses to suit different pipe sizes and insulation needs. It is particularly well-suited for indoor applications.

    Applications.
    Internal hot and cold water supplies, central heating.

    Class “O” Foam Rubber Insulation.

    (Kaiflex, Armaflex, NMC, Thermaflex)

    Class O foam rubber insulation is a type of flexible insulation material designed for thermal and acoustic applications. It is made from nitrile rubber or similar closed-cell materials, offering excellent thermal resistance, moisture control, and fire safety properties.

    Thermal Insulation. It provides effective thermal resistance, reducing heat loss or gain in pipework, ductwork, and equipment.

    Moisture Resistance. The closed-cell structure prevents water vapour penetration, reducing the risk of condensation and corrosion under insulation (CUI).
    Durability. It can be resistant to UV, ozone, and mechanical damage, ensuring long-term performance in both indoor and outdoor environments. Some products come with full UV protection and some need to be coated.

    Applications.
    Hot water storage pipework, domestic plant rooms, heat pump circuits (internal and external), and external condensates.

    EPDM Foam Rubber.

    (Kaiflex, Armaflex, Zotefoam, Insul-tube by NMC)

    EPDM rubber insulation is ideal for outdoor, high temperature and solar pipework use. The insulation has an in-built UV protective layer, meaning it can be installed outside without any further treatment or coverings.  This insulation is also suitable for high-temperature pipework (up to 150 degrees Celsius), making it ideal for use on solar heating systems.  The insulation is available in 2 metre unsplit tube lengths, long coils and flat sheets in a range of thicknesses.
    Applications.
    Heat pump external pipework, external condensate, solar.

    Other insulations include.

    Mineral Fibre Insulation. Foil Coated – Rock wool (HVAC and ducting)
    Phenolic Foam Insulation.  Foil Covered – Kingspan Kooltherm (HVAC and ducting)
    Thermal ducting made from EPP material is a system of ducts and fittings for domestic mechanical ventilation with heat recovery (MVHR)

    Regulations.

    In the UK, insulation is covered by Part L of the Building Regulations, which focuses on the conservation of fuel and power

    Click here for more on regulations

    PAS 2035 is a comprehensive standard and not a regulation. It was introduced in 2019 as part of the UK government’s commitment to improving energy efficiency in buildings. If work being carried out on a UK funded scheme then the current PAS should be followed aswel as building regulations.

    Click here for more on current PAS

  • Technical side of Heat Pumps.

    Technical side of Heat Pumps.

    Heat pumps move energy so we can heat our homes and provide hot water.

    Consider a heat pump to be a heat mover, not a heat maker.

    The technical side of heat pumps can be somewhat confussing as grasping the idea that we create heat from cold air still baffles most of us. Hopefully this section will shed some light and hep with understanding. We also include some regulations and the “best practices”.

    The Science.

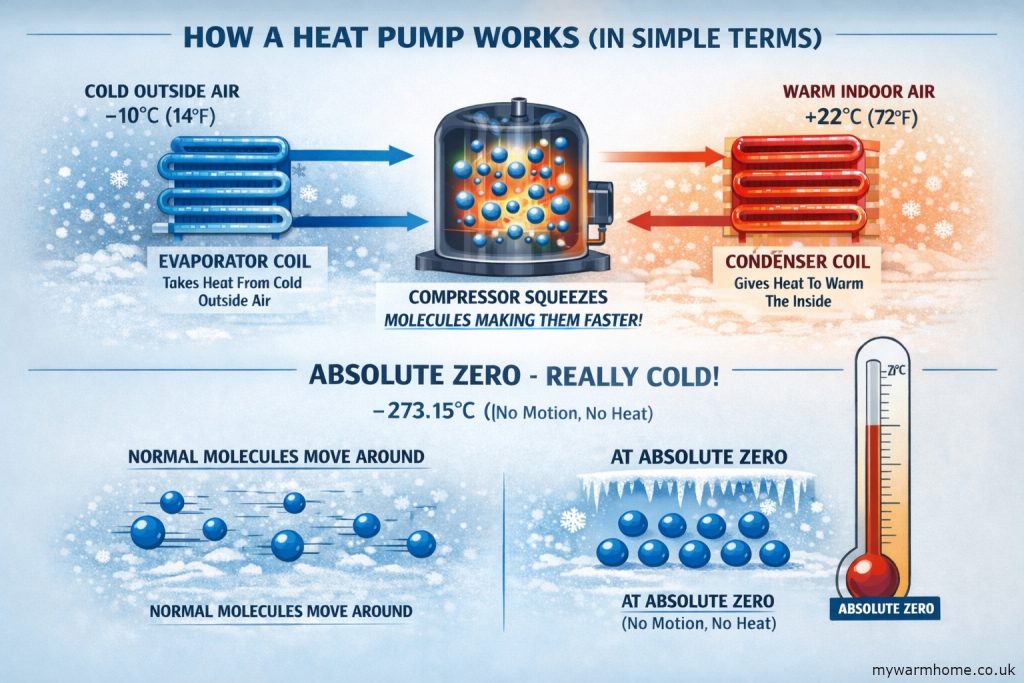
    To understand how heat pumps work, we need to cover some basic physics. At a temperature of 0°C (273 K) and a pressure of 1 atmosphere (average sea level pressure), water freezes.

    This condition is known as “Standard Temperature and Pressure (STP)”. While temperatures can drop below 0°C, the theoretical lowest possible temperature is called absolute zero.

    At absolute zero (0°K*, -273.15°C, or -460°F), there is no molecular motion and no heat energy within the medium.

    This understanding highlights an important fact: even when it feels freezing outside, the air, water, and ground still contain heat energy. 

    The key is finding a way to extract that heat and transfer it to a usable medium, such as radiators.
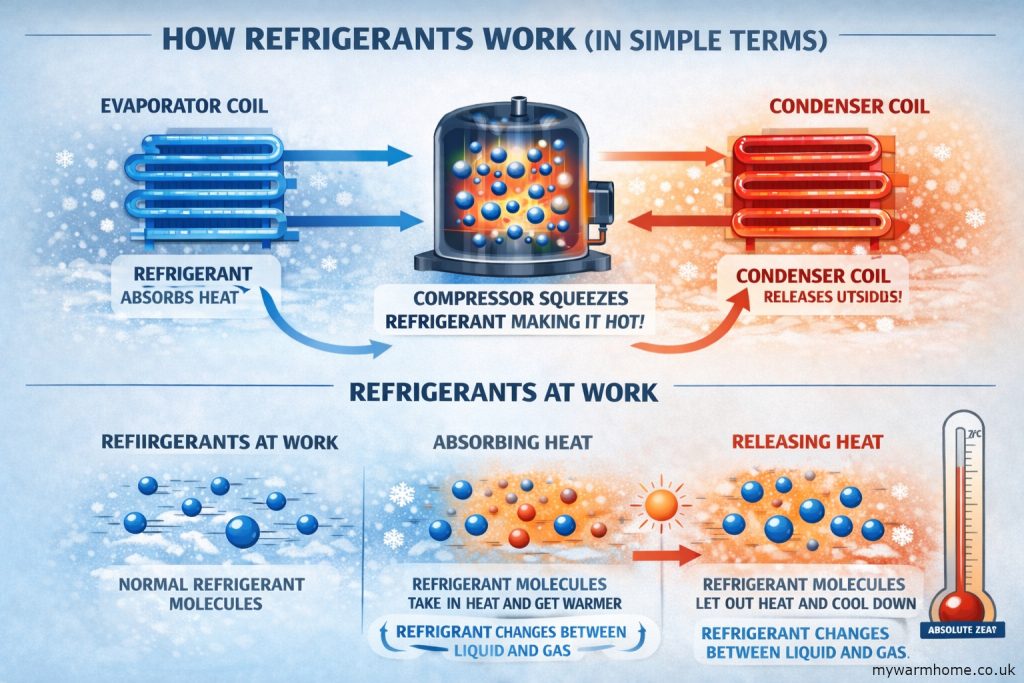
    This is where refrigerants come into play. Instead of water circulating within the heat pump (like we would have in a gas boiler), a refrigerant (see below) is used.

    These refrigerants absorb heat from the outside environment, even at low temperatures, and their temperature increases as they change state.

    Heat pumps come in three main types:

    Air Source. (ASHP)

    Water Source. (WSHP)

    Ground Source. (GSHP)

    How it works! All heat pumps. 

    Heat pumps move heat from the selected source into a building through a refrigeration cycle. Whether its air, ground or water they all work on the same principe but with different installation techniques.
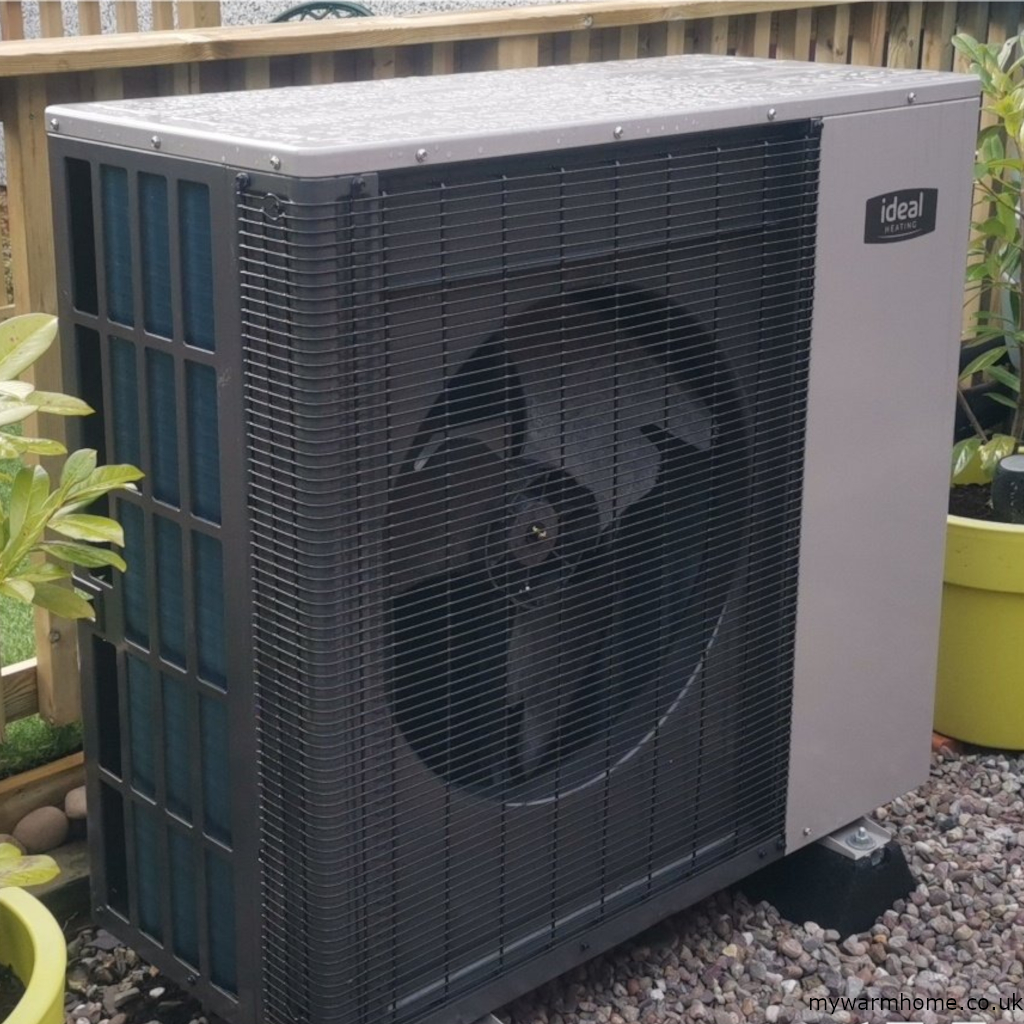
    ASHP use units outside that look like air condition units (they basically are).
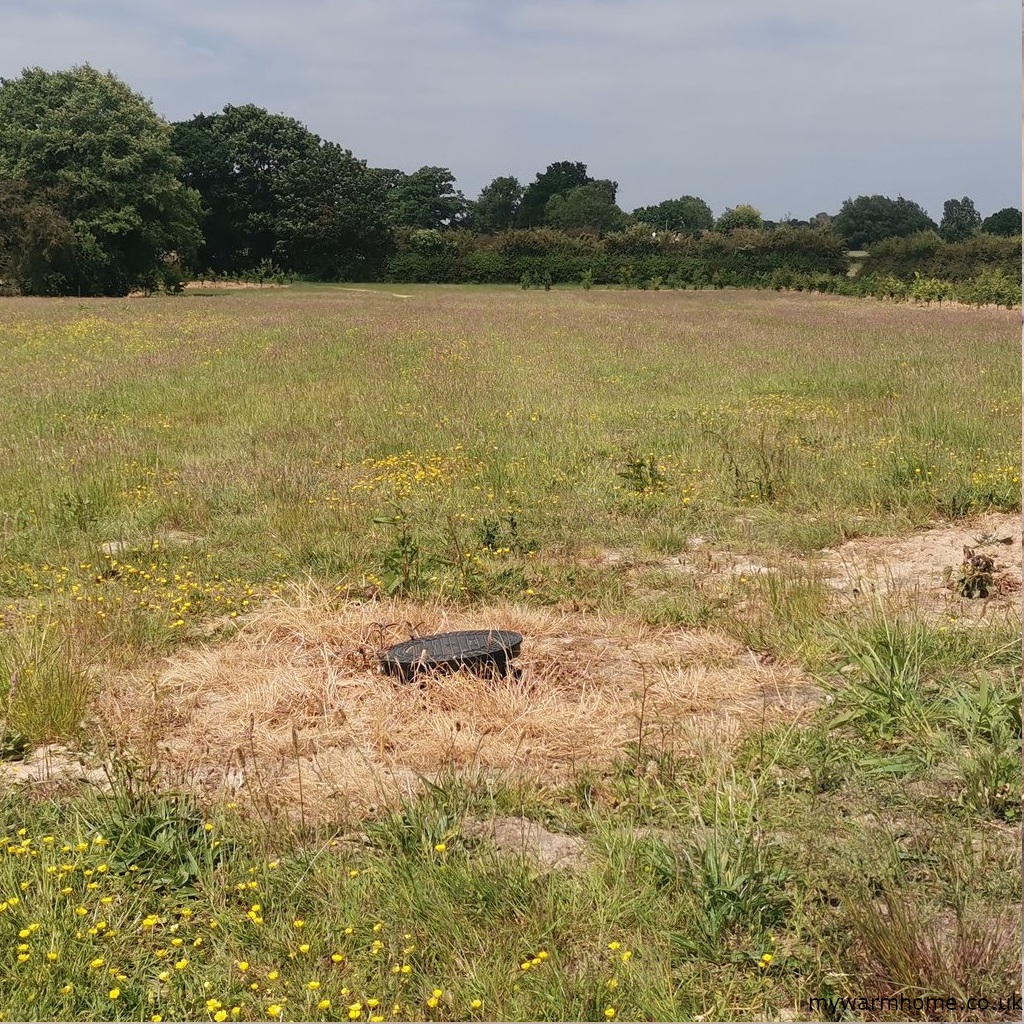
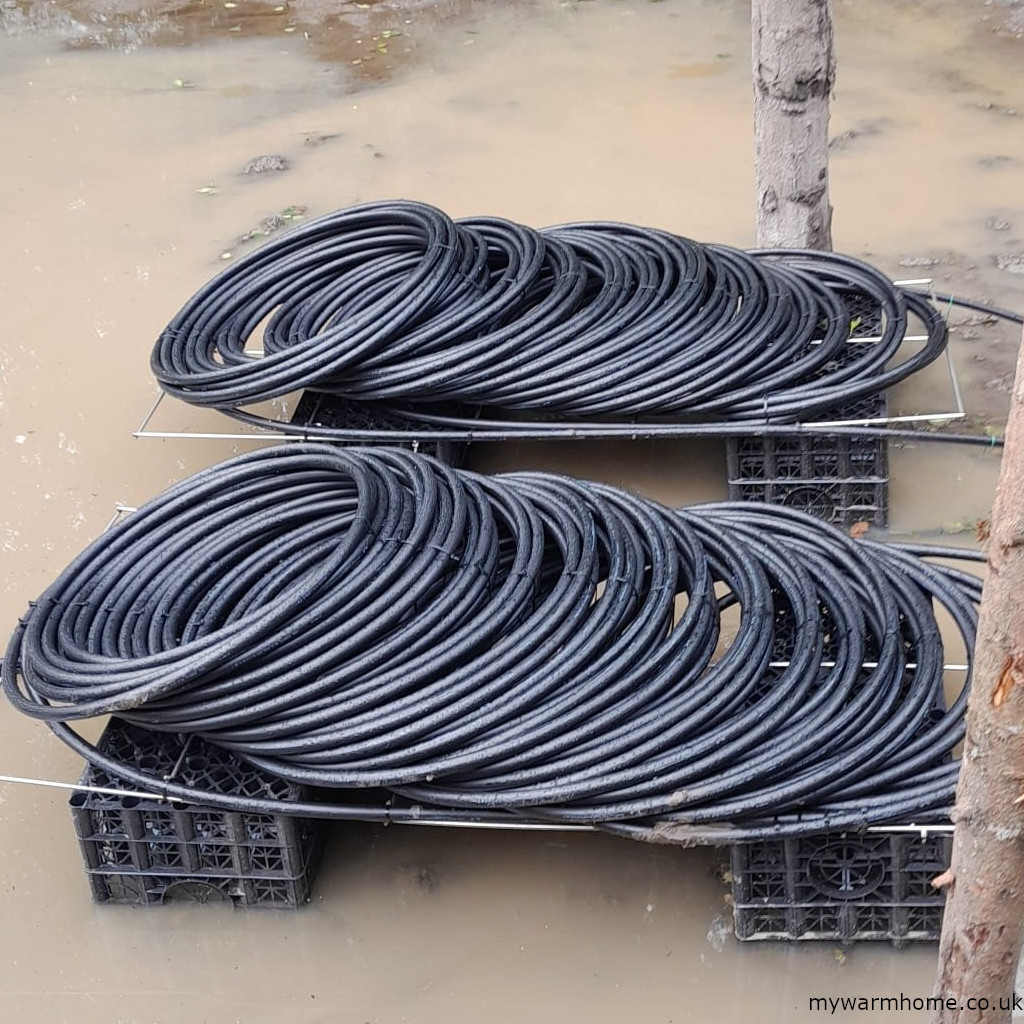
    WSHP use coils or matts submerged in water and GSHP use horizontal loops spread over a open space at a depth of around 2m or vertical loops bored deep at around 100m.
    The heating side is the same and designed to suit the property and personal preferences.

    Properties need to be well insulated to reap the full benefits and cost savings. Radiators should ideally be a size and rating to match the system and property requirements. The delta rating of radiators is becoming more important in the system design.
    Most new builds and retrofitted properties opt for underfloor heating systems, as they naturally run at a lower temperature.

    Now that you know a bit about Delta T, you can see how important it is to size a heating system correctly for your home.
    If the heat pump is too small, it will have to work too hard and may struggle to keep up.
    If it’s too large, it will use more electricity than necessary.
    The aim is to find the right balance between comfort and running costs, something that’s possible with good design and by using the system the right way.

    It works a bit like a fridge in reverse:

    • A fridge pulls heat out of food and dumps it into your kitchen
    • A heat pump pulls heat from outside and dumps that heat it into your home (that’s why the back of a fridge is always warm)

    How it actually warms your house.

    1. Heat is collected from outside (air, ground, or water).
    2. That heat is compressed to raise its temperature.
    3. The warmed heat is delivered to radiators, underfloor heating, blower units, or hot water.
    4. The cycle repeats, quietly and continuously.

    You may ask how can heat energy be in cold water, the ground or cold air? Well thats the confussing part that can be hard to understand. Heat is always around us, even when it feels cold. The air, the ground and water all contain natural heat energy because they’ve absorbed warmth from the sun and the earth over time. Even on a chilly day, there is still energy in the air, it’s just at a low temperature.
    Modern heating systems like heat pumps don’t create heat from scratch; they simply collect this existing, low-level warmth and concentrate it to a higher temperature that can be used to heat your home. So instead of making heat, we’re just capturing and upgrading the heat that’s already there.
    Some heat pumps can be 400% efficient.

    When people say a heat pump is “400% efficient”, it doesn’t mean it’s magically creating energy. It means for every 1 unit of electricity you put in, you get about 4 units of heat out. Abbreviations like “SCOP (seasonal coefficient of performance” and “COP (coefficient of performance)” are used and this is where the % comes from.

    • COP = today’s efficiency
    • SCOP = the yearly average efficiency

    SCOP is the number that really matters for running costs.

    The Different Types of Heat Pumps.

    To determine if a heat pump is suitable for your property, you can consult the UK government’s suitability guide.
    The MCS best practice is here.
    The primary types of heat pumps used in the UK include:

    • ASHP: Air Source Heat Pumps.
    • WSHP: Water Source Heat Pumps.
    • GSHP: Ground Source Heat Pumps.

    A hybrid system is another option to consider, where a fossil fuel-powered boiler (like gas) works alongside a heat pump. This setup can help meet increased heating demands during the colder winter months while still reducing overall reliance on non-renewable energy sources

    Although all heat pumps work on the same principle, they collect heat in different ways:

    • Air Source Heat Pumps (ASHP)
      These draw heat from the outside air using a unit that looks similar to an air conditioner — because it almost is one, just working the other way around.
    • Water Source Heat Pumps (WSHP)
      These collect heat through coils or mats placed under the surface of a pond, lake, or river.
    • Ground Source Heat Pumps (GSHP)
      These use long loops of pipe buried in the ground — either horizontally about 2 metres deep or vertically down boreholes reaching around 100 metres.

    This technology is new to many of us, and it needs to be used a little differently.

    During the heating season, it’s best to control your home’s temperature rather than demand it. In other words, let the system maintain a steady temperature instead of turning it off and on all the time. It’s more efficient (and cheaper) to let the heat pump gently adjust the temperature up or down.
    Most modern systems use outdoor temperature sensors to help with this. These sensors measure the air temperature outside and tell the heat pump how much heat your home is likely to need. On mild days, the system runs at a lower level; when it’s colder, it automatically increases output. This helps your heat pump work in tune with the weather — keeping your home comfortable while using less energy overall.

    Things to consider ASHP (other heat pumps in main section).

    Position

    Away from sleeping and noise-sensitive areas. (newer ASHPs are very quiet).
    Making sure the area around the heat pump is to manufacturers guidance to allow optimum airflow and service needs.

    Condensation removal. 

    Water will come from the unit and can pool. It’s not the same as gas boiler condensate, which can be acidic, so just basic removal to soak away or drain, depending on the manufacturer’s instructions.

    Radiator sizes and pipework. 

    Heat pumps work at lower temperatures, so a bigger surface area, ideally underfloor heating, is beneficial. (see delta T in technical area)

    Insulation of property. 

    The better the wall and loft (or room in roof) insulation, the less heat loss.

    Uninsulated pipework. 

    Bathroom supplies and central heating pipework at the plant should all be insulated. All external pipework should be insulated with a class 0 UV protected insulation.

    Maintenance requirements. 

    Please refer to manufacture guidance as maintenance period may affect warranties. In a ideal world you shoul get external ASHP serviced every year after the heating season. A good clean and check that the unit is in good condition is a must.

    Running costs. 

    What is the average yearly cost to run the heat pump! This can be really important, and research and information from your installer is a must. 

    Heat Pump Running Cost Calculator

    Heat Pump Running Cost

    Daily Cost: £0.00

    Solar matching. 

    As heat pumps operate differently through the seasons, the same goes for solar. If you are having solar PV installed thinking the panels will run the heat pump, then think again. You could try to match the solar generation to the heat pumps output, which could help with running costs.

    Understanding Heat Pump Efficiency: SCOP and COP.

    When looking at heat pumps, you’ll often see the terms COP and SCOP. These are simply ways of measuring how efficiently your system turns electricity into heat.

    COP — Coefficient of Performance.

    For example, a COP of 4 means that for every 1 unit of electricity the heat pump uses, it provides 4 units of heat.
    However, real life isn’t always perfect — temperatures change, systems switch on and off, and conditions vary throughout the year. That’s where SCOP comes in.

    It takes into account:

    • Changing outdoor temperatures as the weather warms and cools.
    • Energy used during standby and defrost cycles.
    • How efficiently the system runs at different power levels.

    In short, SCOP tells you how efficient your heat pump is across the whole year, not just in ideal lab conditions.

    How is SCOP Is Calculated?

    SCOP compares how much heat energy your system produces with how much electricity it uses:

    Example.

    If your heat pump has a SCOP of 4, that means for every 1 kWh of electricity it uses, it provides 4 kWh of heat.
    That’s why people often say a heat pump can be “400% efficient” — it’s not creating energy, just moving it very efficiently.

    Privately installed or funded?

    For any renewable heating project, whether funded privately or through a UK grant scheme, the current best practices, manufacturer’s instructions and relevant building regulations should be strictly adhered to.
    If installed on a UK grant scheme then a quality assurance program that certifies small-scale renewable energy systems and installers need to be followed, currently this is called MCS if insulation is being carried out at the same time and as part of the funding then it must meet the current PAS

    Have a look at the funding area of the site for more information especially the changes to the ECO scheme.

    Installation Guide.

    The manufacturer’s instructions will highlight any regulations that are required. Currently, all electrical regulations need to be followed and documented, as is the MCS checklists if installed on government scheme. Requirements are that properties are well insulated prior to the installation (fabric first approach) and full heat loss calculations are carried out to provide information to install the system to best practice.

    If hot water is being heated in storage tanks by the heat pump then steps need to be taken to protect from bacterial growth. Stored hot water systems connected to heat pumps have cycles to heat the water at given times and a given temperature to stop the growth of Legionella bacteria.

    Electrical certificates.

    The two types of electrical certificates you will come across as a customer who is having any electrical work as part of installing EEM’s (energy efficient measures)

    • Electrical Installation.
    • Minor Works Certificate.

    Electrical Installation Certificate.

    An electrical installation certificate is the type of certificate a customer receives after an electrician has installed one or more new circuits. Other examples include a complete rewire, a replacement consumer unit or an additional consumer unit. Generally, any time electrical work is done at the consumer unit, a new installation certificate will be issued.

    Minor Works Certificate.

    A minor works certificate is issued after an electrician has made an alteration to an existing circuit. Minor works certificates are often used to certify work such as adding additional sockets to an existing circuit or increasing the number of light fittings in a room. It can also be where a fused spur has been installed for an appliance or boiler connection.

  • Health and Safety.

    Health and Safety.

    Where qualified professionals are appointed, their crews should hold the appropriate UK certifications

    Health and safety Basics.

    Health and safety must always be the foremost consideration in any building or home-improvement project. This helps safeguard all individuals on site and protects the property and its surroundings. You should always refer to the most up-to-date UK regulations and statutory requirements, including the Health and Safety at Work etc. Act 1974, the Construction (Design and Management) Regulations (CDM), and relevant Building Regulations, as needed.

    Where qualified professionals are appointed, their crews should hold the appropriate UK certifications, follow industry best practice, and comply with all current legal duties and standards.

    Below, we outline guidance on the typical requirements for both privately funded and government-funded installations.

    Asbestos.

    Asbestos is a naturally occurring mineral that was commonly used in building materials due to its heat resistance, durability, and insulating properties. It can be found in homes built before the 1980s, though it was used in construction and renovation well into the 1990s in some areas. Asbestos is typically found in materials like insulation, roofing, flooring, ceiling tiles, pipes, and even some adhesives.

    When intact and undisturbed, asbestos poses little risk to health. However, if it is damaged or disturbed, such as during renovations or repairs, tiny asbestos fibres can be released into the air. Inhalation of these fibres can lead to serious health issues, including lung cancer, asbestosis (a scarring of the lung tissue), and mesothelioma (a rare form of cancer linked to asbestos exposure).

    If you suspect that your home contains asbestos, it’s crucial not to disturb it and to contact a professional for testing and safe removal if necessary. Below image and reference from the HSE.

    Inside. 

    Asbestos insulating board (shortened to AIB)

    A. AIB around boiler.
    B. Toilet cistern.
    C. Vinyl floor tiles backed with asbestos paper and bitumen adhesive.
    D. AIB or asbestos cement bath panels.
    E. AIB ceiling tiles.
    F. AIB airing cupboard and/or sprayed insulation coating boiler.
    G. Pipe lagging.
    H. AIB partition wall.
    I. Asbestos cement water tank.
    J. AIB behind fuse box.
    K. Textured decorative coating, for example Artex.
    L. Loose fill insulation.
    M. AIB behind fire.
    N. AIB or asbestos cement interior window panel.

    Outside.

    Asbestos insulating board (shortened to AIB)

    1. AIB or asbestos cement soffits and fascias.
    2. Roofing felt.
    3. Asbestos cement roof tiles/slates.
    4. Asbestos cement panels.
    5. Profiled asbestos cement sheeting.
    6. AIB or asbestos cement exterior window panel.
    7. Gutters and asbestos cement downpipes.

    Gas and open flued appliances.

    If the fabric of the property is being improved and open-flued gas appliances exist, then a gas spillage test should be carried out on each appliance by a suitably competent operative. 
    Rules exist that give an average unimproved property a certain amount of leakiness (adventitious air) to allow open-flued appliances to operate safely.
    This all depends on how much fuel burns over a period of time, for example: 7.5kw/hr, 9kw/hr, 6.9kw/hr. You will see this on the data badge of the appliance (gas rating of an appliance here.).

    The more fuel used, the more leakiness is needed. Multifuel appliances are treated in roughly the same way but do not come under gas safe legislations. HETAS and building regulations govern multifuel installations and ventilation.

    This is the reason combustion ventilation is sometimes needed. This allows the air to be replenished (with an open flued appliance we are burning the oxygen in the room that we use to breathe)

    With the introduction of insulation, extraction ventilation should be installed as part of the process, we now have a different factor to add in with gas safety. Extraction fans either pulling or pushing air (PIV) can now effect the performance of the appliance.

    Open flued gas appliances should be checked to prove they are not spilling products of combustion into the property. This is verified by performing a spillage test.

    Part J states. “Extract fans lower the pressure in a building, which can cause the spillage of combustion products from open-flued appliances. This can occur even if the appliance and the fan are in different rooms”.
    Any funded insulation work now includes ventilation upgrades as part of the current PAS, so extract ventilation will be installed. This should have been factored in as part of any ventilation work carried out.
    competent person is required to perform spillage tests.

    Part B, 8(1) of the Gas Safety (Installation and Use) Regulations 1998 states that no person can make any changes to a premises that contains a gas fitting or storage vessel if the changes would compromise the safety of the fitting or vessel.
    This basically means if the fabric of the building (walls, floors, roofs) are being insulated then appliances need to be checked by a suitably competent and qualified person. 

    Electrical.

    Electrics within insulation need to be protected in a way set out by the current regulations. Any high-powered cables that enter insulation either through walls, under floors or within lofts need to be verified as being safe to pass through. If they cannot deem to meet regulations, then they need to be removed out of the insulation or derated. Usually the most common high-powered cables you will find on domestic insulation work will be from main fuse board or through loft space to supply electric showers, electric storage heaters and cooking appliances. Non-fire rated downlights can’t be covered directly with insulation, so fire retardant covers may be required.