
Loft insulation Basics.
Insulating a loft space significantly slows down the rate at which heat escapes from our homes. Since heat naturally rises, the roof becomes the primary area where heat loss occurs. In fact, without insulation, up to 25% of the heat in a home can be lost through the roof. By installing the right amount of insulation and ensuring it is applied correctly, we can drastically reduce this heat loss, leading to better energy efficiency and lower heating costs. Regulations have drastically changed over the years and from the mid 80s when 100 mm of standard itchy insulation seemed to suit we now have up to 300 mm of a much more environmentally substance to satisfy our needs.
Have a look at the installer page for some handy questions to ask.

Health and safety.
You may need specialist advice from trades people and professionals regarding things like,
High amperage cables. Showers, ovens, hob’s and solar installations.
Nesting. Bees, wasps, bats.
Vermin. Rats, mice, squirrels
Asbestos. Vermiculite, flues, fire check boards, loft hatches.
Your installers should pick up most of the above items on the initial pre-installation survey.
As a general rule, high-amperage cables should always be positioned outside the insulation, rather than beneath it. Special care must be taken if there are any nesting bats, as well as bees or wasp nests.
If vermin are present in your loft, installing insulation can create a warm environment that attracts them. Not only can they damage the insulation, but they also tend to gnaw on cables. Additionally, if you notice a strong ammonia (rat urine) smell, be cautious of Weil’s disease.
Consideration and advice will also need to be sought with flues in lofts in case the insulation will interfere with their performance. Some older houses may contain asbestos, which only a trained eye can recognise. Never disturb anything you’re unsure about. The health and safety section has more details.
Installation project.
For any insulation or heating project funded through a UK grant scheme, the current PAS (Publicly Available Specification), best practices, and relevant building regulations should be strictly adhered to. The works should be guaranteed and warranted as part of the current PAS standards, MCS or protected by consumer law which can be a little bit daunting in this area, especially for the privately funded installations. A good guide is here.
Privately funded projects will decide on how to install and what guidelines to follow to suit budget and personal achievements.
A Pre-installation building inspection should be performed on either privately funded or grant funded installations. This should highlight any potential areas of concern and the property’s suitability for the proposed installation.
The current PAS requires Installers to undertake a pre-installation building inspection by the requirements set out in B1-l2 of Table B.1
Loft insulation.
Correct background ventilation. *All rooms with the installation of trickle vents or wall vents if required
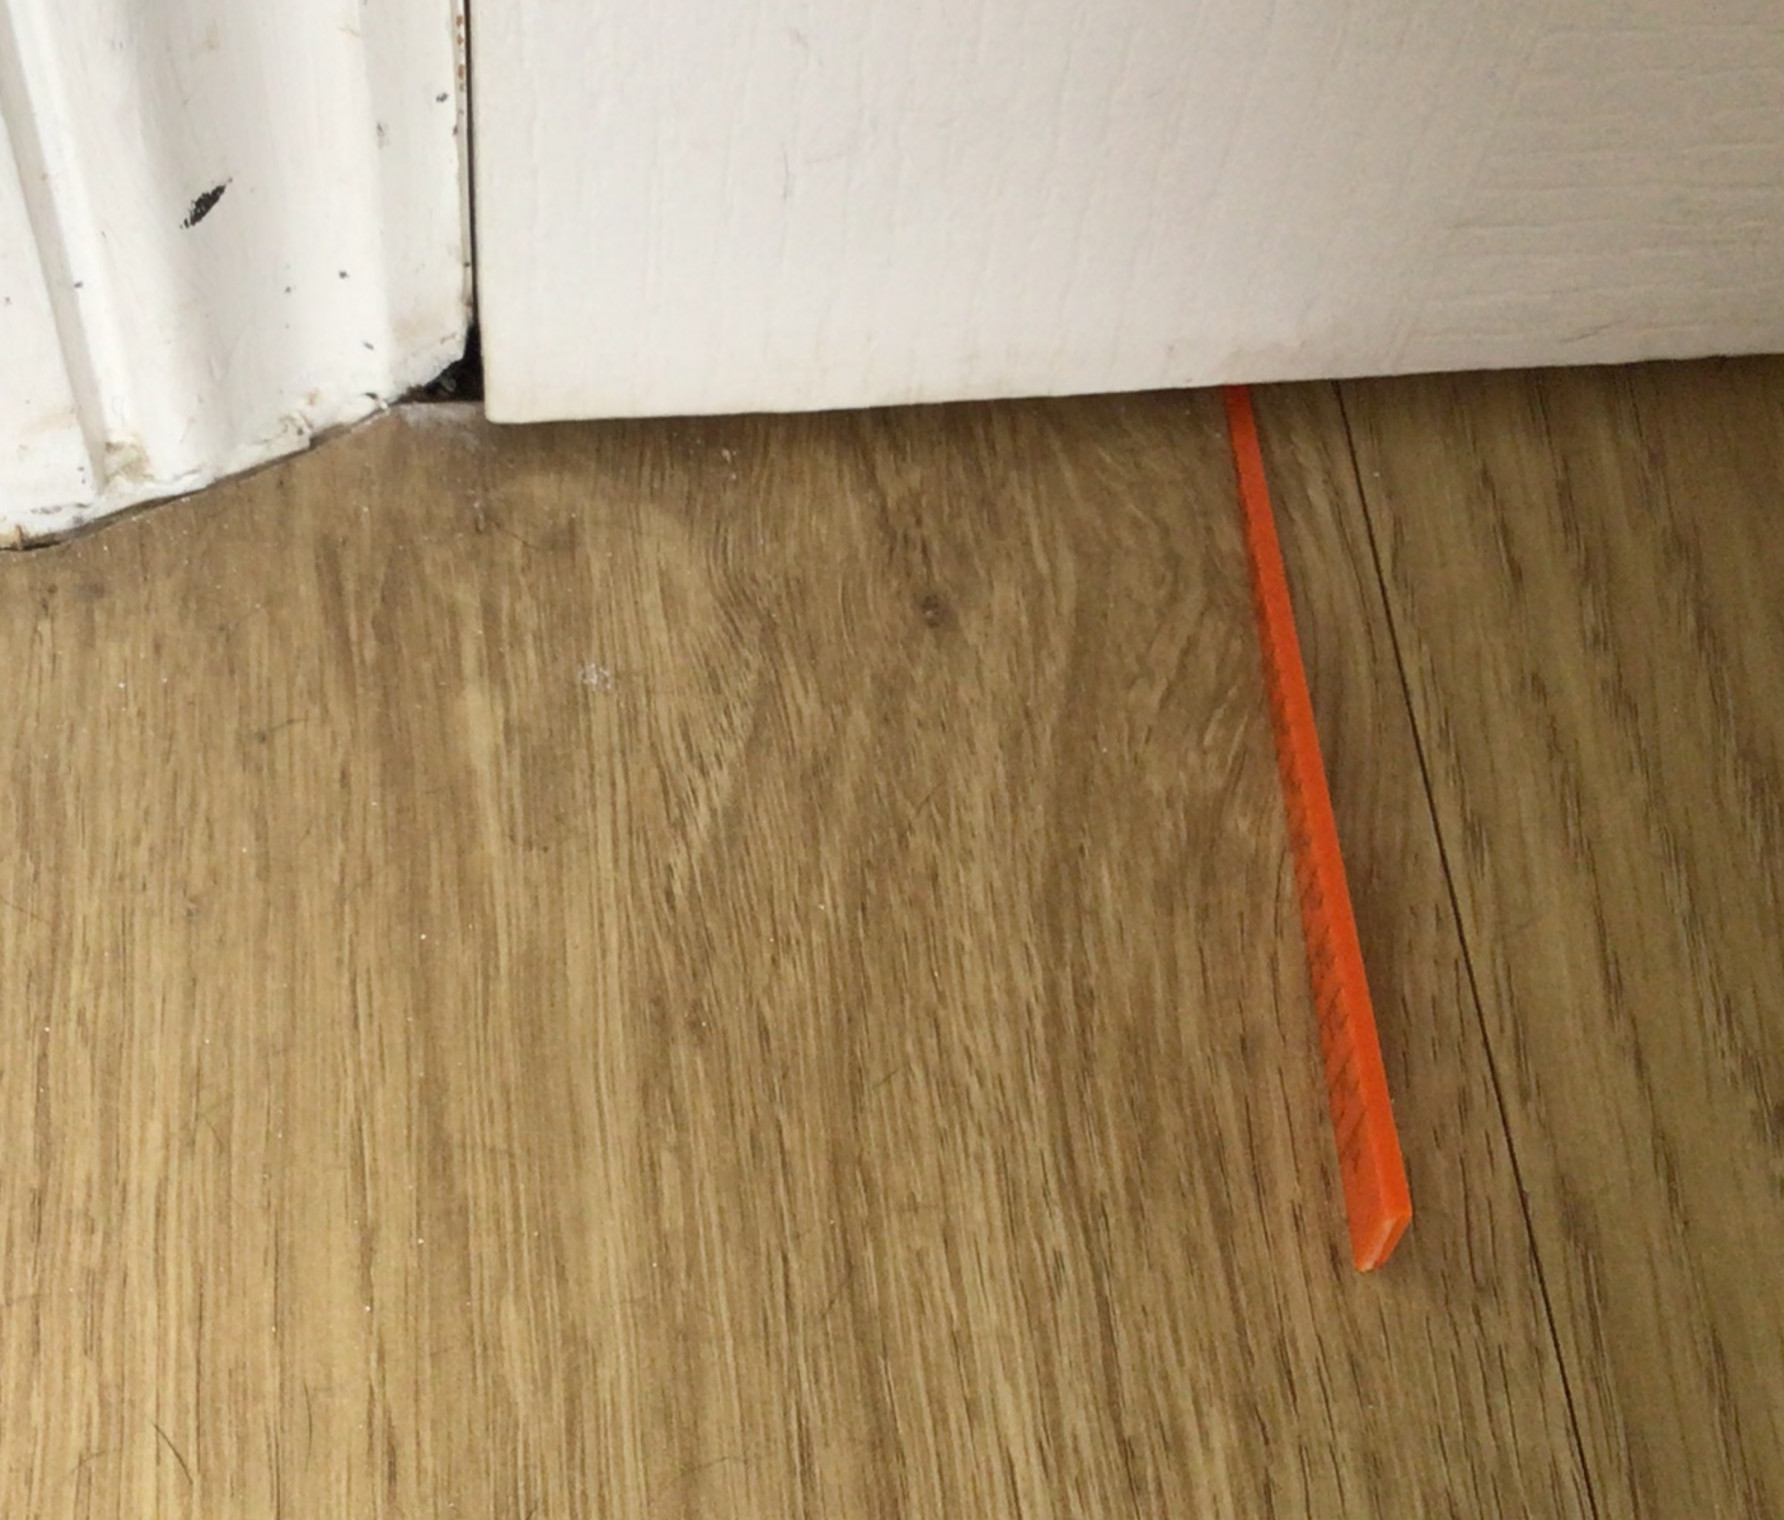
Correct door undercuts. *Undercuts to internal doors allow the free movement of air around the property.
*Testing of the background ventilation pre-installation may allow the installed measure(s) to move forward without the need for door undercuts or trickle vents installed.
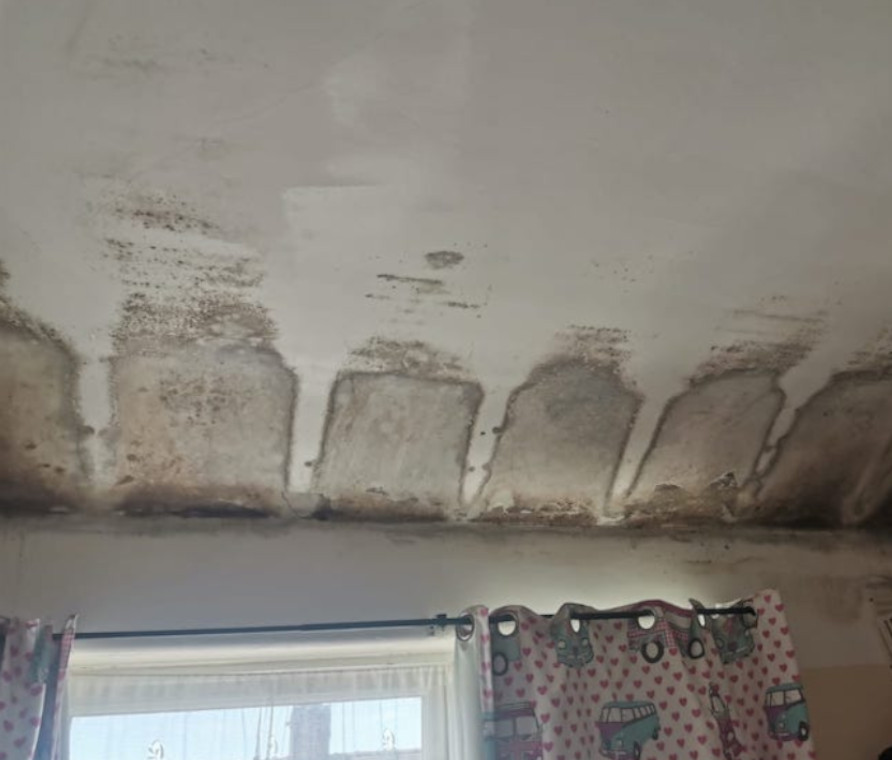
Maintain or improve existing loft ventilation. Soffit vents (they run around the perimeter of the roof (behind the gutters) should not be blocked. If the insulation could potentially cause moisture buildup, then extra or modified ventilation will be required. If a musty smell is present in the loft, then good practice is to improve ventilation.
Correct extract ventilation in wet rooms. Kitchens, bathrooms, WC’s, and utility rooms are all wet rooms.
If extraction exists, then checks need to be carried out by referencing the manufacture’s data or performing an anemometer (testing apparatus) test to confirm extraction rates are being met.
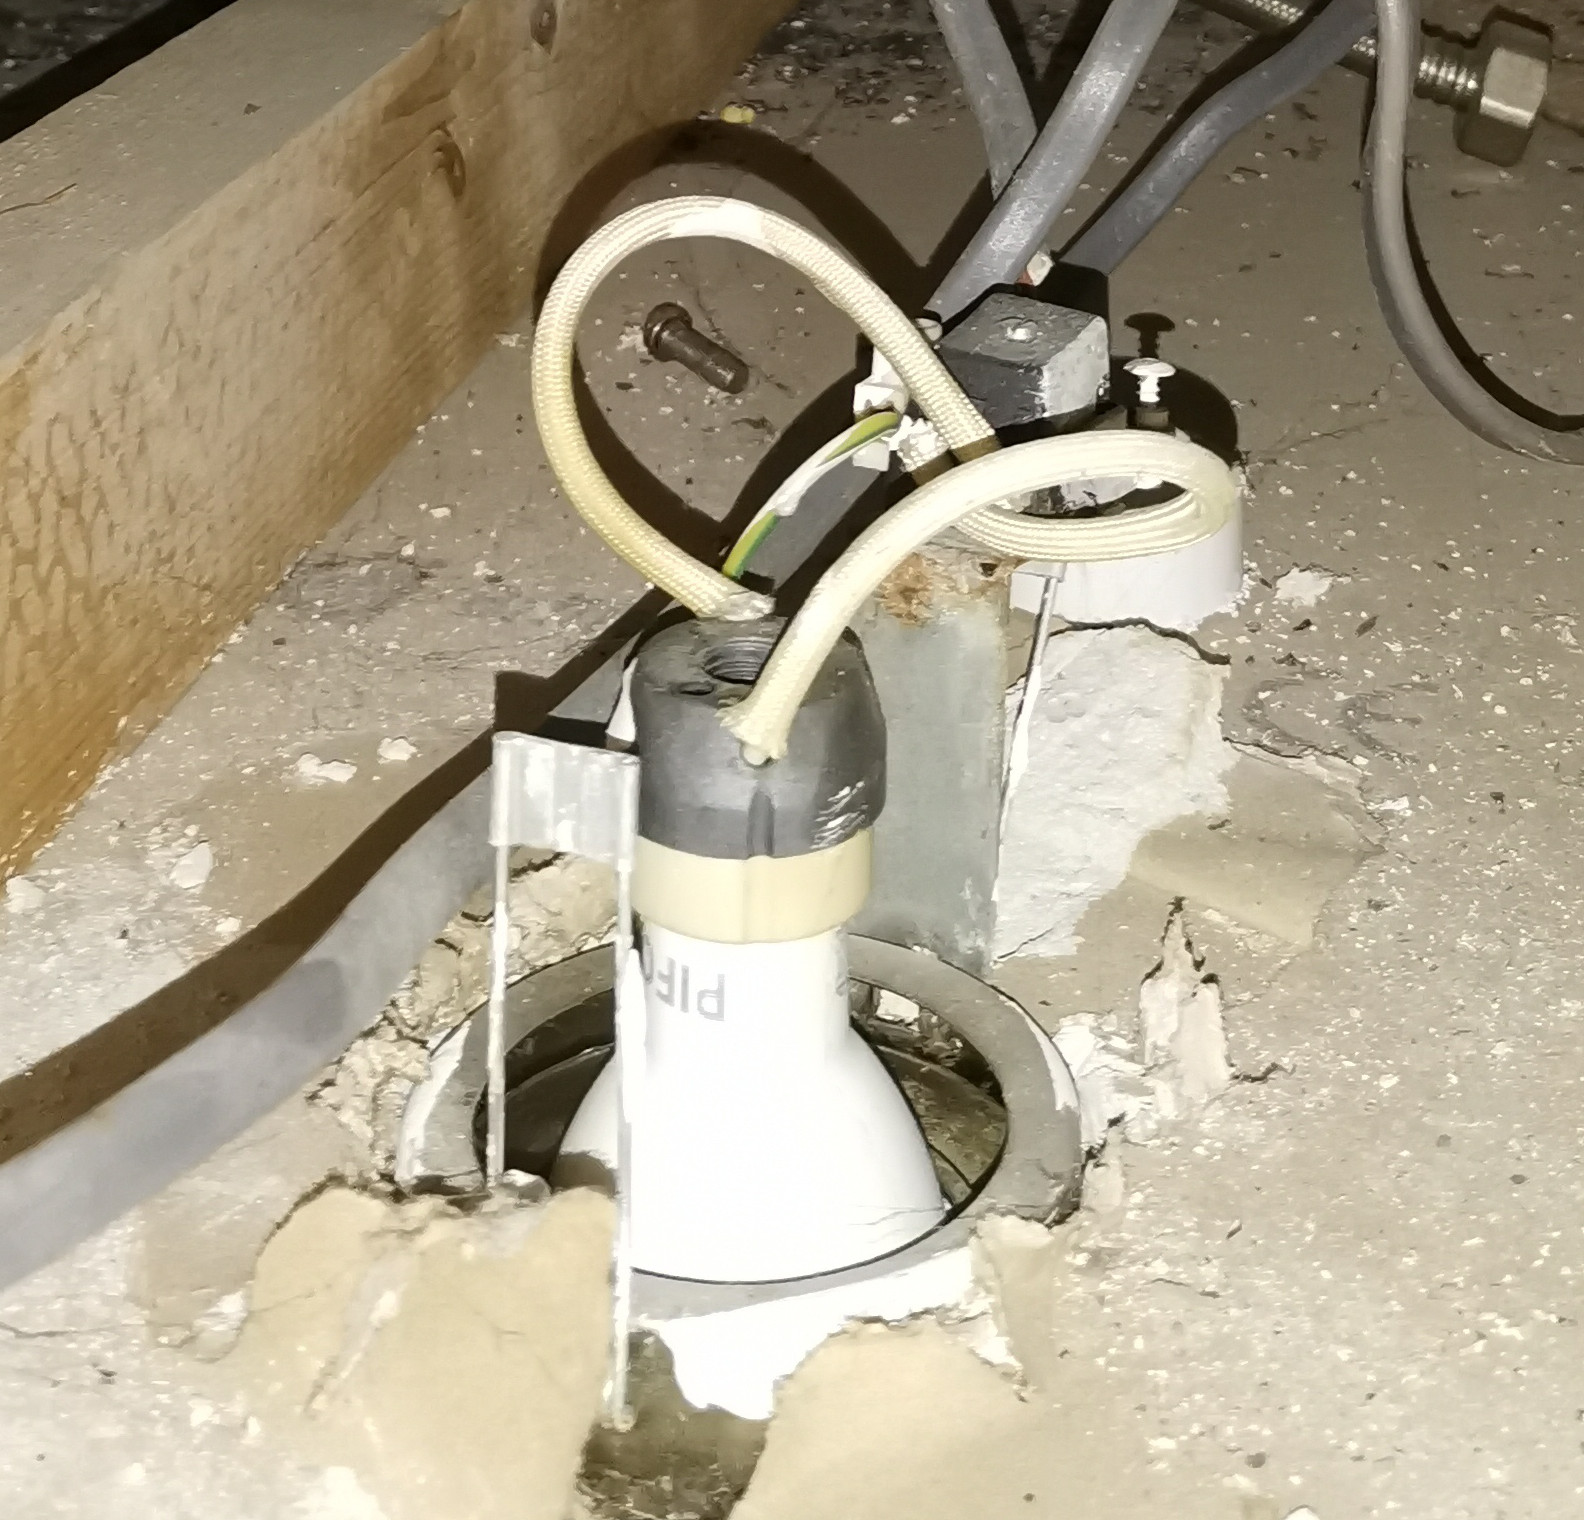
Correct sealing of down-lights with BS standard products. This is to stop air leakage, what’s the point of trying to prevent heat loss if we have gaps in the ceilings?
Pipework within loft space insulated. To protect from freezing in the winter.
Electrical cables checked. Identify any damage and locate high-amperage cables for showers, cookers etc.
Access walkways maintained or installed. Required for maintenance of water tanks, boilers, solar inverters etc.
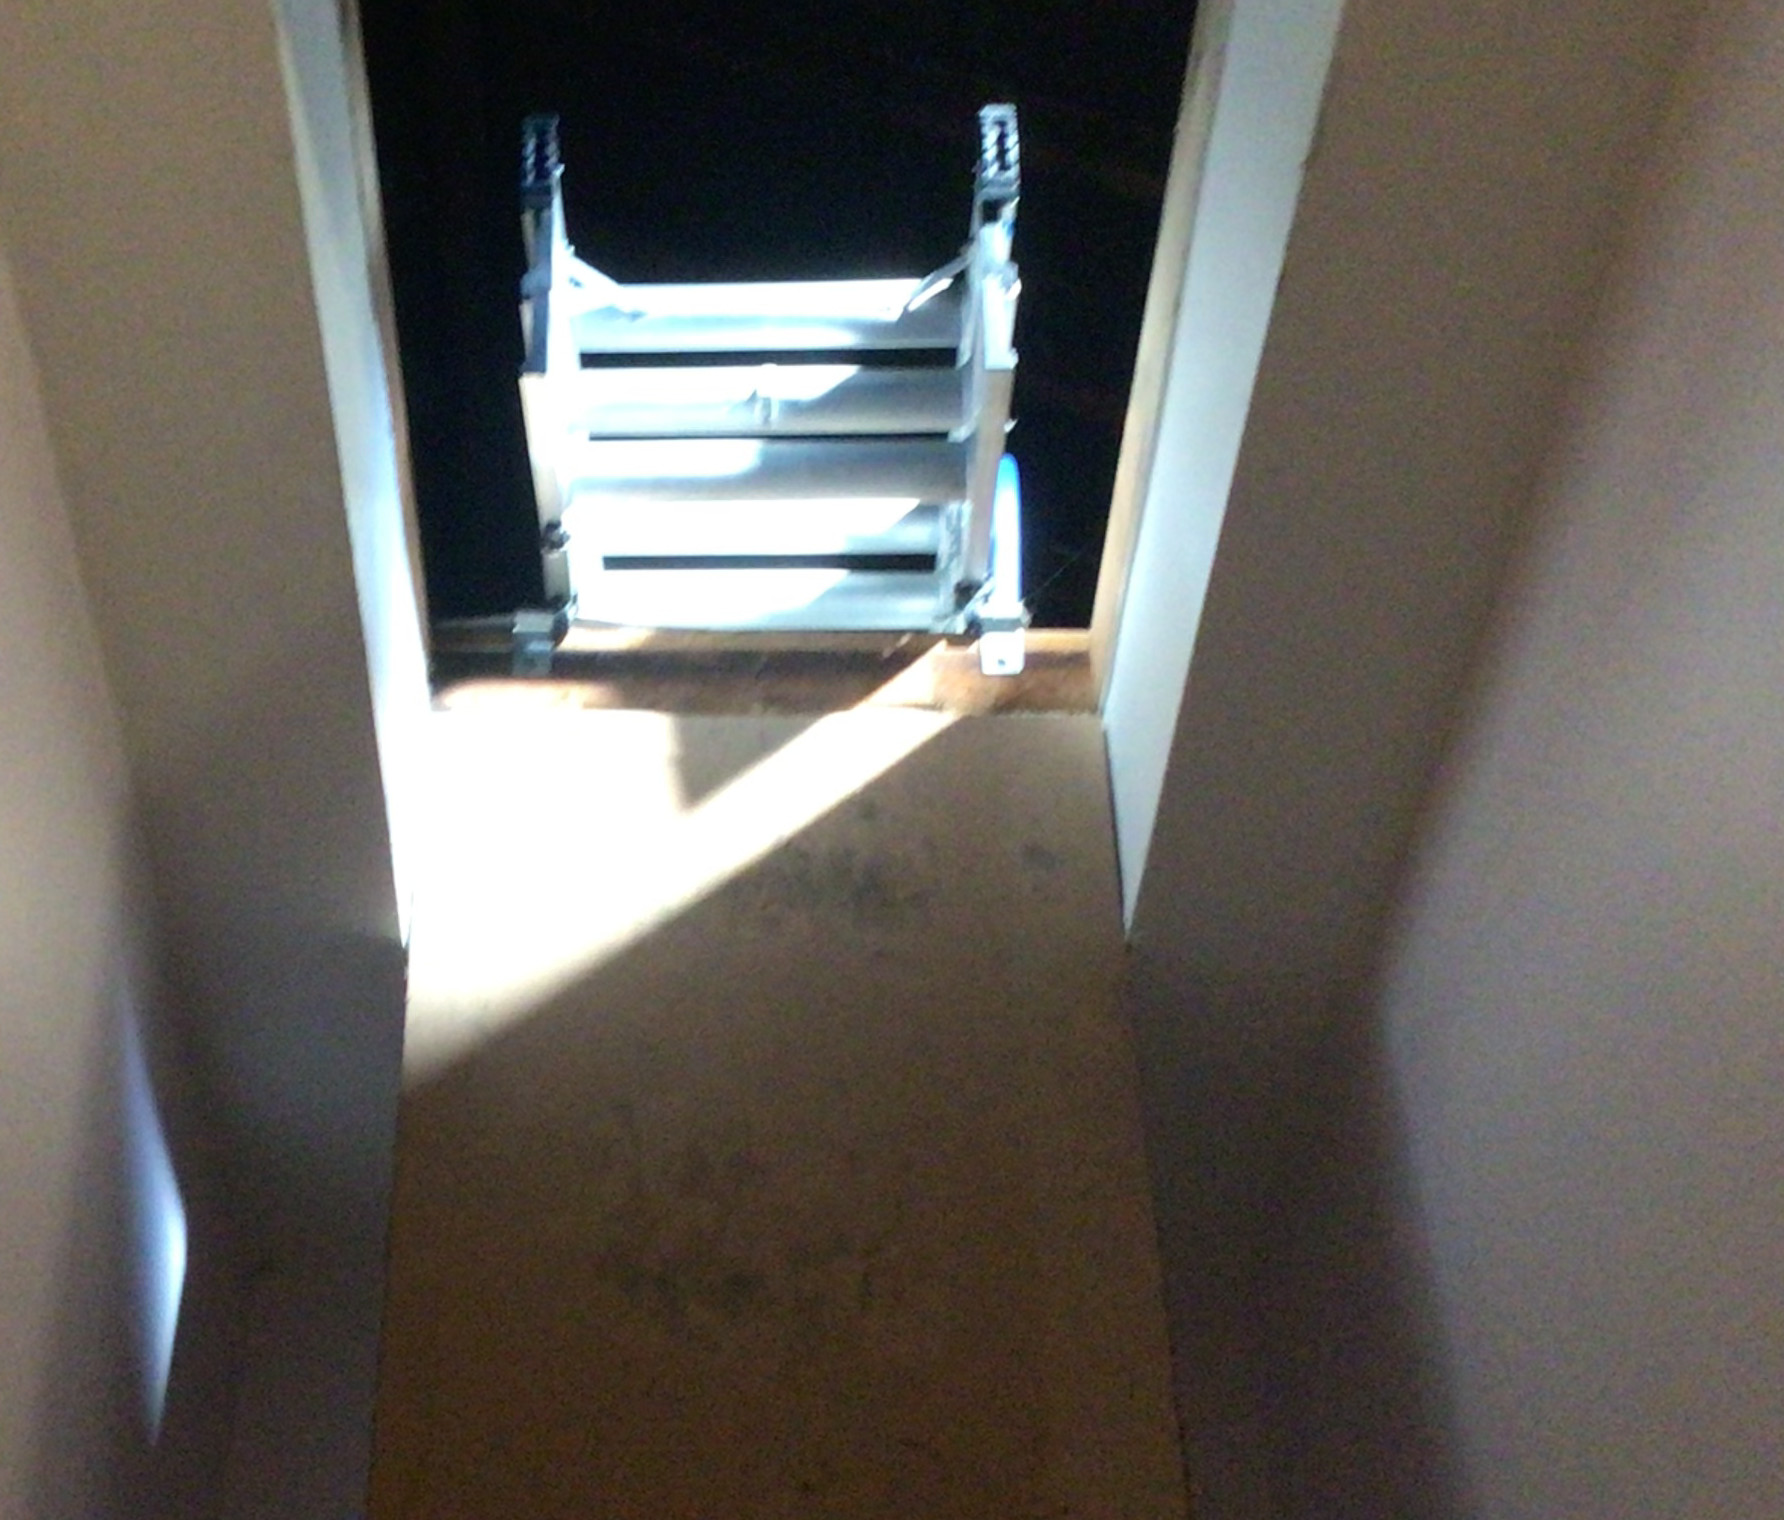
Hatches are sealed and insulated. To prevent a weak point in the insulation.
Mitigation of cold spots/thermal bridges (loft areas and joists). Cross-laying the insulation to prevent a thermal bridge on joists. Where possible, the loft should be 100% insulated and any loft boards lifted and relaid above insulation with stilts or risers post-install. If water tanks exist, then try to mitigate cold spots by insulating them underneath.
Warning labels affixed to rafters. Part of health and safety and also an Ofgem declaration should be attached by the installers on funded schemes.
Meeting current building regulations and best practices. Not only just the current PAS.
Insulation approach. Cold loft or warm loft?
We typically have two ways to add loft Insulation, depending on the type of roof space and its use.
The process for installing is the same in most cases, and the following is a rough guide to prevent failings of loft installation. Ventilation is imperative as when we insulate our loft space we do not want a build up of moisture.
Cold loft vs Warm Loft.
Warm Loft. Insulates directly below the roof (rafters), creating a warm loft space. Ideal for semi-living areas or roof conversions. This type of loft has less temperature fluctuations if kept warm, so less chance of condensation.
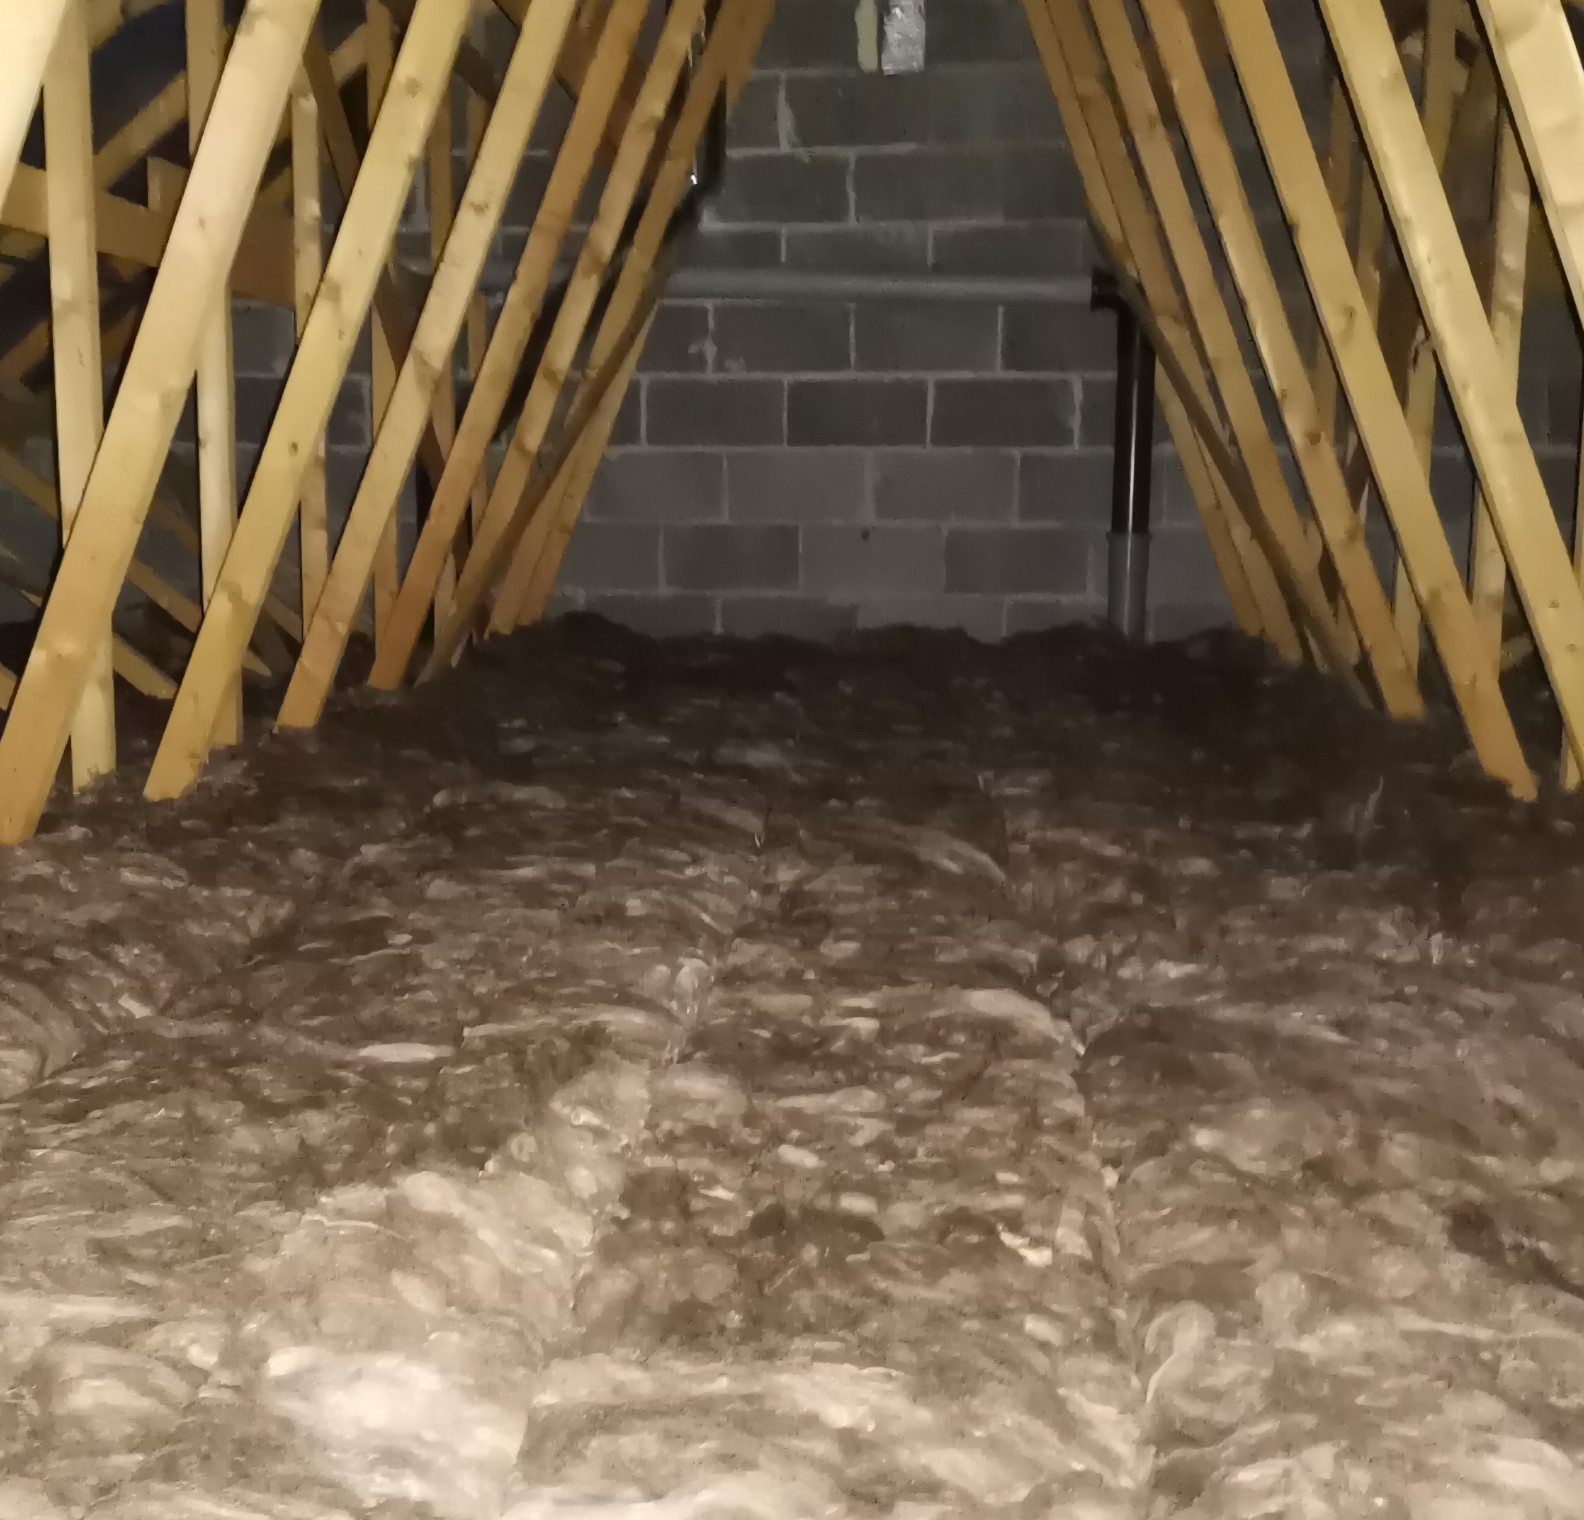
Cold Loft. Insulates the structural deck (directly above the last ceiling), keeping the heated space below warmer.
Cold lofts have the advantage of being cheap and relatively easy to install. This type of loft is subject to temperature fluctuations and condensation, so ventilation may need to be improved.
The insulation should be installed according to current building regulations, current PAS standards and inline with the manufactures recommendations.
The main reason we insulate our lofts is to slow down the amount of escaping heat. The building regulations set out a required U value and the insulating material will have an R value, so the thickness of insulation required should be quite easy to work out. (U-Value = 1/(Sum of all R-Values).
Roofs are designed with ventilation to protect timbers, so this has to be maintained or improved with the use of felt, soffit, eaves, and tile vents. Electrics need to be kept safe and checked for safety pre-installation.
Areas of thermal loss need to be insulated or mitigated (hatches, down lights etc). Any combustion flues should be left alone, if they need moving, unclipping from brackets for any reason then a competent person is required.
Things to consider.
Lighting. Sealing and protecting cables and down lights with BS standard covers. Some lighting may need fire protection.
High-powered cables. These need to be outside of insulation. (showers etc)
Ease of access. For maintenance of solar equipment, water tanks and boilers.
Uninsulated pipework. Bathroom supplies and central heating.
Joist and rafter size. To determine cuts for insulation.
Ventilation. If ventilation requires updating, then felt and tile vents are available.
Ducting. Make sure if ducting is moved, then manufacturers recommendations are followed.
Products used. See below.
Insurance and mortgage. You may need to inform insurance and mortgage companies if using certain products.
Weight. If boarding and storing items in loft. Ceilings are designed to support a certain amount of weight, so the Structural integrity must be maintained.
Potential moisture build up. Does the space feel airy and with no smells of damp.
Warm Loft.
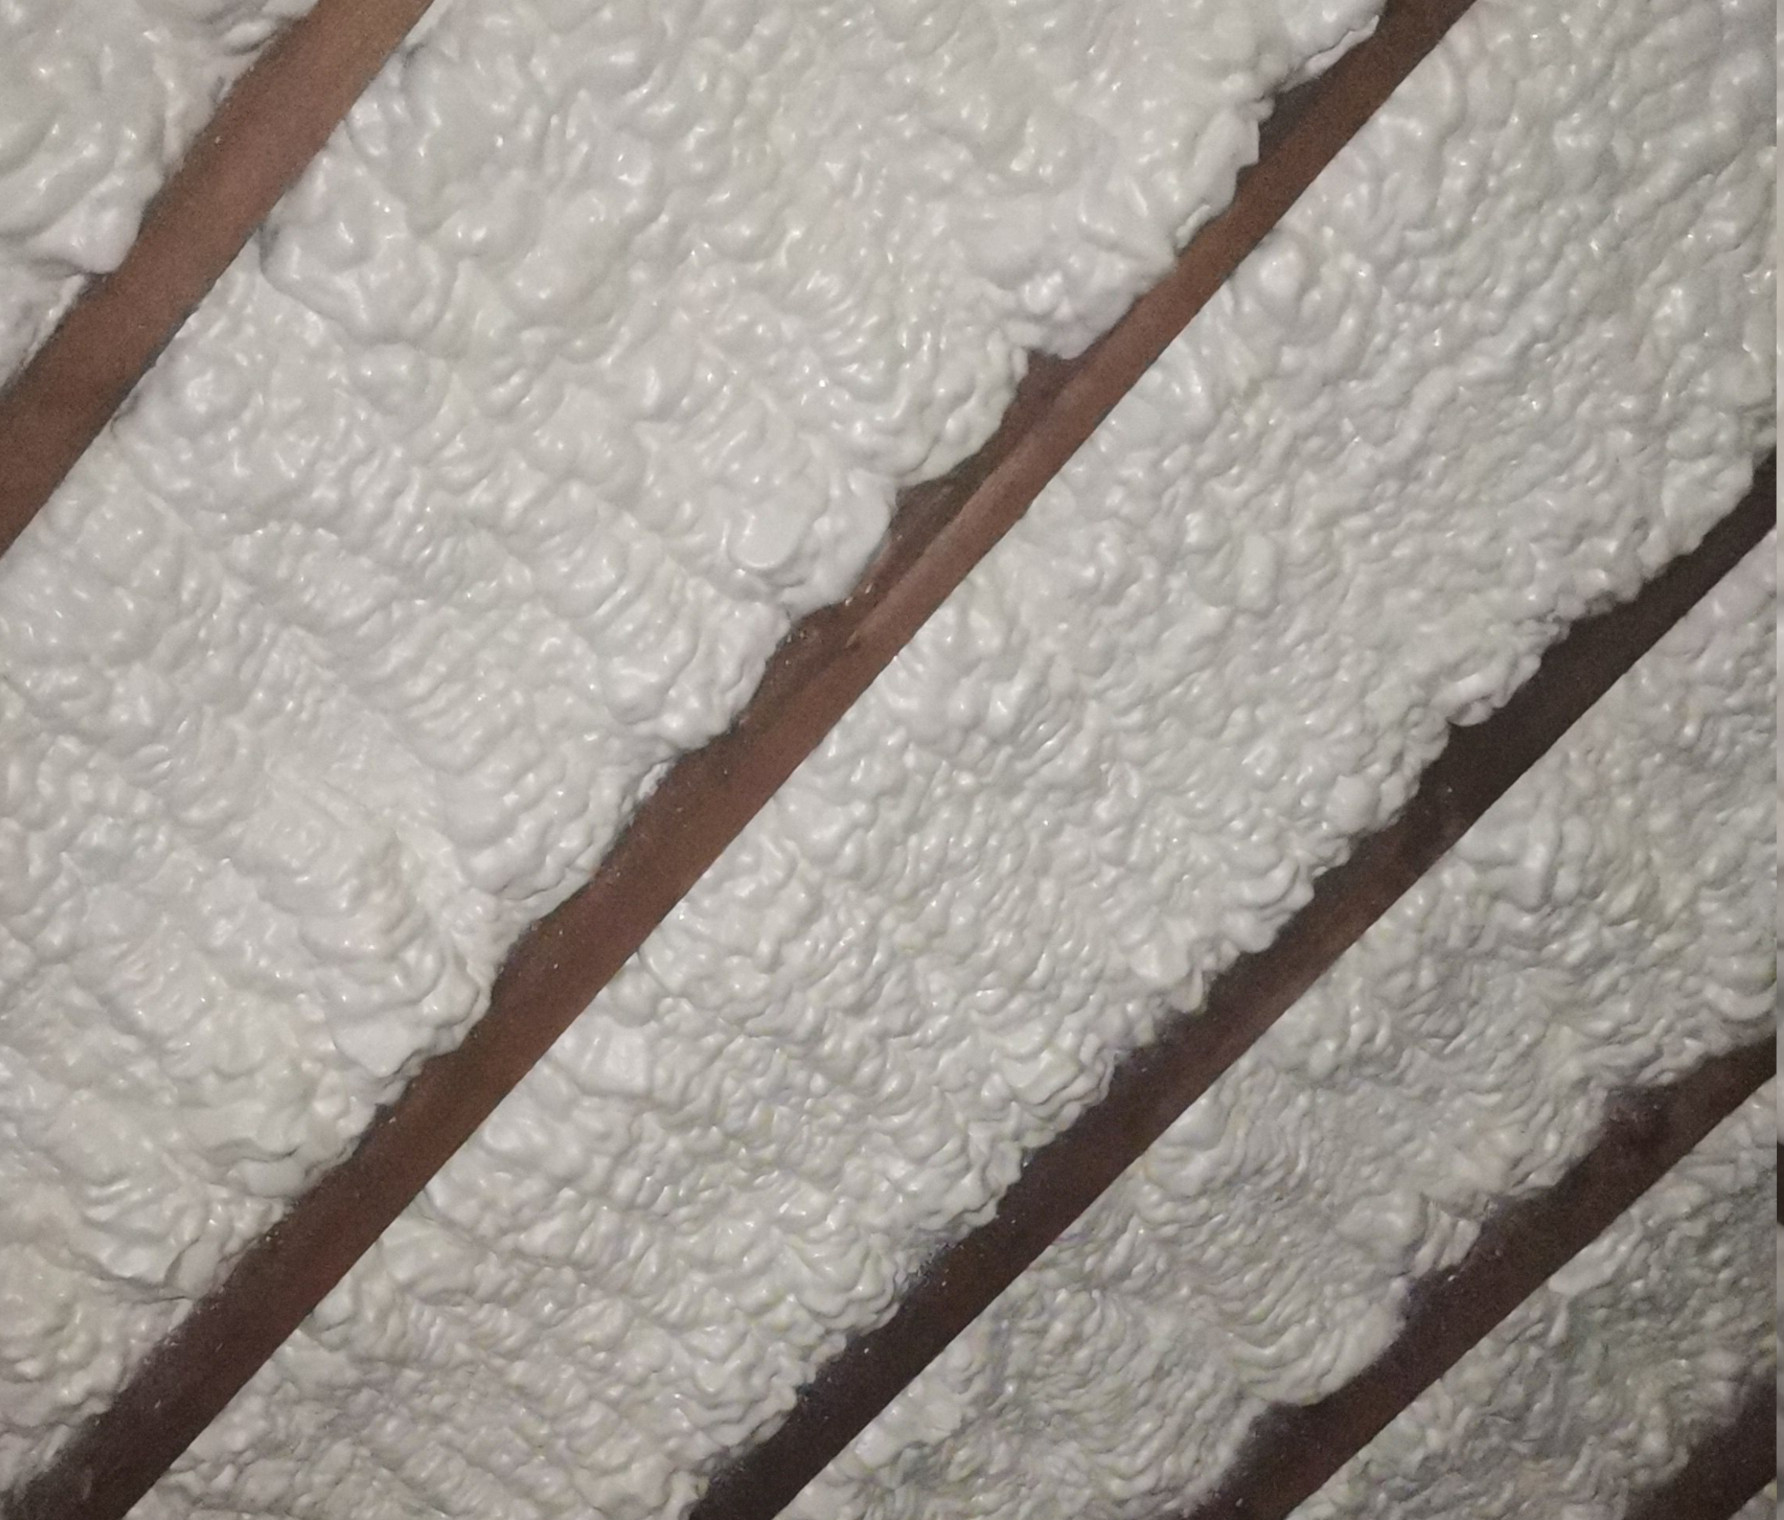
Insulating a warm loft is to place the insulation between the rafters, so this is directly below our roof. The method you choose will take some research and depends on how the space will be used.
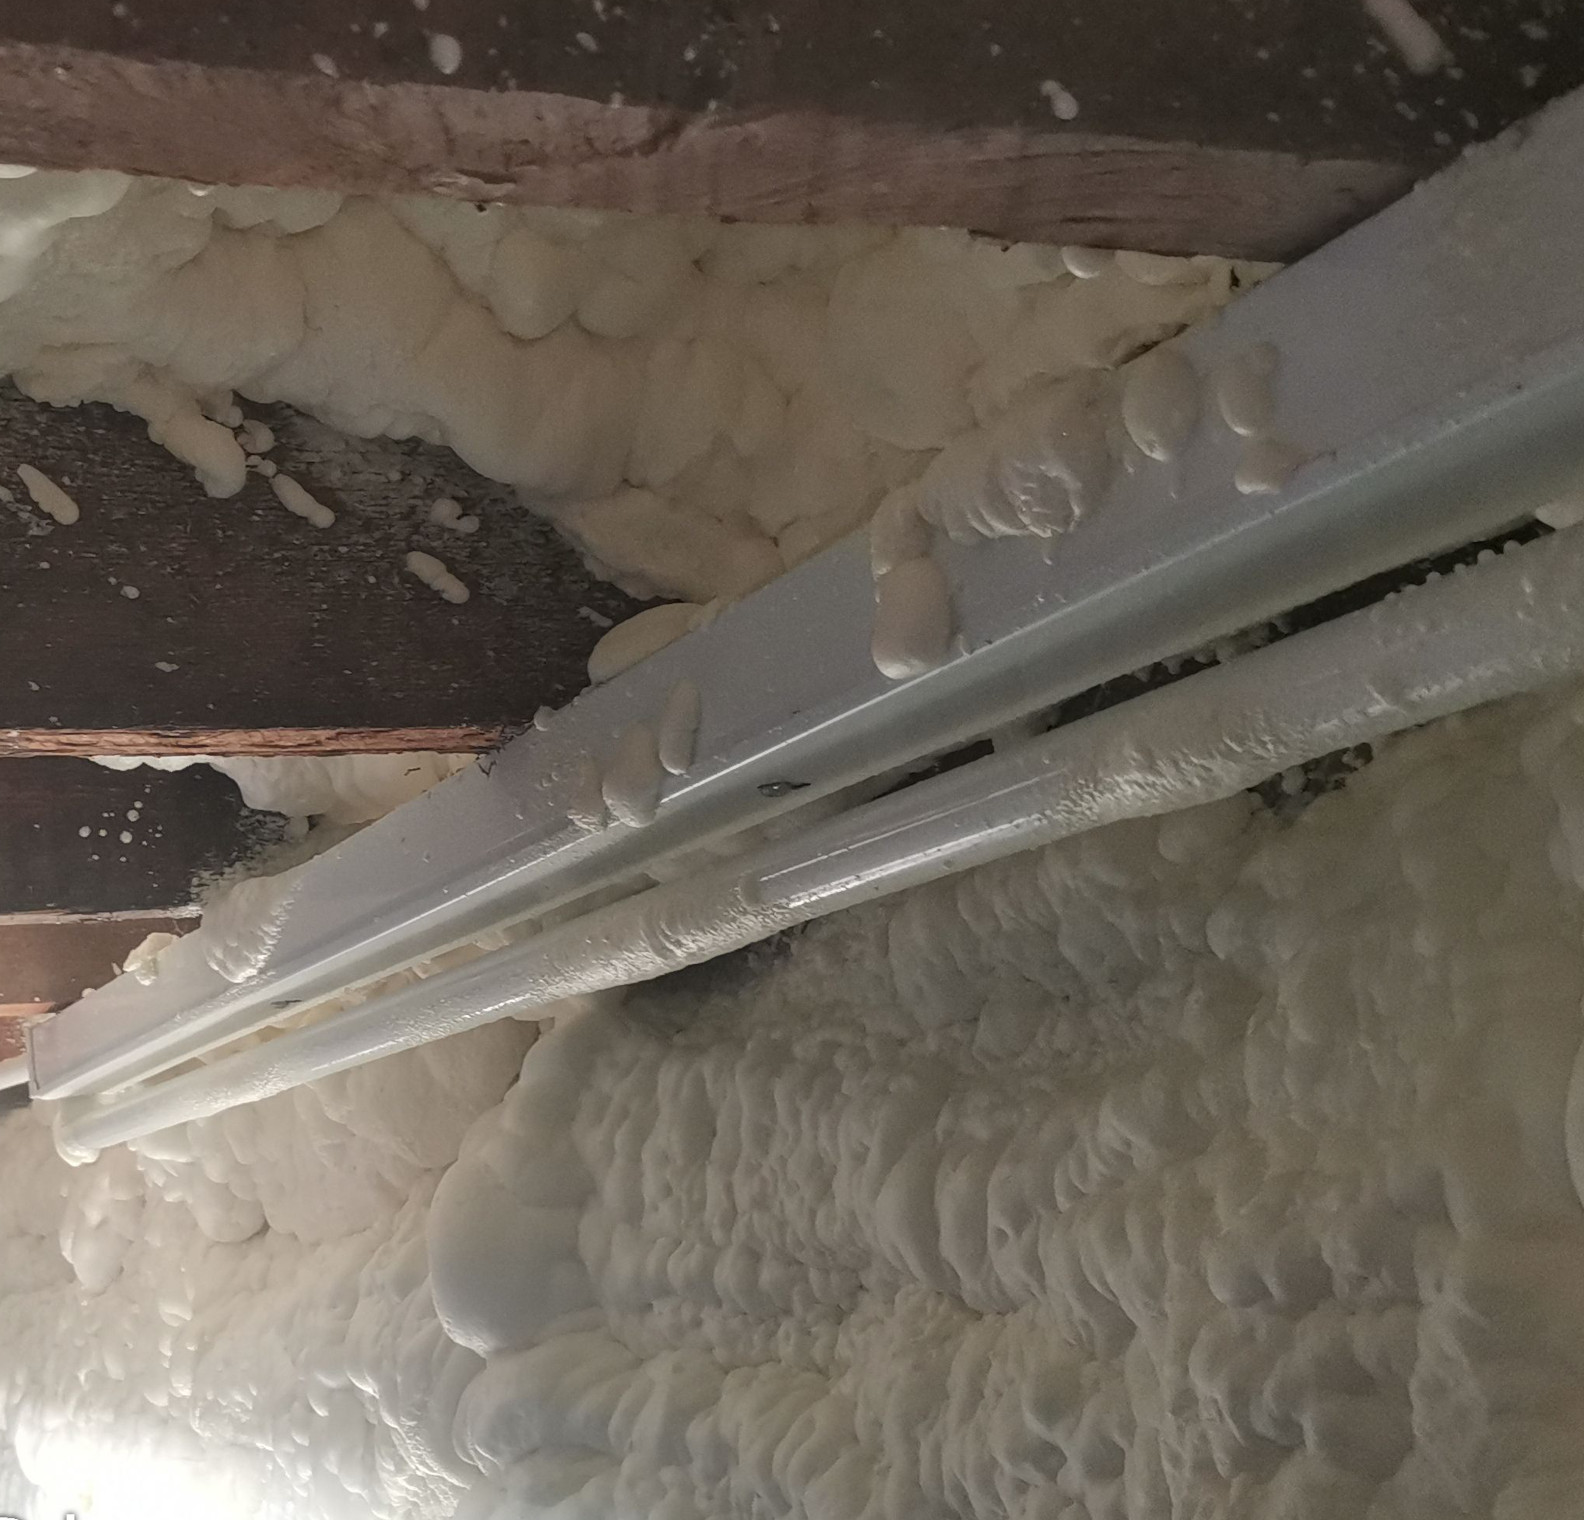
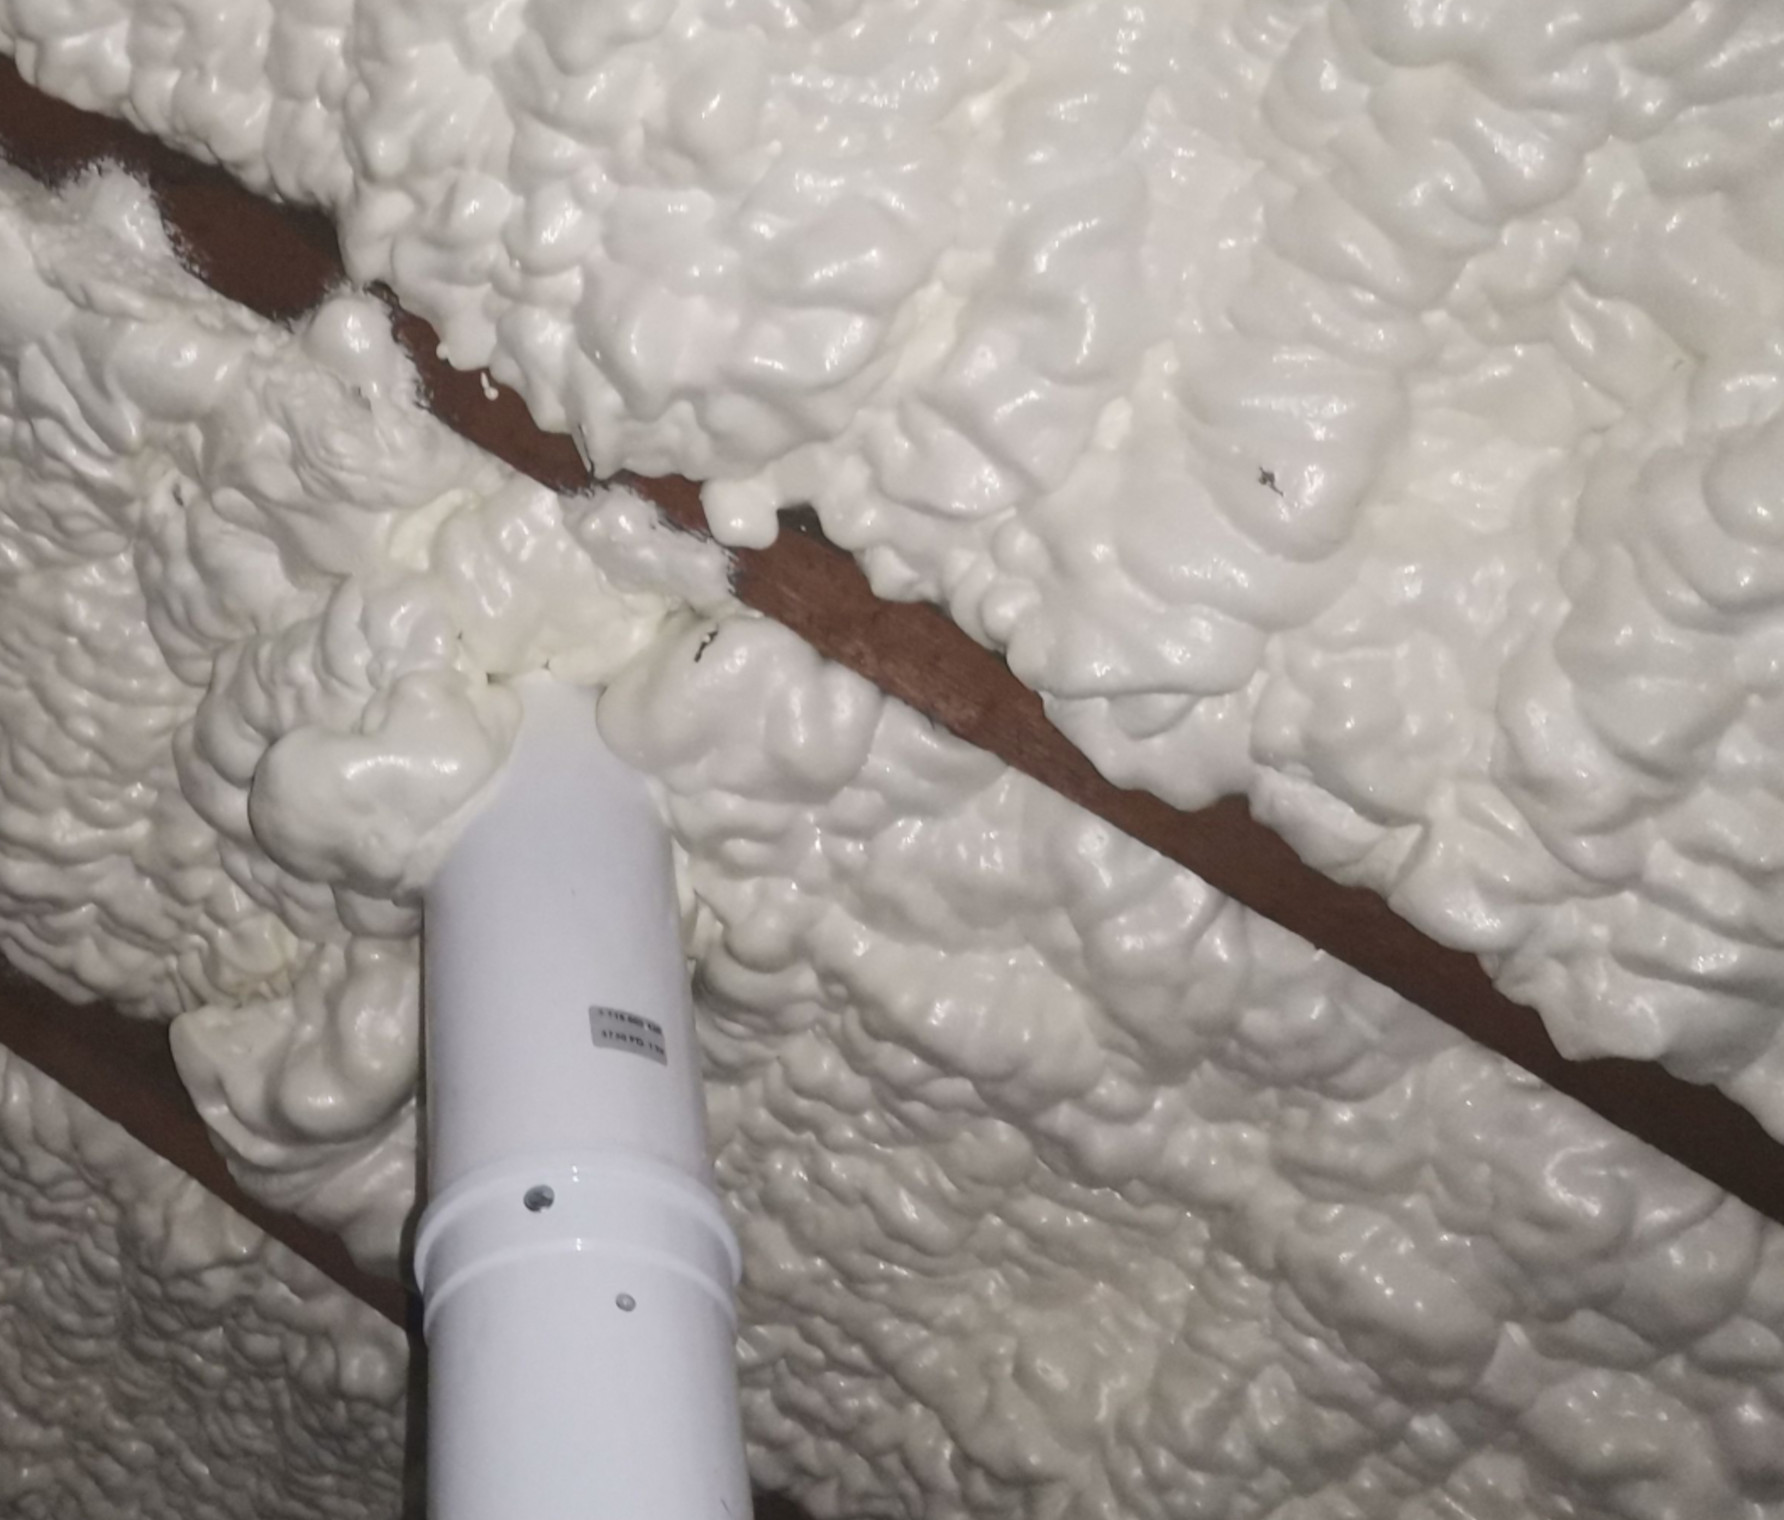
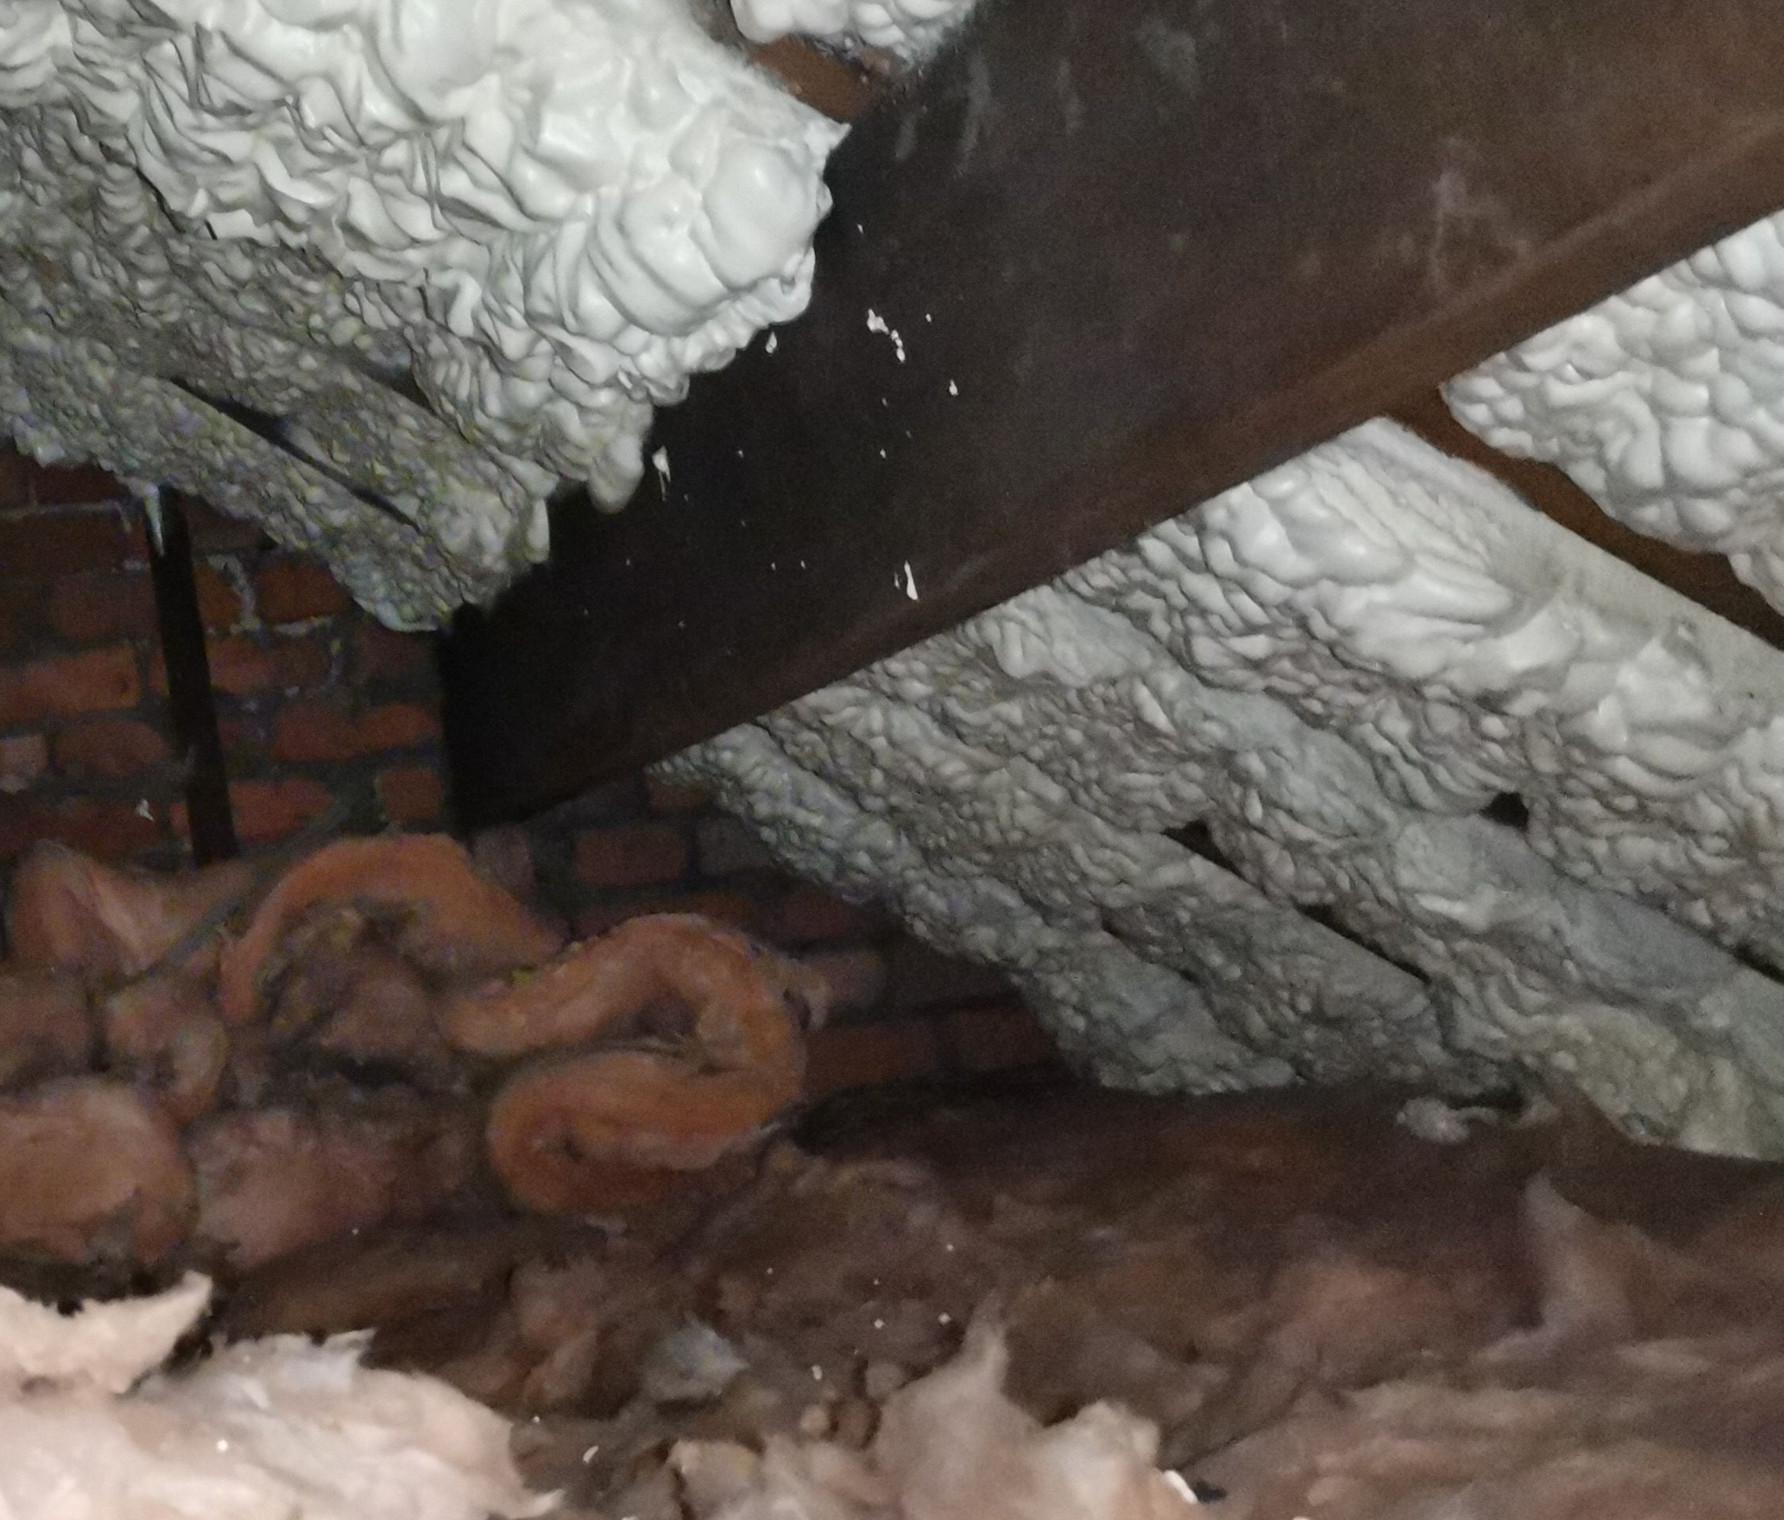
Firstly, the spray foam you have probably heard so much about either negatively or positively!
What is it? Spray foam (expanding foam in the UK) is a chemical product created by two materials (isocyanate and polyol resin) which react when mixed with each other and expand many times its liquid volume after it is sprayed in place. This comes in two types.
Closed cell.
Open cell.
The energy saving trust has great resources to begin your research here.
Closed-Cell Spray Foam.
Structure. Contains cells that are completely closed off, creating a dense, solid structure.
R-Value. Typically, has a higher R-value per inch.
Density. More dense and rigid.
Moisture Resistance. Highly resistant to moisture and can act as a vapour barrier.
Strength. Provides structural support and increases the rigidity of the building.
Application. Can be suitable for exterior walls and roofs, where added strength and moisture resistance are needed.
Open-Cell Spray Foam.
Structure. Contains cells that are open and interconnected, resembling a sponge.
R-Value. Typically, has a lower R-value per inch.
Density. Less dense and softer.
Moisture Resistance. More permeable to moisture and does not act as a vapour barrier.
Sound Insulation. Provides better sound dampening qualities.
Application. Ideal for interior walls, attics, and ceilings where flexibility and sound insulation are beneficial.
Good to know!
Each type of spray foam insulation has its specific advantages, so the choice depends on the particular needs of the project, such as the desired insulation value, moisture resistance, and structural requirements. I do not endorse or condone the use of spray foam when installed well. (Poorly installed is a whole different ballgame!.)
When carrying out research please check with insurance companies, mortgage companies etc as the use of spray foam has been highlighted in various news reports. If you already have existing joist installed insulation then please do your research if having rafter insulation installed, this could cause potentially cause condensation problems.
PIR Insulation.
PIR (Polyisocyanurate) and phenolic foam are both types of rigid insulation boards used in building construction to improve thermal efficiency. These boards are supplied by many manufacturers including Celotex, Recticel, Kingspan, Iko.
Description.
PIR insulation is a type of rigid foam insulation made from polyisocyanurate, a thermoset plastic. It is produced as foam and typically sandwiched between two facings, such as aluminium foil.
Properties.
High R-Value. PIR has a high thermal resistance (R-value), which makes it very effective as an insulator.
Moisture Resistance. It has good moisture resistance, which helps prevent mould and mildew.
Cell structure. Usually sold as closed.
Lightweight and Easy to Handle. It is lightweight, making it easy to handle and install..
Applications. Roof, wall, and floor insulation.
Phenolic Foam Insulation.
Description.
Phenolic foam insulation is made from phenol-formaldehyde resin, a thermosetting plastic. It is produced as a rigid foam and often faced with materials such as foil or glass tissue.
Properties.
Very High R-Value. Phenolic foam has an excellent thermal performance, with an R-value typically higher than PIR.
Cell Structure. Mainly sold as a closed cell but can be manufactured as open.
Durability. It is durable and retains its insulating properties over time.
Applications. Used in a variety of applications, including roof, wall, and floor insulation. (and submarines!)
Comparison and use cases.
Thermal Performance. Both PIR and phenolic foam have high thermal resistance, but phenolic foam generally has a slightly higher R-value
Moisture Resistance. Both types offer good moisture resistance, though phenolic foam’s closed-cell structure gives it an edge in preventing water absorption.
Cost. PIR is typically less expensive than phenolic foam, which can be a consideration for large projects.
Applications. Ideal for high-performance insulation requirements, including in walls, between rafters, and floors.
In Summary.
Both PIR and phenolic foam are excellent choices for rigid insulation, each with its own strengths. The choice between them will depend on specific project requirements such as thermal performance, fire resistance, moisture resistance, and budget.
How to insulate. Cold loft.
Types of insulation used.
Insulating a cold loft is to place the insulation between the joists, so this is above the ceilings. The easiest way is rolled insulation, which can come precut to fit the average joist width. Now we know about r-values, U-values and thermal bridging it should be obvious that by placing the insulation between the joists only, we have a bridge and an insulation weakness at the joists themselves. This is why the best way to insulate is to cross lay over the joist also. This not only adds better air tightness but also mitigates the thermal bridging. Different types of insulation for loft can be chosen by cost, requirements and also access.
The primary and most widely used are.
Mineral wool.
Sheep’s wool.
Glass wool.
PIR (Polyisocyanurate) and phenolic foam.
Mineral wool.
Made from raw materials like stone or silica that are heated until molten, then spun into a fibrous matt.
Properties. Mineral wool is known for its thermal, fire, and acoustic properties. It’s a poor conductor of heat, which helps maintain a consistent temperature in buildings. It’s also resistant to fire and doesn’t release toxic gases when heated.
Excellent thermal and acoustic insulation.
Easy to install.
Relatively cheap.
Breathable (can prevent dampness from damaging wooden timbers).
Cons.
Can sometimes irritate bare skin.
Will compress if you put weight on it.
Sheep’s wool.
Sheep wool insulation is a natural, sustainable, and versatile material that can be used for thermal and sound insulation in buildings. Sheep wool is a natural insulator that can be used in walls, floors, lofts, roofs, and underlays. It’s crimped, which traps air in millions of tiny air pockets.
Excellent thermal and acoustic insulation.
Easy to install.
Safe to touch.
Eco-friendly.
Breathable (can prevent dampness from damaging wooden timbers).
Cons.
Expensive.
Glass wool.
Glass wool insulation, also known as fibreglass insulation, is a common material used to insulate homes and commercial buildings. It’s made from glass fibres that are bonded together to create a wool-like texture. The glass fibres trap air pockets, which act as barriers to prevent heat loss.
Fire-resistant.
Insect repent.
Eco-friendly (mostly made from recycled glass).
Cons.
Most glass wool irritates the skin (protective clothing must be worn when handled).
Becomes less effective when wet.
PIR (Polyisocyanurate) and phenolic foam.
Polyisocyanurate (PIR) and phenolic foam are both types of plastic-based foam insulation boards used in construction:
PIR.
A rigid foam board made from a thermoset plastic that’s known for its high thermal resistance, low water absorption, and structural strength. PIR is often used for flat roofs because of its durability and compatibility with waterproofing methods.
Phenolic foam.
A popular choice for domestic floors that combines thermal efficiency with an economical price point. Phenolic foam may have slightly better thermal performance than PIR, but PIR is more economical.
Fire-resistant
Can be cut to fit snugly between joists.
Higher R-value, so can be thinner to achieve building regulations.
Cons.
Takes longer to fit than rolled insulation.
Comes in large sheets.
How to insulate. Cold loft.
So we know a cold loft is when the loft area is insulated in a way that prevents heat from travelling into the loft space (majority of our lofts are done this way). Heat naturally rises and is replaced with cooler air (convection), so the warm air in our house will move upwards until it meets resistance. We have explained R values and U values on our insulation page.
Depending on this resistance (R-value of plasterboard, plaster, other coverings), our heat will disappear into the loft space at a certain rate. We need to improve the resistance, and we do this by adding insulation at the joists directly above the ceiling, thus increasing the (R) value. Remember R1+R2, etc.
Multiple materials now exist that will give us a (U) value. When we reach a value that shows heat will pass through at a much slower rate (as set out by building regulations) we can then say it has been satisfied. The roof space is classed as cold due to the temperature difference between the dwelling below and the space above. The current recommended insulation value for loft insulation in the UK is a U-value, listed on our regulations page. This corresponds to a minimum insulation thickness of “X” amount of insulation. These values are something you need to consider while insulating your loft to ensure energy-efficient loft spaces. Knauf has a free calculator that can help when determining insulation values and thickness
A new access hatch may be needed, as it may not be physically possible to access with the insulation product. Once access issues are resolved, the area to insulate needs to be looked at. The area should be clear, and as much debris as possible removed from between joists. This debris can accumulate over the years as the under roofs of older houses begin to break down, this can cause problems with dust and also add weight. If you are thinking of a roof replacement, I highly recommend waiting and clearing all the debris from the loft post-roof replacement. Whichever insulation is chosen, then this need to be fitted snugly between the joists and then crossways to prevent repeated thermal bridges.
You could mix and match with a board insulation between joists and blanket laid crossways over top, the main thing is to mitigate the thermal bridge and achieve the U-value required. All areas of leakage i.e. downlights need to be sealed and protected. Loft hatches need to be sealed and insulated Video from Knauf

Good to know.
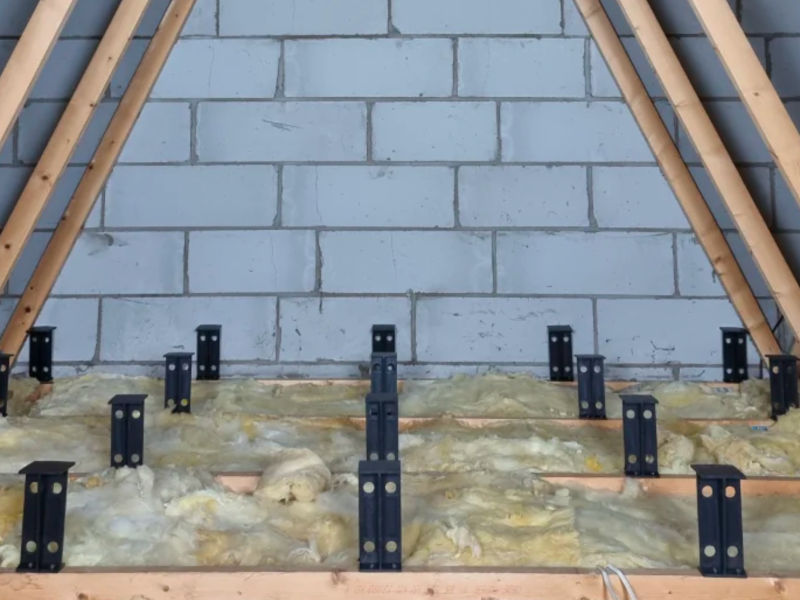
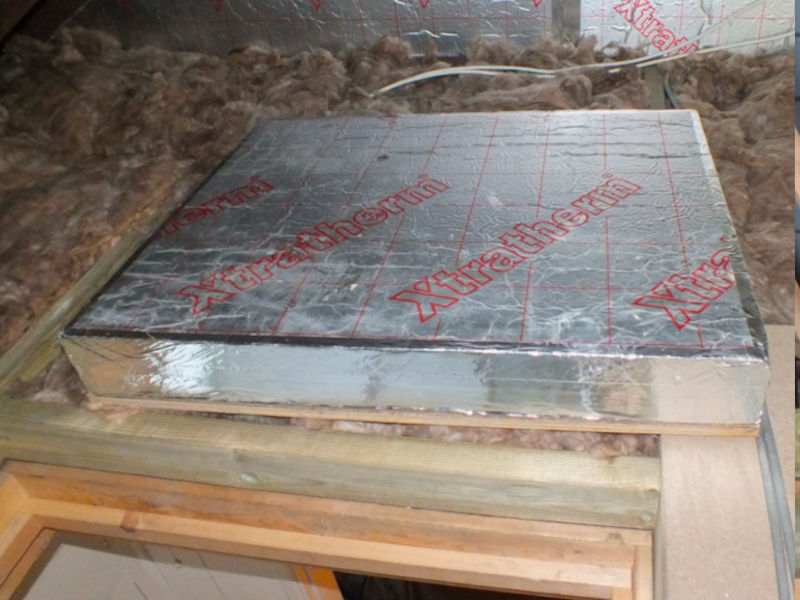
When insulating a loft at joist level, it’s important to consider both storage options and access control. Various hatches and ladder systems are available, and while some may look stylish, you should prioritize practicality and ease of use, especially as we age.
If you want to create a storage space, avoid compressing the insulation, as this reduces its effectiveness. There are products available that raise the loft floor to provide storage space and create access walkways to essential items like boilers, water tanks, and solar inverters. Pay special attention to the hatch area, which needs to be draught-proofed and insulated. This is one of the weakest points in the insulation system because hot air rises and can escape quickly through a poorly insulated hatch, defeating the purpose of insulating in the first place.

Gas and open flued appliances.
If the fabric of the property is being improved and open-flued gas appliances exist, then a gas spillage test should be carried out on each appliance by a suitably competent operative.
Rules exist that give an average unimproved property a certain amount of leakiness (adventitious air) to allow open-flued appliances to operate safely.
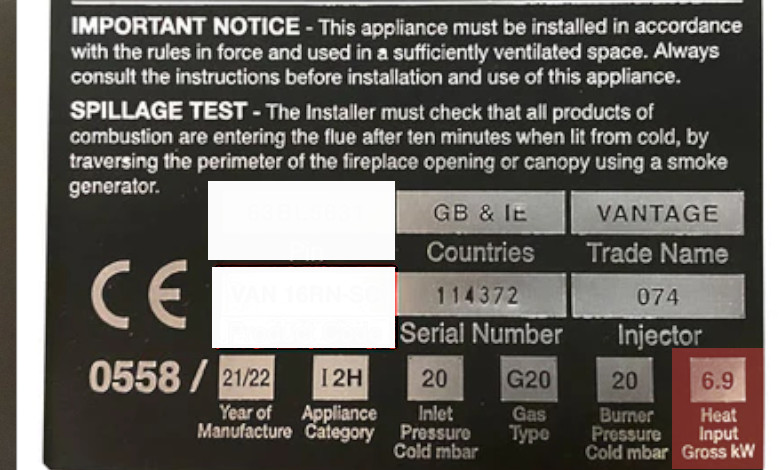
This all depends on how much fuel burns over a period of time, for example: 7.5kw/hr, 9kw/hr, 6.9kw/hr. You will see this on the data badge of the appliance (gas rating of an appliance here.). The more fuel used, the more leakiness is needed. Multifuel appliances are treated in roughly the same way but do not come under gas safe legislations. HETAS and building regulations govern multifuel installations and ventilation.
This is the reason combustion ventilation is sometimes needed. This allows the air to be replenished (with an open flued appliance we are burning the oxygen in the room that we use to breathe)
With the introduction of insulation, extraction ventilation should be installed as part of the process, we now have a different factor to add in with gas safety. Extraction fans either pulling or pushing air (PIV) can now effect the performance of the appliance.
Open flued gas appliances should be checked to prove they are not spilling products of combustion into the property. This is verified by performing a spillage test.
Part J states. “Extract fans lower the pressure in a building, which can cause the spillage of combustion products from open-flued appliances. This can occur even if the appliance and the fan are in different rooms”.
Any funded insulation work now includes ventilation upgrades as part of the current PAS, so extract ventilation will be installed. This should have been factored in as part of any ventilation work carried out. A competent person is required to perform spillage tests.
Part B, 8(1) of the Gas Safety (Installation and Use) Regulations 1998 states that no person can make any changes to a premises that contains a gas fitting or storage vessel if the changes would compromise the safety of the fitting or vessel.
This basically means if the fabric of the building (walls, floors, roofs) are being insulated then appliances need to be checked by a suitably competent and qualified person.


Installation Guide.
Below you will find links to UK regulations and other useful information. These links are to third party websites, and we cannot guarantee the validity or safety of the following sites. If you find any broken links or issues, we would love to know. Please read our disclaimer. Contact us here for issues.
Energy saving trust guide.
Pas 2035
Pas 2030
Part A – Structure
Part B – Fire safety
Part C – Site preparation and resistance to contaminants and moisture
Part D – Toxic substances
Part E – Resistance to sound
Part F – Ventilation
Part G – Sanitation, hot water safety and water efficiency
Part H – Drainage and waste disposal
Part J – Combustion appliances and fuel storage systems
Part K – Protection from falling, collision and impact
Part L – Conservation of fuel and power
Part M – Access to and use of buildings
Part O – Overheating
Part P – Electrical safety
Part Q – Security in dwellings
Part R – Infrastructure for electronic communications
Part S – Infrastructure for charging electric vehicles
Part T – Toilet accommodation
Regulation 7 – Materials and workmanship
The Gas Safety (Installation and Use) Regulations, 1998
MCS (microgeneration certification scheme)
Electrical standards