
Cavity wall insulation Basics.
Cavity wall insulation (CWI) is less disruptive than internal (IWI) and external wall insulation (EWI).
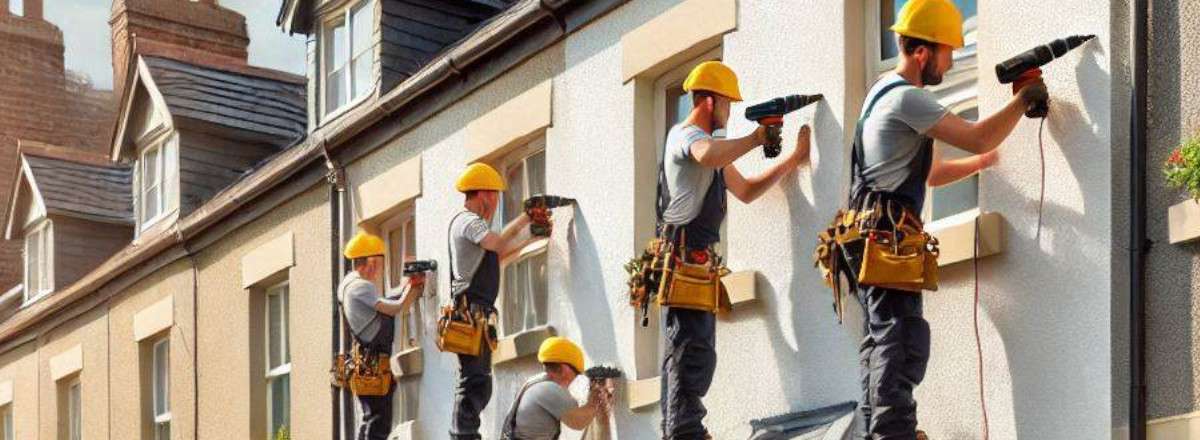
The cavity wall space (if clear of debris and dry) can be filled with a suitable product to create an insulation layer between the inner and outer walls. It’s not a DIY project as specialist mixing and pumping equipment is required, and detailed drill patterns need to be adhered to. An unfilled cavity wall can have a U-Value of anywhere between 1.6 W/m2k and 0.60 W/m2k, (brick, air gap, brick etc) depending on when it was built.
By installing cavity wall insulation you can help to improve your U-value and in turn, improve the insulation of your home to about 0.30 W/m2k. Current regulations can be found in our regulations section.
Thin cavity walls are generally not suitable for treatment, as they often pose challenges due to debris and mortar snots (chunks of mortar) inside the cavity. Before filling any cavity wall, a thorough borescope inspection should be conducted to ensure the cavity is clear and suitable for the intended product, with a minimum recommended cavity width of 50mm. The walls should also be in good condition, with no gaps or deterioration in the pointing.
Properties located in areas exposed to severe weather conditions, such as strong winds, heavy rain, or coastal environments, require extra consideration to ensure the insulation method is appropriate and effective.
Important note – Cavity wall insulation will need to be installed prior to external wall insulation, Internal wall insulation should not be installed on to a filled cavity wall. This is because of the temperature difference and risk of Interstitial Condensation.
You can start your research on installers with the following trade organisations.
Ciga (Cavity Insulation Guarantee Scheme)
NIA (National Insulation Association)
IAA (Insulation Assurance Authority)
Have a look at the installer page for some handy questions to ask.
Health and safety.
You may need specialist advice from tradespeople and professionals regarding things like,
High amperage cables. external high power cables through cavity, solar installations.
Nesting. Bees, wasps within walls.
Asbestos. Guttering, downpipes.
As a general rule, high-amperage cables should always be positioned outside of the insulation. Some houses may have high powered cables through the cavity feeding garages and outhouses and these will need to be advised upon by a qualified professional. Some properties also may have been modified with electric supplies routed through cavity from outside. Have a good look to see if any frequent visitors of bees or wasps are entering the walls.,
Your property may have ladders and possibly scaffolding during installation of energy efficiency measures (EEMs) so it’s crucial for safety guidelines to be in place, warning signs, pavement ramps etc. Contractors should always explain the dangers and inform you of any changes. If you are seeing failings in health and safety then it will need to be flagged up to the installers on site or supervisors.
If you have close neighbours, then permissions may be needed for access and also approval for works in regards to dust and nuisance during installation. Gas appliances and ventilation requirements should be carefully considered during the work. Address any potential nesting of bats or birds on the property. Some older houses may contain asbestos panels pipes and guttering, which requires a keen eye and some expertise to identify.
Never disturb anything you are uncertain about; always seek advice from qualified professionals when in doubt.
If any ponds are in the proximity to the property, then it’s a good idea to cover during install in case overspill enters the water. The health and safety section will go into more details of potential hazards.
Pre-installation building inspection requirements Prior to commencing the physical installation of the cavity wall insulation at location, the Retrofit Installer shall undertake a pre-installation building inspection in accordance with the requirements set out in B1-l2 of Table B.1
Installation project.
For any insulation or heating project funded through a UK grant scheme, the current PAS (Publicly Available Specification), best practices, and relevant building regulations should be strictly adhered to. The works should be guaranteed and warranted as part of the current PAS standards, MCS or protected by consumer law which can be a little bit daunting in this area, especially for the privately funded installations. A good guide is here.
Privately funded projects will decide on how to install and what guidelines to follow to suit budget and personal achievements.
A Pre-installation building inspection should be performed on either privately funded or grant funded installations. This should highlight any potential areas of concern and the property’s suitability for the proposed installation.
The current PAS requires Installers to undertake a pre-installation building inspection by the requirements set out in B1-l2 of Table B.1
CWI insulation.
Correct background ventilation. *All rooms, with the installation of trickle vents or wall vents if required
Correct door undercuts. *Undercuts to internal doors allow the free movement of air around the property to allow airflow around the property.
*Testing of the background ventilation pre-installation may allow the installed measure(s) to move forward without the need for door undercuts or trickle vents installed.
Maintain existing ventilation. To prevent insulation spill, sleeving and sealing will be required if not present on existing ventilation.
Correct extract ventilation in wet rooms. Kitchens, bathrooms, WC, utility rooms.
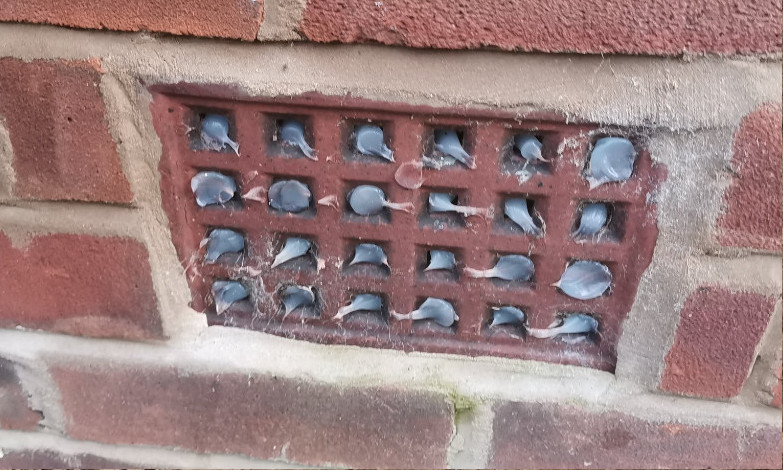
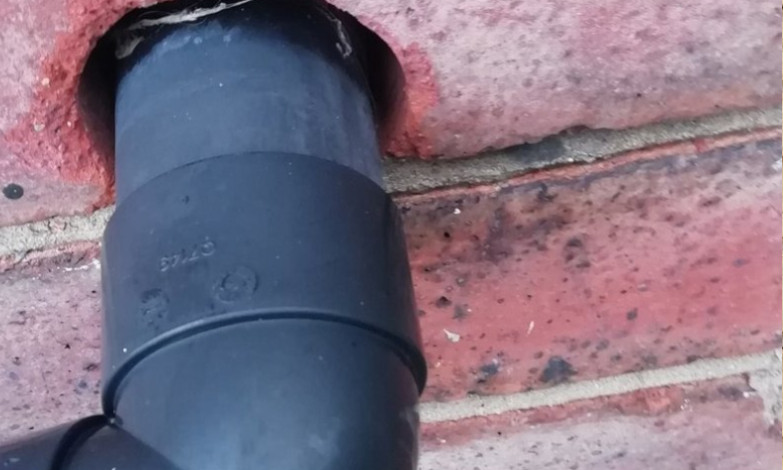
Correct sealing of cavity wall vents. Cavity vents can be found outside and are used to allow airflow in the cavity space when unfilled. they look a little like standard vents but are open to the cavity. They are usually silicon filled or filled in with cement if the walls have been previously insulated.
Mitigation of cold spots/thermal bridges. Conservatories, hard to reach areas. Ideally, all areas need to be insulated.
If any areas are hard to reach, then the choice of product can dictate, thermabead can be lanced in and does not have to conform to a full drill pattern.
Meeting current building regulations. As always, check regulations if required.
Agreeing on the product to be used. Ask installers or retrofit coordinator what product is going to be used, then do your research!
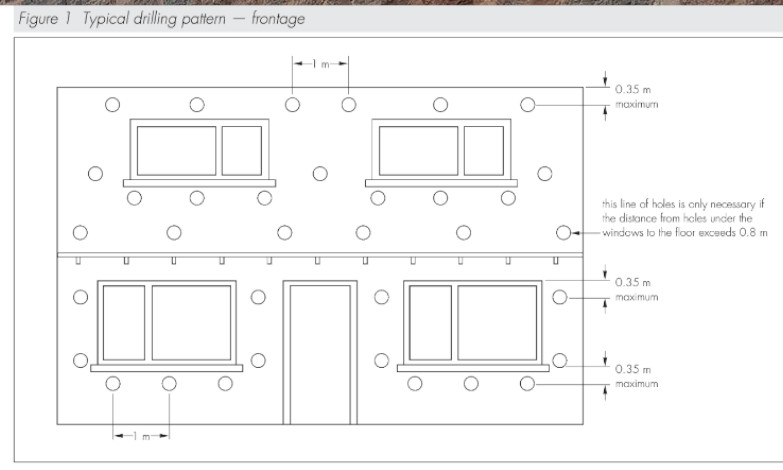
Correct drill pattern for product used. Each product or system will have its own BBA or KIWA certificate and installation method from manufacturers, A drill pattern is the way the installation is performed to maximise fill.
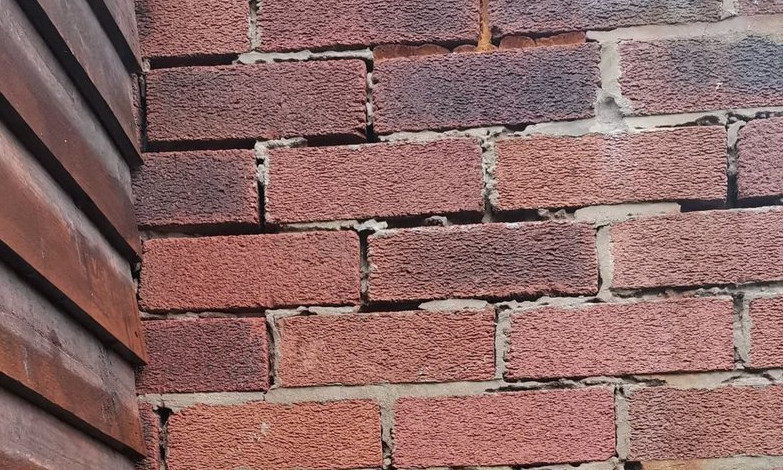
The walls should be in good condition. No signs of brick deterioration or mortar failing, even though the main products used today can safely transfer any water ingress. Some walls with raked joints may not be suitable.
The insulation performs best in a dry environment. Finlock guttering should be avoided unless it has been modified and made watertight. Any failings in downpipes and rainwater removal should be rectified pre-installation.
The main insulation products that are used in the UK are fibre and EPS bead (there is also Urea formaldehyde foam, which is very rarely used). EPS Bead insulation is one of the most efficient ways to fill a cavity wall, the process involves injecting beads into the cavity of your wall . The beading can improve the U-Value to meet current regulations and is also the product of choice for most installers and homeowners. Difficult areas can be “lanced” in from the side.
Details regarding the products can be found at the national blown bead website.

Insulation approach.
Cavity wall insulation is a crucial part of improving the energy efficiency of a building. It helps in reducing heat loss through walls and can significantly lower energy bills. There are many types of cavity wall insulation but we concentrate on the two main types, each with its own characteristics and suitable applications. The choice can be determined by personal choice, thickness of cavity and property considerations. Modern day products are usually treated with a fire retardant and are also water repellent. Some companies are now replacing old cavity wall insulation by extraction, this is done by a great big vacuum cleaner! some bricks are removed around the property and the old insulation is sucked right out. This is usually being carried out due to system failure or a breakdown of the insulation over time.
if you are having cavity wall insulation installed then ask what product will be used and look for the BBA or KIWA certificates online, you cannot search on the main site unless you register but usually all the manufacturers will have a download some where.
Here is a link to a superglass one.
EPS bead.
Description. Designed for properties that have a cavity of at least 35mm in some cases 50mm minimum. Expanded polystyrene (EPS) beads are small, lightweight beads that can be injected into cavity walls to a consistent density. The have a bonding agent sprayed in at the same time and create a honeycomb effect within the wall.
Products.
Ecobead, Thermabead, Evobead
Advantages.
Helps prevent moisture buildup within the walls.
Reduces the risk of mold and dampness within your property.
Good thermal performance.
Considerations.
No existing damp or mould issues with ventilation fitted in wet rooms and sufficient background ventilation.
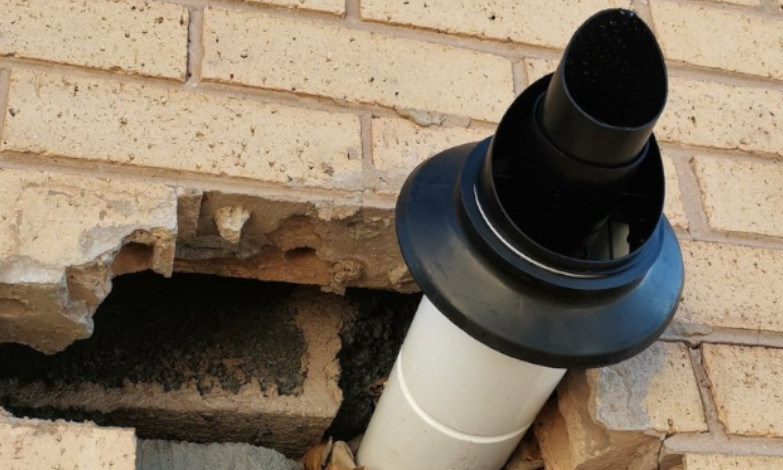
Boiler flues, brick chimneys identification.
Overspills into loft space and open gaps.
Overspills into the local environment.
Check BBA or KIWA certificates.
Blown mineral.
Description.
Designed for properties that have a cavity of at least 35mm in some cases 50mm minimum.
Works by using the insulating air pockets within the fibre as a resistance to heat transfer.
Blown mineral wool is a type of insulation made from raw materials that is applied in a loose, granular form.
It can be made from rock, sand, limestone, soda ash, and recycled glass.
Products. Knauf superfil, Superglass, Instafibre
Advantages.
Good thermal performance.
Mineral wool is the easiest insulation material to dispose of because of its recyclability.
Environmentally friendlier than some other insulating materials.
Considerations.
No existing damp or mould issues with ventilation fitted in wet rooms and sufficient background ventilation.
Boiler flues, brick chimney’s identification.
Overspills into loft space and open gaps.
Overspills into the local environment.
Check BBA certified.
Things to consider.
Ease of access. Installation may require large vehicles containing the cavity fill, walkways may need to be crossed with appliance hoses etc.
Insurance. (you may need to inform insurance if using certain products)
High powered cables from consumer units etc. need to be address within the insulation and possibly de-ratted or moved to a different location. Very rare but I have seen shower cables run through cavity walls.
Awkward areas. How they will be treated. (conservatories, side alleys)
Identification of asbestos materials. Gutterning, downpipes, canopies, soffits and fascias.
Ventilation. sleeved or introduced as required pre installation.
Combustion appliances. Open flue fires and older style boilers.
Products used. Bead or fibre.
Insurance. CIGA.
Weather. Areas of driving rain.
Location. Near the coast or at altitude.
Fire regulations.
Access. Neighbours agreement for access.
Nuisance and neighbours.
Damp courses. (150mm above ground level)
Pointing. (ideally not recessed)/raked)
Walls.
Types of Wall Construction.
UK homes are typically classified into three different types of wall construction:
- Solid Wall
- Cavity Wall
Non-Standard Construction (System-Built)
Identifying the type of construction is essential for determining the best approach to installing CWI insulation and controlling moisture. Cavity wall insulation can only be installed to walls with a cavity pattern and a clear cavity. The cavity should be minimum 35mm for most products.


CWI
Characteristics of a cavity wall.
Usually found in homes built after the 1920s.
Construction pattern. (uniform cavity)
Can vary in thickness from 250mm upto 300mm.
Will usually have cavity wall vents, either terracotta or plastic.
Wall Composition and Dew Points.
Dew points. The temperature at which condensation forms, must be considered to prevent condensation within the wall structure.
Damp Courses. Essential for preventing rising damp. Should show no signs of being breached.
Water Run-offs. Functioning gutters and downpipes are crucial for protecting the walls from water ingress. Overhangs on window sills and anything that protrudes from the wall should have a reasonable run-off.
Ventilation. Adequate ventilation is necessary to prevent moisture buildup inside the property. Ventilation systems should be compatible with the CWI system to maintain indoor air quality and prevent dampness.
Combustion appliances. Brick chimneys identified., Combustion appliances identified wall vents sealed, positioned and not blocked.
Sealing. Around door and window frames if necessary, around boiler flues and extraction if required. Cavity vent to be cemented or sealed with silicone.
Can water get trapped in a wall?
The Building Research Establishment (BRE), a world leading, scientific research centre published their BRE Good Building Guide (44, Part 2) which provided the following guidance on cavity wall insulation;
“There can be an increased risk of rain penetration if a cavity is fully filled with insulation, i.e. moisture is able to transfer from the outer to the inner leaves, resulting in areas of dampness on internal finishes.
Rainwater, under certain driving rain conditions, can penetrate the outer leaf of masonry leading to wetting of the cavity insulation, a reduced thermal performance and damage to internal finishes.”
If the insulation becomes wet or fails then cold spots can arise causing thermal bridging. If this happens, then areas in the property will be prone to moisture attraction. If installed properly and the walls are in good condition, then no problems should arise. Another consideration is how much the property is open to extreme elements. A standard map has been used for many years and gives an insight to areas prone to wind driven rain. The UK Gov has recently released a much more in depth study, which can be found here.
As with all insulation, if installed on a grant scheme or self funded, the ventilation and moisture control is a priority and needs to be added to the design. The ventilation section should give you a good grasp of what is required and why!

Conclusion.
Selecting the right type of cavity wall insulation depends on the property’s design, location, and moisture management needs. Always consider factors like wall composition, dew points, damp courses, overhangs, water run-offs, thermal bridges and ventilation to ensure an effective and durable insulation solution.
Gas and open flued appliances.
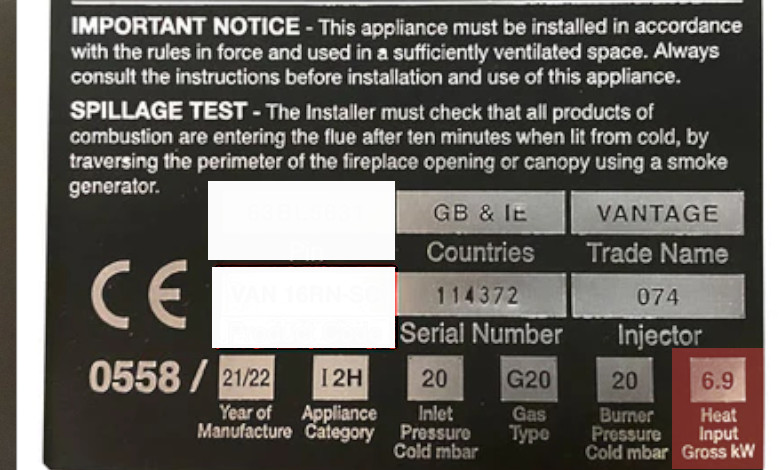
If the fabric of the property is being improved and open-flued gas appliances exist, then a gas spillage test should be carried out on each appliance by a suitably competent operative.
Rules exist that give an average unimproved property a certain amount of leakiness (adventitious air) to allow open-flued appliances to operate safely.
This all depends on how much fuel burns over a period of time, for example: 7.5kw/hr, 9kw/hr, 6.9kw/hr. You will see this on the data badge of the appliance (gas rating of an appliance here.). The more fuel used, the more leakiness is needed. Multifuel appliances are treated in roughly the same way but do not come under gas safe legislations. HETAS and building regulations govern multifuel installations and ventilation.
This is the reason combustion ventilation is sometimes needed. This allows the air to be replenished (with an open flued appliance we are burning the oxygen in the room that we use to breathe)
With the introduction of insulation, extraction ventilation should be installed as part of the process, we now have a different factor to add in with gas safety. Extraction fans either pulling or pushing air (PIV) can now effect the performance of the appliance.
Open flued gas appliances should be checked to prove they are not spilling products of combustion into the property. This is verified by performing a spillage test.
Part J states. “Extract fans lower the pressure in a building, which can cause the spillage of combustion products from open-flued appliances. This can occur even if the appliance and the fan are in different rooms”.
Any funded insulation work now includes ventilation upgrades as part of the current PAS, so extract ventilation will be installed. This should have been factored in as part of any ventilation work carried out. A competent person is required to perform spillage tests.
Part B, 8(1) of the Gas Safety (Installation and Use) Regulations 1998 states that no person can make any changes to a premises that contains a gas fitting or storage vessel if the changes would compromise the safety of the fitting or vessel.
This basically means if the fabric of the building (walls, floors, roofs) are being insulated then appliances need to be checked by a suitably competent and qualified person.


Installation guides.
Below you will find links to UK regulations and other useful information. These links are to third party websites, and we cannot guarantee the validity or safety of the following sites. If you find any broken links or issues, we would love to know. Please read our disclaimer. Contact us here for issues.
Energy saving trust guide.
Pas 2035
Pas 2030
Part A – Structure
Part B – Fire safety
Part C – Site preparation and resistance to contaminants and moisture
Part D – Toxic substances
Part E – Resistance to sound
Part F – Ventilation
Part G – Sanitation, hot water safety and water efficiency
Part H – Drainage and waste disposal
Part J – Combustion appliances and fuel storage systems
Part K – Protection from falling, collision and impact
Part L – Conservation of fuel and power
Part M – Access to and use of buildings
Part O – Overheating
Part P – Electrical safety
Part Q – Security in dwellings
Part R – Infrastructure for electronic communications
Part S – Infrastructure for charging electric vehicles
Part T – Toilet accommodation
Regulation 7 – Materials and workmanship
The Gas Safety (Installation and Use) Regulations, 1998
MCS (microgeneration certification scheme)
Electrical standards