Should UK Heat Pumps Be Installed with a Cooling Cycle?
Heat pumps are usually promoted in the UK as an alternative to gas or oil heating. However, many heat pumps can do something else that is becoming increasingly valuable: they can reverse their operation and cool the home during hot weather.
With warmer summers and more homes experiencing overheating, should reversible heating and cooling become a standard consideration when installing a heat pump?
In my opinion, it should at least be discussed during the design process.
A heat pump and an air conditioner are closely related.
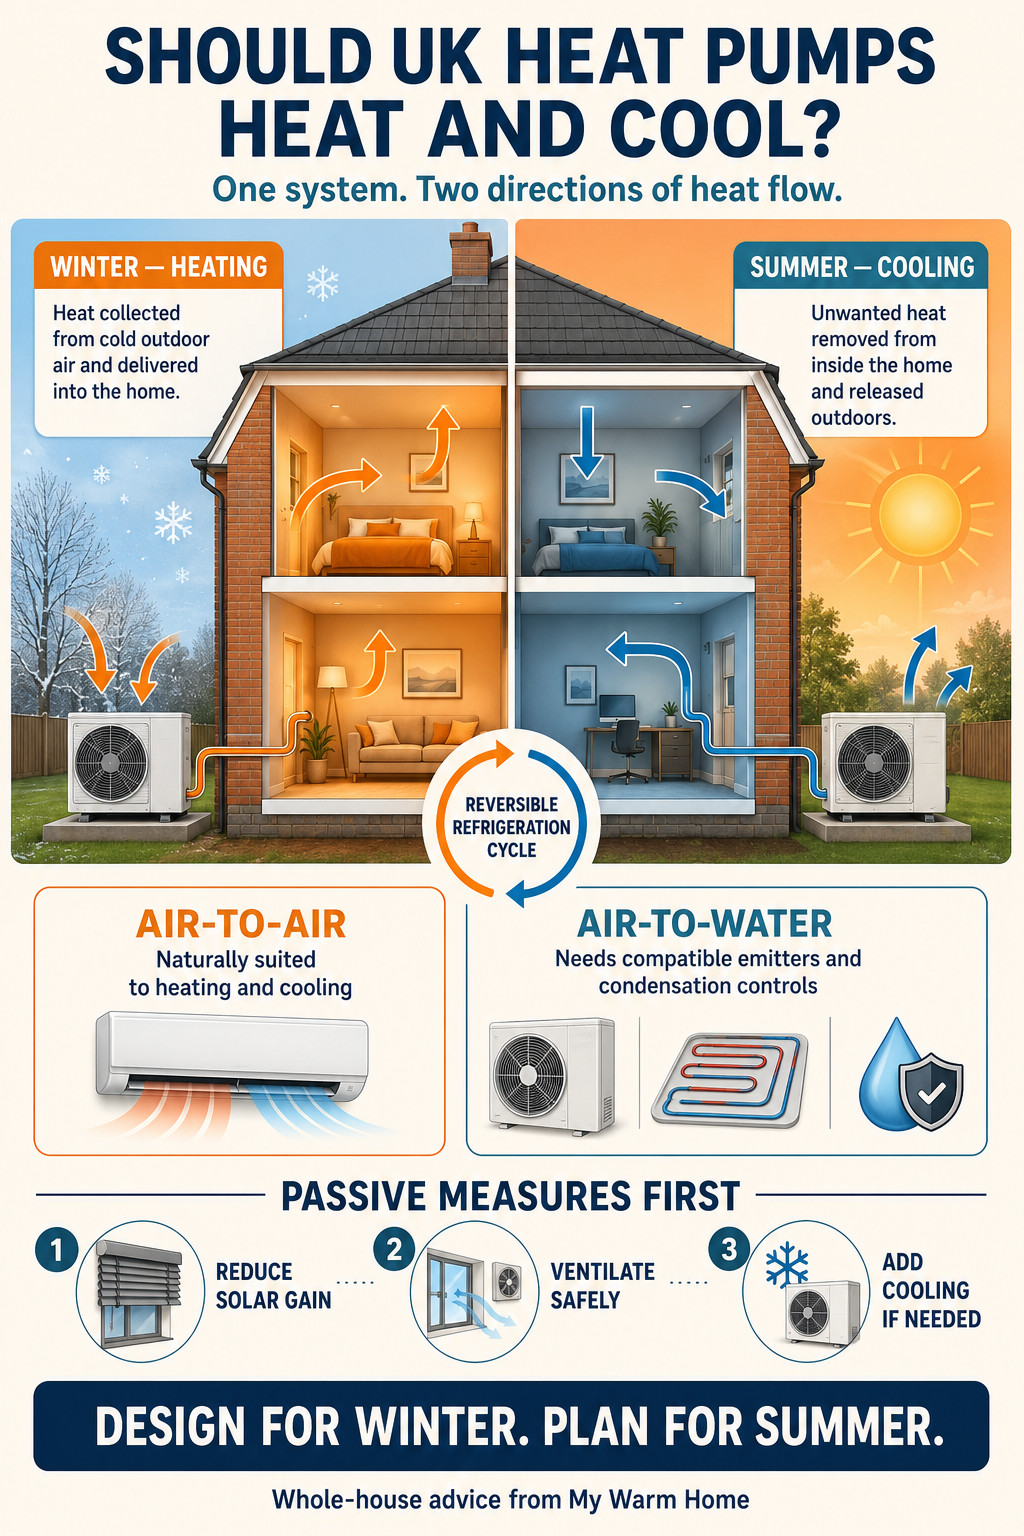
A heat pump does not create heat in the same way as a boiler. It uses a refrigeration cycle to collect heat from one place and transfer it somewhere else.
During winter, an air source heat pump collects heat from the outside air and transfers it into the home. A reversible heat pump can change the direction of this process during summer. It then collects unwanted heat from inside the property and releases it outdoors.
This is effectively an air-conditioning cycle.
The technology is not particularly new or unusual. Air-to-air heat pumps commonly provide both heating and cooling. Some air-to-water and ground source heat pumps can also operate in a cooling mode, provided the complete system has been designed for it.
UK homes are beginning to overheat
The UK has traditionally concentrated on keeping homes warm. Insulation, airtightness and improved glazing all help reduce winter heat loss, but summer comfort has not always received the same attention as we have never really had great summers to talk about!
This is changing.
The English Housing Survey found that approximately 2.9 million households reported their homes becoming uncomfortably hot during 2023–24. Overheating was reported in properties of different ages, not only modern homes. English Housing Survey: climate-resilient homes
Highly insulated and airtight homes can retain unwanted summer heat if solar gain, ventilation and shading have not been properly considered. Flats, converted roof spaces, homes with large areas of glazing and properties where windows cannot safely be left open may be particularly vulnerable.
Installing a new heating system without considering how the same property will perform during summer feels increasingly short-sighted.
Does this mean every home needs air conditioning?
No.
Mechanical cooling should not be used as a substitute for good building design. The first stage should always be to reduce the amount of unwanted heat entering the home and provide a safe way for excess heat to escape.
Secure night-time ventilation (not leaving a window open)
Cross-ventilation
Correctly designed mechanical ventilation
Insulation that reduces heat transfer through the roof and walls
Reducing unnecessary internal heat gains
Approved Document O, which applies to new residential buildings in England, follows this general approach. It expects practical passive measures to be considered before mechanical cooling is adopted. Approved Document O: Overheating
However, passive measures will not solve every situation. Some homes cannot be adequately ventilated because of external noise, pollution, security concerns or their physical layout. Vulnerable residents may also require greater control over indoor temperatures.
In these circumstances, carefully designed cooling can be a sensible part of a whole-house comfort strategy.
Air-to-air heat pumps are naturally suited to cooling
Air-to-air heat pumps deliver warmed or cooled air through indoor units. They are closely related to split air-conditioning systems and can normally change between heating and cooling without needing a separate heating circuit.
They can be particularly useful in:
Flats and apartments
Smaller homes
Properties without an existing wet central-heating system
Bedrooms and converted lofts
Homes that regularly experience summer overheating
Air-to-air systems do not normally provide domestic hot water, so a separate hot-water system may still be required.
The BUS scheme introduced Air to Air as part of its funding, more info here.
Cooling with an air-to-water heat pump is more complicated
An air-to-water heat pump normally supplies warm water to radiators or underfloor heating. Simply purchasing a heat pump with a cooling setting does not mean the existing heating system can safely or effectively cool the property.
Ordinary radiators provide very little useful cooling. They can also develop condensation if their surface temperature falls below the dew point of the surrounding air.
A properly designed air-to-water cooling system may require:
Fan-assisted radiators or fan-coil units
Cooling-compatible underfloor or ceiling circuits
Dew-point and humidity controls
Insulated distribution pipework
Condensate collection and drainage
Suitable controls and zoning
Separate heating and cooling design calculations
Underfloor cooling can provide gentle temperature reduction, but it must be carefully controlled. If the floor becomes too cold, condensation may form on its surface or within the construction.
Cooling must therefore be designed as part of the system from the beginning. It should not be treated as a setting that can simply be switched on later.
What do MCS standards say?
Current MCS heat-pump design standards include reversible systems capable of providing both heating and cooling. However, the system must still be designed and optimised for heating. MCS Heat Pump Design Standard MIS 3005-D
That is an important distinction.
A UK heat pump must be capable of meeting the property’s calculated winter heat loss efficiently. Cooling capability should be an additional benefit, not an excuse to compromise the heating design or oversize the equipment.
The heating requirement and cooling requirement should be assessed separately.
Cooling will use electricity
Cooling is not free. Running a heat pump during summer increases electricity consumption, and unnecessary use could create additional costs and increase peak demand on the electricity network.
Good controls are therefore essential.
Cooling should be used to maintain a safe and comfortable temperature rather than trying to turn a UK home into a refrigerator. Solar panels may help supply some of the electricity because cooling demand often coincides with periods of strong sunshine, but generation and demand will not always match perfectly.
Homeowners should understand how to operate the system sensibly and be made aware of the likely running costs before installation.
Our view.
Reversible heat pumps should not automatically be installed in every UK property, but cooling should become a standard question during heat-pump and retrofit assessments.
Before selecting a system, the designer should consider:
Does the property currently overheat?
Is overheating likely to increase after insulation or airtightness improvements?
Can shading and ventilation control the problem?
Are any occupants particularly vulnerable to high temperatures?
Is the proposed heat pump capable of reversible operation?
Can the heat emitters, controls and pipework safely provide cooling?
Are the homeowner’s expectations and likely running costs understood and affordable?
Where cooling may be required, specifying a reversible heat pump and compatible distribution system during the original installation could be considerably easier than trying to modify the property later.
The future of domestic comfort is not simply about heating homes efficiently in winter. It is about creating homes that remain healthy, comfortable and affordable throughout the year.
A correctly designed heat pump can potentially be part of both solutions, but only when heating, cooling, ventilation, insulation and solar gain are considered together as part of a whole-house plan.
Is TrustMark’s latest decision to introduce monitored video walkarounds another significant step in strengthening quality assurance across retrofit projects?.
The aim is clear: improve transparency, provide better evidence of the installation process, and help identify issues that still photographs alone might miss.
But it’s worth considering what this looks like from the homeowner’s perspective.
Before any work even begins, a homeowner has often already had a detailed retrofit assessment, with hundreds of photographs taken to document the property and its condition.
Once installation starts, installers typically take hundreds more images to demonstrate compliance, record progress, and protect themselves should any future disputes arise.
If the project is then selected for technical monitoring, another round of photographs and evidence is often collected.
Now, with monitored video walkarounds becoming part of the process, homeowners may understandably feel that their home is under constant surveillance.
While every stage has a legitimate purpose, we should be asking ourselves:
Are we collecting evidence because it genuinely improves quality, or because we’re building ever-larger compliance files?
Good quality assurance is essential, but so is respecting the fact that this is someone’s home, not a film set.
A professional video walkaround can absolutely add value when it captures installation quality, key details, and workmanship that static images might miss. But it should complement existing evidence—not simply become another layer of documentation for documentation’s sake.
At My Warm Home, we’ve always believed that the focus should remain on delivering safe, high-quality installations while keeping the homeowner’s experience at the centre of the process.
Quality, transparency and customer respect should all go hand in hand.
Reputable installers are often accredited by recognised trade bodies or professional organisations.
Selecting a trustworthy installer for your heating, insulation, or renewable energy project requires careful research and due diligence. Hiring the right professional ensures your home is safe, efficient, and compliant with regulations, and helps protect warranties, insurance, and grant eligibility.
Reputable installers are often accredited by recognised trade bodies or professional organisations. Accreditation confirms that the installer:
Meets industry standards
Has undergone proper training
Is legally authorised to perform specific types of work
NAPIT – Covers electrical and heating installations.
NICEIC – Approved contractor scheme for electrical work.
MCS – Microgeneration Certification Scheme – Required for heat pumps, solar PV, and renewable energy installations. Using accredited installers is essential for compliance, safety, and accessing grants or incentives, such as the UK Boiler Upgrade Scheme (BUS) or Warmhomes funding.
Being registered with the above does not always mean the work is checked by the certification company, It usually shows competence within the field of current health & safety practices and current regulations. Remember that if you have any work carried out at your property either on a funded scheme or self financed you should be covered by consumer rights. The citizen’s advice is always a good place for information.
Some of the below will help with your journey in finding trades.
If you feel you are vulnerable.
Try to get a family member or neighbour to sit in with you when getting quote visits, also maybe designate someone else to deal with the process.
Ask for Recommendations.
Seek recommendations from friends, family, or colleagues who have recently had similar work done. Personal recommendations can be invaluable in finding trustworthy installers.
Read Reviews and Testimonials.
Check online reviews and testimonials on platforms like Trustpilot, Checkatrade, or Which? Trusted traders and google reviews. These platforms often provide insights into the quality of work and customer satisfaction, But please be aware that not all reviews can be genuine!
Obtain Multiple Quotes.
Don’t settle for the first installation company you find. Obtain quotes from multiple companies for comparison. Be wary of quotes that are significantly lower than others, as they may indicate subpar workmanship or the use of inferior materials. If you are applying for funding, then be weary of being promised the earth or pushed into signing up. Any decent installation company should keep you at ease and answer all your questions honestly.
Verify Insurance and Guarantees.
Ensure that the installation company/individual has adequate insurance coverage, including public liability insurance, to protect you and your property in case of accidents or damage. Also, inquire about any guarantees or warranties offered for the work they perform.
Check for Compliance with Regulations.
Certain types of work, such as electrical or gas installations, require compliance with specific regulations and safety standards. Verify that the installers you choose are appropriately qualified and registered to carry out such work.
Communicate Clearly.
Communicate your expectations clearly, including timelines, budget constraints, and any specific requirements you may have. Reputable installers will be transparent and be responsive to your needs.
Trust Your Instincts.
If something feels off during your interactions with installers or if they seem unwilling to provide necessary information or documentation, trust your instincts and consider looking elsewhere.
Get Everything in Writing.
Once you’ve decided on an installation company, make sure to get all agreements, including costs, timelines, replacement of fixings (window sills, skirting etc) redecorating and scope of work, in writing. This helps protect both parties and ensures clarity and accountability throughout the project.
Below are some questions you need to be asking.
External Wall Insulation.
Preparation and Property Impact.
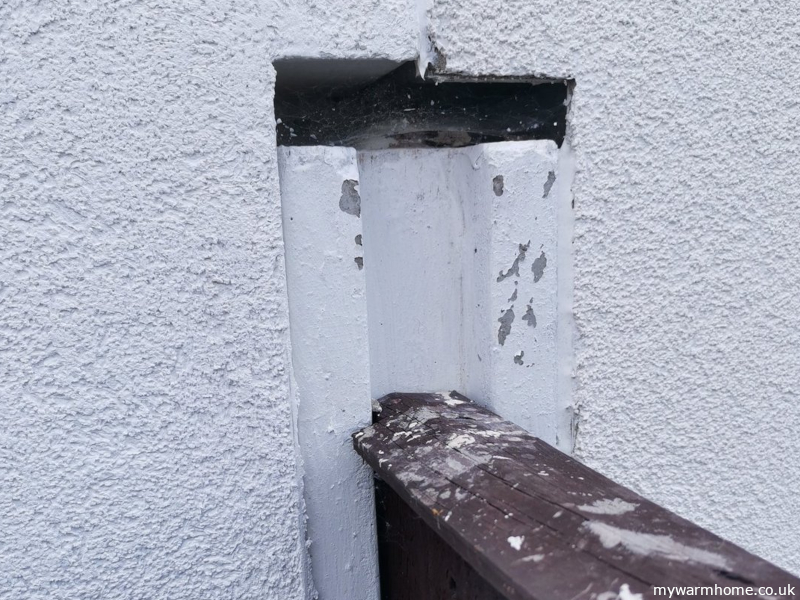
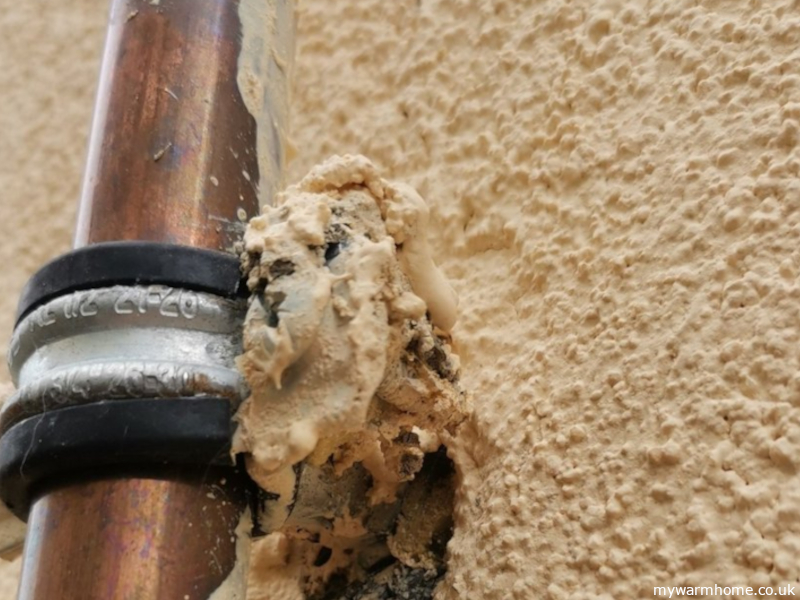
External Wall Insulation can significantly change the look and function of your property, so it’s important to understand the process in detail before work begins. Confirm what insulation system will be used, its thickness, and the finish type (e.g. render, brick-slip, or cladding). Ask how the installers will deal with fixtures and features such as satellite dishes, alarm systems, lights, air vents, overflow pipes, and external taps—these should all be properly removed, extended, and reinstated, not simply covered over or worked around.
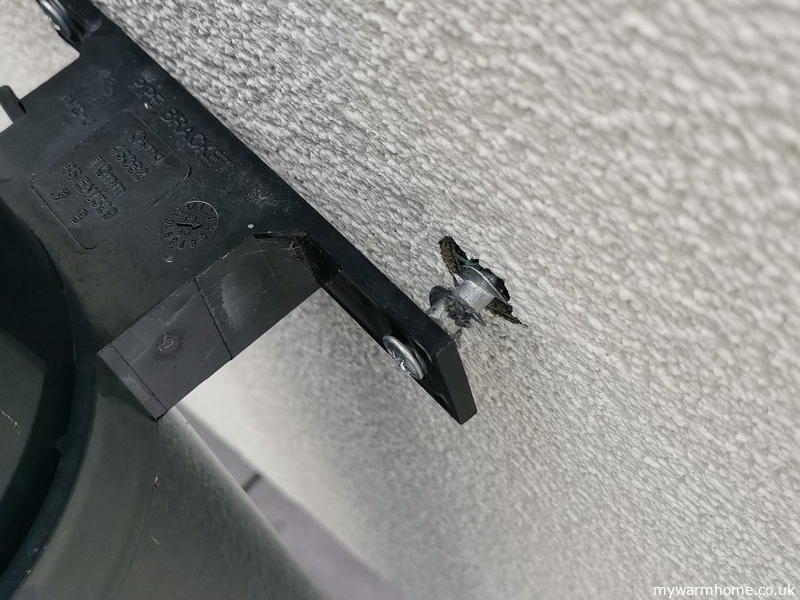
Work around detailingGas pipe renderedPoor Fixings
Openings and Details.
Discuss how the system will accommodate windows, doors, and sills, as these may need to be extended or replaced to ensure proper sealing and to prevent water ingress. Check that drip beads, stop beads, and corner trims will be installed neatly and to specification for a high-quality, durable finish.
Ventilation and Airflow.
Make sure that ventilation and airbricks are not blocked or removed. Ask how they will be extended through the insulation system to maintain airflow and prevent damp or condensation. Obtain a clear ventilation specification, and ensure the finish matches or complements your property’s appearance. For homes with fireplaces or open flues, ask about spillage testing and combustion ventilation to ensure safety and compliance.
Groundworks and Damp-Proof Course.
Confirm that the insulation will finish above the damp-proof course (DPC) and that appropriate base trims and drainage channels will be installed. The system should not bridge the DPC unless designed to do so, as this can lead to moisture problems. Ensure that any existing damp or drainage issues—including blocked gutters or damaged downpipes—are addressed before insulation begins.
Aesthetics and Boundaries.
If your home is part of a terrace, semi-detached, or adjoins another property, ask how the system will terminate at party walls, fences, or neighbouring structures. Ensure that detailing will be neat and watertight. For listed buildings or properties in conservation areas, confirm that planning permission or building consent is in place. Regulations change so what may of been permitted last year may not be now, and visa versa!.
Safety and Compliance.
For homes with chimneys, fireplaces, or combustion appliances, ask about spillage tests and combustion ventilation to ensure safety after the installation.
Documentation and Clean-Up.
Request written details of all materials, fixings, and finishes, including manufacturer names and warranty information. Confirm that all waste and debris will be removed and agree on a timeline for completion and clean-up.
Finally, ensure you have full contact information for everyone involved in the project, including the installation team, project or site manager, and—if installed through a UK grant scheme, the Retrofit Coordinator responsible for oversight and compliance.
Internal Wall Insulation and Room-in-Roof Considerations.
Disruption and Reinstatement.
Internal Wall Insulation can be highly disruptive, often requiring the removal of features such as skirting boards, window sills, coving, door frames, electrical sockets, light fittings, and radiators. Confirm that your installer will reinstate all removed items and specify whether they will be restored or replaced. Ensure that qualified tradespeople—such as joiners for woodwork and plumbers for wet work—will carry out these tasks, and get this commitment in writing.
System and Detailing.
Ask which insulation system will be used and how the installer plans to treat complex areas such as coving, cupboards, or meter locations. For room-in-roof spaces, confirm that any loft or eaves hatches will be properly insulated and professionally fitted, not simply boarded over. If you use roof storage, ensure this area remains accessible and structurally suitable for use once insulated.
Check that all electrical, alarm, TV, satellite, and internet cables will be correctly routed through the insulation and fully reinstated afterwards.
Ventilation and Safety.
A ventilation system should be installed as part of the works. Obtain a detailed specification to confirm it meets high standards of performance and finish. For homes with fireplaces or open flues, ask about spillage testing and combustion ventilation to ensure safety and compliance.
Pre-Installation Checks and Documentation.
Before work begins, inspect the external walls, damp-proof course, gutters, and downpipes. Any existing issues must be identified and either rectified by the installer or formally agreed with you in writing, as they can compromise insulation performance and cause long-term problems.
Finally, confirm that all debris will be cleared and agree on a timeline for completion and cleanup. Request full contact details for everyone involved, including the office manager, installation team (noting if subcontractors are used), and—if the work is part of a UK grant scheme—the Retrofit Coordinator overseeing the project.
Cavity Wall Insulation considerations.
Scope and Drilling.
Confirm that all suitable wall areas will be insulated, which may involve internal drilling. Discuss in advance where drilling will occur and what materials will be used to fill and finish the holes afterwards to ensure a neat appearance.
Garages and External Finishes.
For attached but unheated garages, talk through insulation options—particularly if shelving, cupboards, or other fixtures will need to be removed or adjusted. When drilling into external walls, ask what colour of mortar will be used to fill the holes, especially on rendered or painted surfaces. Confirm whether installers will repaint or touch up the finish to match the existing façade.
Material and Clean-Up.
Find out exactly which insulation material is being used and take the time to research its properties and suitability for your home. Clarify whether the installation team will be responsible for cleaning up spills, dust, or debris, and have this commitment documented in writing. If you have outdoor features such as ponds or livestock areas, inform the installers so they can take precautions against overspill.
Ventilation and Safety.
If new ventilation is required, request a clear specification and ensure all installations are completed to a high standard of finish. For homes with fireplaces or open flues, ask about spillage tests and combustion ventilation to maintain safety and compliance.
Pre-Installation Checks and Aftercare.
Inspect external walls, damp-proof courses, gutters, and downpipes before work begins. Any existing damp or drainage issues must be resolved first, as they can undermine the effectiveness of the insulation and lead to long-term problems. Finally, confirm that all debris will be removed and agree on a clear timeline for completion and cleanup—especially important for removal and refill projects.
Underfloor Insulation considerations.
Materials and Installation.
It can be challenging to assess conditions beneath the floor unless you have a basement. Confirm the type, thickness, and support method of insulation being installed, and ensure all accessible areas will be covered. If floorboards need to be lifted, be aware this can cause damage—ask whether replacements will match the original boards to maintain appearance and consistency. Take pre-installation photographs for reference.
Cross Ventilation.
Adequate underfloor ventilation is essential. Make sure any existing vents or decorative grilles are retained or replaced with alternatives that are both functional and visually appropriate. Request written confirmation of how cross-flow ventilation will be maintained or improved, including details of the units being installed. The system should allow sufficient airflow to prevent moisture buildup and stop water ingress.
Basement Insulation.
If a basement is being insulated, ask about fire safety compliance and verify that all work adheres to current building regulations. It’s worth doing your own research for added assurance.
Ventilation and Safety.
If a ventilation system is included, obtain a detailed specification and confirm it will be installed to a high standard. For properties with fireplaces, request information on spillage tests and combustion ventilation to ensure safety and compliance.
Pre-Installation Checks and Cleanup.
Inspect external walls, damp-proof courses, subfloor ventilation, and rainwater systems (gutters, downpipes, etc.) before work begins. Any existing damp or drainage issues must be resolved first, as they could compromise the insulation and cause long-term damage. Finally, confirm that all debris and waste materials will be removed and agree on a clear timeline for completion and cleanup.
Loft Insulation considerations.
Materials and Impact.
Ask which insulation materials will be used, such as spray foam, mineral wool, or PIR boards—and make sure you understand their limitations and how they may affect your property’s insurance or mortgage eligibility.
Access and Storage.
Discuss how the installation will impact access to essential services in the loft, such as boilers or solar inverters, and whether storage areas will still be usable or need adjustment.
Electrical Safety.
If you have recessed down lights, these must be properly protected to prevent air leakage and potential overheating. Suitable covers or fire-rated caps should be used. For electric showers or other circuits with cables running through the loft, ensure proof is provided that the cables are not buried within insulation, as this can cause overheating.
Pipework and Loft Hatches.
All exposed water pipes should be fully insulated. The loft hatch should also be insulated and drought-proofed to a professional standard avoid makeshift solutions like loosely stapled insulation.
Ventilation and Timber Protection.
Adequate airflow in the loft is essential to prevent condensation and protect the roof timbers. Confirm that ventilation will be maintained or improved as part of the work.
Whole-Home Ventilation and Safety.
If a new ventilation system is being installed, request a clear specification to ensure it meets high-quality standards and finishes. For homes with open fireplaces, ask about spillage tests and combustion ventilation to ensure safety and compliance.
Gas Boiler considerations.
Gas Supply.
Most combination boilers need a larger gas supply pipe than older systems, often requiring an upgrade from the meter. Before installation, confirm the planned gas pipe route to avoid unnecessary external runs if an internal route is possible. If the pipe must run outside, ensure it’s properly clipped and installed in line with regulations.
Heating Controls.
Discuss your heating controls and where the thermostat will be located. It should be positioned in a room without a thermostatic radiator valve (TRV) or any secondary heat source such as a fire or cooker, to ensure accurate temperature readings.
Condensate Drainage.
All condensing boilers produce condensate that must be drained safely. Ideally, this drainage point should be located indoors. If the condensate pipe must run externally, it needs to be insulated with Class 0 lagging. Confirm the type of insulation being used and how it will be secured and supported.
System Clean and Preparation.
Ensure all debris will be removed during installation and clarify when this will happen. Most boiler manufacturers require a full system flush before fitting the new unit—this is essential. Make sure the installer carries it out, and ideally, observe the process. The correct use of cleaning and inhibitor chemicals is vital for system health, and their use should be recorded in the Benchmark log (the boiler’s installation and service record). Ask for a copy for your files.
Warranty and Guarantees.
Confirm both the manufacturer’s warranty and the installer’s guarantee, particularly regarding leaks and workmanship. Once the boiler is installed, it’s a good idea to call the manufacturer directly after a few weeks to confirm that your warranty is fully registered and active.
Solar PV Considerations.
Panel Direction.
You may already know the direction your property faces, but installers might suggest positioning the panels differently. This could be due to access issues, roof condition, or other practical constraints. However, the optimum orientation delivers the best performance, so make sure your installer prioritises efficiency over convenience.
Inverter Location.
The inverter should be installed somewhere easy to access for inspection, servicing, and maintenance, while also being protected from the elements. Some models are suitable for outdoor installation, provided they’re shielded from direct sunlight and rain. If you live near the coast, ask about corrosion resistance and whether additional protection is needed.
Monitoring Meter.
The generation meter (monitoring meter) should be positioned where it can be easily read and checked regularly. Make sure it’s visible enough to monitor energy production and detect early signs of faults (for example, if it isn’t blinking in daylight). Some installers may say it has to go in loft if inverter is also installed there, but dont allow, have it somewhere you can read and check.
Paperwork and Certification.
Confirm the expected timescales for all necessary documentation, including MCS certification, DNO approval, and any paperwork your energy supplier may require.
Warranties and Guarantees.
Clarify the warranty terms and guarantee lengths for all equipment. Make sure you know who to contact in case of faults or system failure.
Get Everything in Writing.
Once you’ve decided on a installation company, make sure to get all agreements, including costs, timelines, and scope of works, in writing. This helps protect both parties and ensures clarity and accountability throughout the project.
Air source Heat Pumps.
System Type and Design.
Ask your installer to explain which make, model of heat pump is being fitted and why it’s suitable for your property. Confirm that the system has been properly sized for your home, an undersized or oversized unit can reduce efficiency and increase running costs. Request a full design calculation (MCS or equivalent) showing heat loss per room, flow temperatures, and emitter sizing. Ask what refrigirant is used within the pump (R32, R290 etc). Ask about hybrid systems to help in the winter months.
Outdoor Unit Location.
The external unit should be positioned where airflow is unrestricted, but noise and vibration will not affect you or neighbours. It must sit on a stable, level base (often a concrete pad with anti-vibration plinth) and be clear of obstructions such as fences or foliage. If located near boundaries, confirm it meets local noise regulations and planning guidance. It should meet manufactures clearances for optimum airflow. For coastal or exposed locations, ask about corrosion-resistant finishes and protective coatings. (if within 2000m from the coast this is a must)
Internal Components.
Confirm where the indoor cylinder, buffer tank, and controls will be located. These should be easily accessible for servicing and maintenance, with pipework neatly installed and insulated. Discuss how existing systems—such as radiators or underfloor heating will be adapted or replaced, and ensure the flow and return pipe sizes are appropriate for the new system.
Condensate and Drainage.
Heat pumps produce condensate water, particularly in colder weather. This must be drained safely away from the base unit, ideally into a proper soakaway or drain. The pipework must not freeze, so confirm that suitable insulation and gradients are in place. The condensate produced is not the same a a combustion boiler so it is not acidic.
Electrical and Controls.
Ensure the electrical supply is adequate and compliant with regulations, with a dedicated isolator switch. Ask about the control system whether it will use smart thermostats, weather compensation, or load compensation and how to use these features for maximum efficiency.
Groundworks and Protection.
If installing a ground source heat pump, confirm the ground loop layout (horizontal trenches or boreholes), and request documentation of where pipes are buried for future reference. For air source units, confirm that rainwater runoff from roofs won’t drip onto the unit and that the area around the base remains well-drained and clear of standing water.
Warranties, Maintenance, and Support.
Ask for details of warranties and service agreements for both the equipment and installation. Heat pumps require annual servicing to maintain performance and warranty validity, so ensure you receive a maintenance schedule and the installer’s or manufacturer’s contact details.
Paperwork and Certification.
Ensure you receive all necessary documentation, including MCS certificates,DNO notifications, and user manuals. These are essential for warranty registration, grant schemes (such as the Boiler Upgrade Scheme), and resale value.
Cleanup and Completion.
Confirm that all debris and packaging will be removed and agree on a clear completion timeline. Obtain written contact details for the installation company, lead installer, and if installed through a UK grant scheme the Retrofit Coordinator responsible for the project.